Bomb Defusal Manual
Expanded Mod Version
May 13th 2024
www.keeptalkinggame.com
ktane.timwi.de
lotsofs.github.io/KTANE
www.keeptalkinggame.com
ktane.timwi.de
lotsofs.github.io/KTANE
Welcome to the dangerous and challenging world of bomb defusing.
Study this manual carefully; you are the expert. In these pages you will find everything you need to know to defuse even the most insidious of bombs.
And remember — One small oversight and it could all be over!
A bomb will explode when its countdown timer reaches 0:00 or when too many strikes have been recorded. The only way to defuse a bomb is to disarm all of its modules before its countdown timer expires.

Front |

Side |
Each bomb will include a certain number of modules that must be disarmed. All modules must be disarmed to defuse the bomb. Modules can be identified by an LED in the corner, typically the top right. When this LED is lit green, the module has been disarmed.
Most modules are discrete and can be disarmed in any order. However, there are exceptions. Some modules require to be solved at a certain time or in a specific order.
Another common module type are "Needy" modules, which present a special case: These cannot be disarmed, but pose a recurrent hazard.
Needy modules can typically be identified as a module with a small 2-digit timer in the top center. Interacting with the bomb may cause them to become activated. Once activated, these needy modules must be tended to regularly before their timer expires in order to prevent a strike. Stay observant: Needy modules may reactivate at any time.
When the Defuser makes a mistake, the bomb will record a strike which will be displayed on the indicator above the countdown timer. Bombs with a strike indicator will typically explode upon the third strike. The timer will begin to count down faster after a strike has been recorded.
If no strike indicator is present above the countdown timer, the bomb will explode upon the first strike, leaving no room for error.
Some bombs might allow for more than three strikes, however it may be possible that the strike indicator can only display up to two strikes and not show any additional strikes.
Some disarming instructions will require specific information about the bomb, such as the serial number or other widgets. This type of information can typically be found on the top, bottom, or sides of the bomb casing.
See the appendices for identification instructions on widgets and other information that will be useful in disarming certain modules. The most common widgets are indicators, batteries, ports. Due to how ubiquitous these are, information on these three types of widget has been redundantly included on the next page as well as in Appendix A, B, and C.
The following widgets are most commonly found on the edges of the bomb, alongside the serial number: Indicators, batteries, ports.

Labelled indicator lights. Most Common indicators:
| Battery | Type |
|---|---|
 |
AA |
 |
D |
Common battery types can be found within enclosures.
Digital and analog ports can be found on silver colored plates.
Sometimes a port plates without any mounted ports may appear.
Despite having two sockets, the Stereo RCA port counts as a single port.
| Port | Name |
|---|---|
 |
DVI-D |
 |
Parallel |
 |
PS/2 |
 |
RJ-45 |
 |
Serial |
 |
Stereo RCA |
There is always one serial number on the bomb, which consists of a combination of six digits and letters in the following format:
??#XX#
? = any letter or digit
# = any digit
X = any letter
The letters O and Y will not occur.
Apart from "Needy" modules, certain disarmable modules also require urgent interaction at specific points in time. Others may require specific solves of other modules in order to be solved or prevent strikes.
Many of these bear no obvious visual distinction from their normal counterparts. Identify them early and avoid disaster.
Often, many of these modules will mention ignored modules. Those ignored modules are typically the modules listed here, however not every module may ignore every other module listed here.
These modules require interaction at a specific point in time. Failure to do so may result in strikes or worse. It is therefore essential to find these modules early to avoid unpleasant surprises.
| Turn The Key |
|---|
 |
Like Needy modules, these modules also require repeated or constant attention. The difference is these modules will eventually be permanently disarmed once requirements are met. Like time-sensitive modules, find these modules early before they can hit you with a strike.
| The Swan |
|---|
 |
These modules require certain information to be read before solving any other module. Typically such information is already revealed at the activation of the bomb, with further information revealed upon each disarming of a module. The information cannot be retrieved later on without striking. It is therefore important to find these modules first to avoid the required information being missed.
| Forget Me Not |
|---|
 |
These modules require specific modules to be solved either before or after solving the module itself in order to avoid strikes or the module becoming unsolveable. It is recommended to find these modules early on to avoid negative consequences.
| Turn The Keys |
|---|
 |
These modules may prove problematic if their instructions are not read early on, but don't necessarily carry the same level of urgency as above modules. Identify these after having identified other indiscrete modules.
| Souvenir |
|---|
 |
Certain modules have hidden properties that may be relevant to other modules.
Vanilla modules are the earliest designs you can find on a bomb. They are the original, and any other module is referred to as modifications, as they are not designed by the original bomb manufacturers. Because of this some modules may treat these differently.
Indiscrete modules cannot be solved at any time or in any order. They come with special caveats. See Appendix I for more information.
| Module Name | Properties | |
|---|---|---|
| Vanilla | Indiscrete | |
| Complicated Wires | X | |
| Forget Me Not | X | |
| Keypad | X | |
| Maze | X | |
| Memory | X | |
| Morse Code | X | |
| Needy Capacitor | X | |
| Needy Knob | X | |
| Needy Vent Gas | X | |
| Password | X | |
| Simon Says | X | |
| Souvenir | X | |
| Who's on First | X | |
| Wire Sequence | X | |
| Wires | X | |
| The Button | X | |
| The Swan | X | |
| Turn The Key | X | |
| Turn The Keys | X | |
Modules can usually be identified by an LED in the corner, normally the top right. When this LED is lit green, the module has been disarmed.
All modules must be disarmed to defuse the bomb.

UP, down, left, right, UP, down, left, right...!
| Letter | Left/right | Above/below |
|---|---|---|
| A | GJMOY | HKPRW |
| B | IKLRT | CDFYZ |
| C | BHIJW | DEMTU |
| D | IKOPQ | CJTUW |
| E | ACGIJ | KSUWZ |
| F | CERVY | AGJPQ |
| G | ACFNS | HOQYZ |
| H | LRTUX | DKMPS |
| I | DLOWZ | EFNUV |
| J | BQTUW | EHIOS |
| K | AFPXY | DIORZ |
| L | GKPTZ | ABRVX |
| M | EILQT | BFPWX |
| Letter | Left/right | Above/below |
|---|---|---|
| N | PQRSV | AFGHL |
| O | HJLUZ | IQSTX |
| P | DMNOX | CFHKR |
| Q | CEOPV | BDIKN |
| R | AEGSU | BNOXY |
| S | ABEKQ | GMVYZ |
| T | GVXYZ | CJLSU |
| U | FMVXZ | BILNY |
| V | DHMNW | AEJQX |
| W | DFHMN | GLQRT |
| X | BDFKW | AJNOV |
| Y | BCHSU | EGMTW |
| Z | JNRSY | CLMPV |
| Key | Press if L/R | Press L/R if | Press if A/B | Press A/B if |
|---|---|---|---|---|
| A | GJMOY | EGKRS | HKPRW | FLNVX |
| B | IKLRT | CJSXY | CDFYZ | LMQRU |
| C | BHIJW | EFGQY | DEMTU | BDPTZ |
| D | IKOPQ | IPVWX | CJTUW | BCHKQ |
| E | ACGIJ | FMQRS | KSUWZ | CIJVY |
| F | CERVY | GKUWX | AGJPQ | BIMNP |
| G | ACFNS | AELRT | HOQYZ | FNSWY |
| H | LRTUX | COVWY | DKMPS | AGJNP |
| I | DLOWZ | BCDEM | EFNUV | JKOQU |
| J | BQTUW | ACEOZ | EHIOS | DFTVX |
| K | AFPXY | BDLSX | DIORZ | AEHPQ |
| L | GKPTZ | BHIMO | ABRVX | NTUWZ |
| M | EILQT | APUVW | BFPWX | CHSYZ |
| Key | Press if L/R | Press L/R if | Press if A/B | Press A/B if |
|---|---|---|---|---|
| N | PQRSV | GPVWZ | AFGHL | AFGHL |
| O | HJLUZ | ADIPQ | IQSTX | IQSTX |
| P | DMNOX | DKLNQ | CFHKR | CFHKR |
| Q | CEOPV | DJMNS | BDIKN | BDIKN |
| R | AEGSU | BFHNZ | BNOXY | BNOXY |
| S | ABEKQ | GNRYZ | GMVYZ | GMVYZ |
| T | GVXYZ | BHJLM | CJLSU | CJLSU |
| U | FMVXZ | HJORY | BILNY | BILNY |
| V | DHMNW | FNQTU | AEJQX | AEJQX |
| W | DFHMN | CIJVX | GLQRT | GLQRT |
| X | BDFKW | HKPTU | AJNOV | AJNOV |
| Y | BCHSU | AFKTZ | EGMTW | EGMTW |
| Z | JNRSY | ILOTU | CLMPV | CLMPV |

“Why do we need to study algebra? We’ll never use it in real life...” Anybody else remember saying that?
| x = n | y = i − p | z = m + t × d | |||
|---|---|---|---|---|---|
| n = sum of digits in the serial number | i = number of indicators p = number of ports |
m = number of modules t = number of AA batteries d = number of D batteries |
|||
| 3 or more battery holders present? | +2 | 2 or fewer battery holders present? | −2 | No battery holders present? | +3 |
| RJ-45 port present? | −1 | Serial port present? | +3 | Parallel port present? | −6 |
| Lit BOB indicator present? | +4 | Unlit FRQ indicator present? | −5 | Lit MSA indicator present? | +2 |
| Serial number contains a vowel? | −3 | Sum of the serial number digits is prime? | +4 | Sum of the serial number digits is divisible by 3? | +1 |

Can you speak English? Do you know the alphabet? Then you should be okay.
| JQXZ | QEW | AC | ZNY | TJL |
| OKBV | DFW | YKQ | LXE | GS |
| VSI | PQJS | VCN | JR | IRNM |
| OP | QYDX | HDU | PKD | ARGF |

Randomly punching in the letters will eventually give me another word. One of the arrangements must work, right?
The display shows a word. Rearrange the letters to form another word. It’s got to work. It just has to. Note that the status light is on the top left of the module.
See Appendix Sword for an anagrams reference table.
| ABELRY | BARELY, BARLEY, BLEARY |
|---|---|
| ACEHRS | ARCHES, CHASER, SEARCH |
| ACELLR | CALLER, CELLAR, RECALL |
| CEORST | CORSET, ESCORT, SECTOR |
| ADEEST | SEATED, SEDATE, TEASED |
| AEELPS | ASLEEP, ELAPSE, PLEASE |
| AEHRSS | RASHES, SHARES, SHEARS |
| AELNRT | ANTLER, LEARNT, RENTAL |
| AEMRST | MASTER, STREAM, TAMERS |
| CEERSU | RECUSE, RESCUE, SECURE |
| DEERST | DESERT, DETERS, RESTED |
| DEIRST | DIREST, DRIEST, STRIDE |
| DELOOP | LOOPED, POODLE, POOLED |
| DERSTU | DUSTER, RUDEST, RUSTED |

For once you aren’t only focusing on what’s right in front of you. Make sure you pay attention to what’s going on behind the scenes here. We all know how you feel about exploding.
This module will present you with a colored button, a counter, and a submit button. However, the backing may be a certain color. Based on the color of the backing and the color of the button, press the button until the counter matches a certain number and press submit.
Use the rules in Table B to determine your letter pair, finding the first two conditions that apply, using the first letter from the first rule and the second letter from the second rule.
With the letter pair found in Step 1 and Table A, use the first letter along the left and the second letter along the top to find the number of times to press the button before pressing submit.
| A | B | C | D | E | F | |
| A | 3 |
2 |
9 |
1 |
7 |
4 |
| B | 7 |
9 |
8 |
8 |
2 |
3 |
| C | 5 |
1 |
7 |
4 |
4 |
6 |
| D | 6 |
4 |
2 |
6 |
8 |
5 |
| E | 5 |
1 |
5 |
3 |
9 |
9 |
| F | 1 |
2 |
3 |
6 |
7 |
8 |
(Please note that if you press the button when the counter reads 9, the counter will reset to 0.)
TABLE B: Priority rules
| RULE | FIRST LETTER | SECOND LETTER |
| If the color of the backing matches the color of the button | A |
C |
| Otherwise, if the button or the backing (but not both) are white or black | D |
B |
| Otherwise, if there are no D batteries present on the bomb * | C |
E |
| Otherwise, if there are no AA batteries present on the bomb | D |
D |
| Otherwise, if the button and the backing are primary colors ** | B |
F |
| Otherwise, if the color of the button is a secondary color *** | F |
E |
| Otherwise, if there is an unlit SND indicator present on the bomb | E |
B |
| Otherwise, if the bomb contains a Serial port | B |
C |
| Otherwise, if the backing's color mixed with blue creates the button's color **** | C |
D |
| Otherwise, use this rule (This rule can be used twice) | E |
A |
*: D batteries are detected as any battery holder with exactly one battery. **: Primary colors are Red, Yellow, and Blue ***: Secondary colors are Orange, Green, and Purple ****: Mixing Red and Yellow will make Orange, Blue and Yellow will make Green, and Red and Blue will make Purple. Mixing Blue and White will not make Blue.

FIRE! ... (splash) Missed.
Attention, Cadet. We’ve narrowed the enemy’s locations to within this 5×5 grid. The targets in this area are concealed, but we do have a fair bit of intelligence on them.
We suspect this information may not be enough to determine with accuracy where the enemy forces are deployed. This is where you come in. We need you to figure out which locations within the battle arena we can safely survey without being seen:
Attention, Ensign. We need you to ascertain the locations of all enemy vessels. When you have done so, the module is disarmed. The following tools are at your disposal:
Our intelligence indicates that:
Good luck. Make us proud.
You might think that a button telling you to press it is pretty straightforward. That’s the kind of thinking that gets people exploded.
See Appendix A for indicator identification reference.
See Appendix B for battery identification reference.
Follow these rules in the order they are listed. Perform the first action that applies:
If you start holding the button down, a colored strip will light up on the right side of the module. Based on its color, you must release the button at a specific point in time:
You might think that a button telling you to... What does it say, exactly?
Use the table to help translate the button's label.
Use the language sticker on the module to help identify the correct language.
Refer to the original manual of The Button for instructions on how to disarm the module.
| Language | Press | Hold | Abort | Detonate |
|---|---|---|---|---|
| BG | Натисни | Задържи | Абортирай | Детонирай |
| CS | Stisknout | Držet | Zrušit | Odpálit |
| DA | Tryk | Hold | Afbryd | Spræng |
| DE | Drücken | Gedrückt halten | Abbrechen | Zünden |
| EN | Press | Hold | Abort | Detonate |
| EO | Puŝu | Tenu | Haltu | Eksplodigu |
| ES | Presionar | Mantener | Abortar | Detonar |
| ET | Vajuta | Hoia | Katkesta | Õhka |
| FI | Paina | Pidä | Keskeytä | Räjäytä |
| FR | Pousser | Maintenir | Arrêter | Déclencher |
| FY | Yndrukke | Fêsthâlde | Ôfbrekke | Ûntstekke |
| GA | Brúigh | Coinnigh | Tobscoir | Maidhm |
| HE | לחץ | החזק | בטל | פוצץ |
| HY | Սեղմել | Պահել | Ձգել | Պայթել |
| IT | Premi | Tieni premuto | Annulla | Detona |
| JA | 押す | 長押し | 中止 | 爆破 |
| KO | 누르시오 | 누른채 유지 | 접근금지 | 폭파 |
| LT | Spausti | Laikyti | Nutraukti | Sprogdinti |
| Language | Press | Hold | Abort | Detonate |
|---|---|---|---|---|
| NL | Indrukken | Vasthouden | Afbreken | Ontsteken |
| NO | Trykk | Hold inne | Avbryt | Detoner |
| PL | Przyciśnij | Przytrzymaj | Anuluj | Zdetonuj |
| PT | Apertar | Segurar | Abortar | Detonar |
| RU | нажать | Держать | Стоп | Взорвать |
| SV | Tryck | Håll ned | Avbryt | Detonera |
| TH | กด | กดค้าง | ยกเลิก | จุดชนวน |
| TR | Bas | Tut | İptal et | Patlat |
| ZH | 按下 | 按住 | 解除 | 引爆 |
Follow these rules in the order they are listed. Perform the first action that applies:
If you start holding the button down, a colored strip will light up on the right side of the module. Based on its color, you must release the button at a specific point in time:

Who said that a circle was pointless?
The bomb presents a button in the shape of a big circle spinning around. Based on the tables below, determine which parts of the circle to press. If you press a wrong part of the circle or press the parts of a circle in the wrong order, a strike will be incurred.
| For each BOB, CAR, or CLR indicator: | +1 if lit, -1 if unlit. |
| For each FRK, FRQ, MSA, or NSA indicator: | +2 if lit, -2 if unlit. |
| For each SIG, SND, or TRN indicator: | +3 if lit, -3 if unlit. |
| For each solved module: | +3 each. |
| For the number of batteries: | +4 for odd, -4 for even. |
| There are port plates with parallel port: | +5 each, -4 if paired with serial port |
| There are port plates with DVI-D: | -5 each, +4 if paired with Stereo RCA |
| For each special* indicator: | +6 each. |
| For each special* port: | -6 each. |
| For each Two Factor code: | Add the least significant digit. |
*Special ports or indicators are custom made, such as NLL or the USB port.
| -0-, 1, 2 | Red, Yellow, Blue |
| 3, 4, 5 | Orange, Green, Magenta |
| 6, 7, 8 | Blue, Black, Red |
| 9, A, B | Magenta, White, Orange |
| C, D, E | Orange, Blue, Black |
| F, G, H | Green, Red, White |
| I, J, K | Magenta, Yellow, Black |
| L, M, N | Red, Orange, Yellow |
| O, P, Q | Yellow, Green, Blue |
| R, S, T | Blue, Magenta, Red |
| U, V, W | Black, White, Green |
| X, Y, Z | White, Yellow, Blue |
*If circle is spinning counter-clockwise, reverse order of button presses.
The zero in the table is marked like this. -0-.

Binary is a time-honored tradition of communication with tiny blinking lights.
| 17 | 15 | 6 | 2 | 24 | 8 | 26 | 25 | 21 | 24 | 1 | 15 | 18 | 8 |
| G | R | B | |||||||||||
| 18 | 15 | 19 | 31 | 12 | 6 | 19 | 21 | 11 | 16 | 19 | 2 | 1 | 29 |
| B | G | R | |||||||||||
| 8 | 25 | 1 | 15 | 20 | 15 | 9 | 3 | 6 | 24 | 1 | 24 | 5 | 26 |
| G | B | R | |||||||||||
| 21 | 27 | 6 | 12 | 27 | 20 | 7 | 1 | 19 | 15 | 3 | 13 | 9 | 28 |
| B | R | G | |||||||||||
| 3 | 21 | 14 | 22 | 7 | 28 | 16 | 27 | 22 | 17 | 26 | 2 | 31 | 15 |
| G | B | R | |||||||||||
| 8 | 22 | 30 | 19 | 1 | 25 | 31 | 16 | 9 | 7 | 6 | 13 | 9 | 7 |
| R | B | G | |||||||||||
| 5 | 18 | 12 | 7 | 5 | 12 | 31 | 16 | 10 | 15 | 17 | 9 | 12 | 25 |
| R | G | B | |||||||||||
| 4 | 20 | 18 | 25 | 20 | 4 | 24 | 29 | 17 | 16 | 12 | 16 | 29 | 19 |
| G | R | B |
| Color key: | R | red |
|---|---|---|
| G | green | |
| B | blue |

Over 18 quintillion combinations, only some of them actually matter.
| # | Rule |
|---|---|
| 0 | If exactly one quadrant has 5 or fewer white pixels, the answer is the number of white pixels in the other 3 quadrants. |
| 1 | If there are exactly as many mostly-white quadrants as there are lit indicators, the answer is the number of batteries. |
| 2 | If exactly one row or column is completely white or completely black, the answer is its x-/y-coordinate (starting from 1 in the top/left). |
| 3 | If there are fewer mostly-white quadrants than mostly-black quadrants, the answer is the number of mostly-black quadrants. |
| 4 | If the entire bitmap has 36 or more white pixels, the answer is the total number of white pixels. |
| 5 | If there are more mostly-white quadrants than mostly-black quadrants, the answer is the smallest number of black pixels in any quadrant. |
| 6 | If exactly one quadrant has 5 or fewer black pixels, the answer is the number of black pixels in the other 3 quadrants. |
| 7 | If there are exactly as many mostly-black quadrants as there are unlit indicators, the answer is the number of ports. |
| 8 | If there is a 3×3 square that is completely white or completely black, the answer is the x-coordinate (starting from 1) of the center of the first such square in reading order. |
| 9 | If there are exactly as many mostly-white quadrants as mostly-black quadrants, the answer is the first numeric digit of the serial number. |

Nobody’s favorite kind of math. Who even likes math, anyway?
| Byte 1 | Bit | Byte 2 |
|---|---|---|
| No AA batteries | MSB | 1 or more D battery |
| Parallel port | 3 or more ports | |
| Lit indicator NSA | 2 battery holders or more | |
| More modules than you have (starting) time in minutes | Lit indicator BOB | |
| More than one lit indicator | More than one unlit indicator | |
| Number of modules divisible by 3 | Last digit of serial number is odd | |
| Less than 2 D batteries | Even number of modules | |
| Less than 4 ports | LSB | 2 or more batteries |
Here is a table of explanations of each bitwise operator:
| Info | AND | OR | XOR | NOT |
|---|---|---|---|---|
| HOW | Going bit by bit, if both bits are 1, the return bit is 1. Otherwise, the return bit is 0. | Going bit by bit, if either (or both) bit is 1, the return bit is 1. Otherwise, the return bit is 0. | Going bit by bit, if either (but not both) bits are 1, the return bit is 1. Otherwise, the return bit is 0. | Ignore the second operand. Going bit by bit, the return bit is the opposite. |
| MATH | bit1 && bit2 | bit1 || bit2 | (bit1 && !bit2) || (!bit1 && bit2) | !bit1 |

What? Where?
See Appendix BLANK for blank modules identification.
The module appears blank, but has eight touch-sensitive regions laid out as in the following diagram. Touch the regions that have the most conditions met in any order.
|
|
|
|
|
|
|
|
|

Not only do you have to find the exit, you have to find the beginning!
This module has four buttons labeled N for North, E for East, S for South, and W for West. The defuser must use these buttons to navigate through a maze they cannot see. Use the following steps to discover what the maze looks like, where you are in the maze, and which side of the maze the exit is on.
Use the first conditional that applies out of the following list to determine what rotation the maze has.
Look at each button and use the table below to determine it's value. Then, use these rules to determine the starting location in the maze:
| Red | Green | Blue | Gray | Yellow | |
|---|---|---|---|---|---|
| North | 1 | 5 | 2 | 2 | 3 |
| East | 3 | 1 | 5 | 5 | 2 |
| West | 2 | 5 | 3 | 1 | 4 |
| South | 3 | 2 | 4 | 3 | 2 |

Why is there a big Venn diagram? Why are there some weird symbols? Oh no...
| X ∧ Y AND |
X ∨ Y OR |
X ⊻ Y XOR |
X → Y IMPLIES |
 |
 |
 |
 |
| X | Y NAND |
X ↓ Y NOR |
X ↔ Y XNOR |
X ← Y IMPLIED BY |
 |
 |
 |
 |

This doesn’t feel right.
See Appendix BLANK for blank modules identification.
Braille consists of raised dots arranged in a regular grid. Each letter has 2×3 locations, each of which can have a raised dot or not. The following table shows the encoding for Unified English Braille.
a
| b
| c
| d
| e
| f
| g
| h
| i
| j
|
k
| l
| m
| n
| o
| p
| q
| r
| s
| t
|
u
| v
| w
| x
| y
| z
| and
| for
| the
| with
|
ar
| bb
| cc
| ch
| ea
| ed
| en
| er
| ff
| gg
|
gh
| in
| ing
| of
| ou
| ow
| sh
| st
| th
| wh
|
| acting | 3 | dating | 4 | heading | 1 | meaning | 3 | server | 4 |
|---|---|---|---|---|---|---|---|---|---|
| aiming | 1 | dealer | 3 | hearing | 1 | miners | 4 | shaking | 1 |
| artist | 2 | eating | 2 | heating | 2 | nearer | 1 | sought | 1 |
| asking | 4 | eighth | 2 | higher | 2 | parish | 4 | staying | 1 |
| bearing | 4 | farmer | 4 | insist | 3 | parker | 4 | strands | 2 |
| beating | 3 | farming | 2 | lasted | 3 | parking | 1 | strings | 4 |
| beings | 1 | faster | 1 | laying | 2 | paying | 4 | teaching | 1 |
| binding | 2 | father | 1 | leader | 4 | powers | 1 | tended | 4 |
| bought | 4 | finding | 1 | leading | 4 | pushed | 1 | tender | 1 |
| boxing | 4 | finest | 3 | leaned | 4 | pushing | 2 | testing | 3 |
| breach | 2 | finish | 4 | leaning | 4 | rather | 3 | throwing | 3 |
| breast | 1 | flying | 2 | leaving | 1 | reaching | 3 | towers | 4 |
| breath | 3 | foster | 2 | linking | 1 | reader | 1 | vested | 3 |
| breathe | 3 | fought | 3 | listed | 2 | reading | 1 | warned | 3 |
| bringing | 3 | gaining | 3 | listen | 1 | resting | 3 | warning | 2 |
| brings | 3 | gather | 4 | living | 4 | riding | 2 | weaker | 3 |
| carers | 2 | gazing | 4 | making | 3 | rushed | 2 | wealth | 2 |
| carter | 3 | gender | 4 | marked | 1 | rushing | 1 | winner | 2 |
| charter | 2 | growing | 4 | marking | 1 | saying | 2 | winning | 3 |
| crying | 4 | headed | 2 | master | 2 | served | 2 | winter | 3 |

How did they get invisible ink to even work like that?

Click. Click. Kaboom!
| Red Button Occurrence | Press if label is...* | Press if shape is... | Yellow Button Occurrence | Press if label is...* | Press if shape is... | |
|---|---|---|---|---|---|---|
| First or Sixth | Abort | Square | First or Sixth | Detonate | Circle | |
| Second or Seventh | Detonate | Hexagon | Second or Seventh | Hold | Hexagon | |
| Third or Eighth | Hold | Circle | Third or Eighth | Abort | Square | |
| Fourth or Ninth | Abort | Circle | Fourth or Ninth | Press | Circle | |
| Fifth or Tenth | Press | Square | Fifth or Tenth | Hold | Hexagon |
| Blue Button Occurrence | Press if label is...* | Press if shape is... | White Button Occurrence | Press if label is...* | Press if shape is... | |
|---|---|---|---|---|---|---|
| First or Sixth | Hold | Circle | First or Sixth | Hold | Hexagon | |
| Second or Seventh | Abort | Square | Second or Seventh | Detonate | Square | |
| Third or Eighth | Detonate | Hexagon | Third or Eighth | Press | Hexagon | |
| Fourth or Ninth | Press | Square | Fourth or Ninth | Abort | Circle | |
| Fifth or Tenth | Press | Hexagon | Fifth or Tenth | Detonate | Square |
* Due to budget cuts, the buttons will only display the first letter of each word.
If you start holding the button down, the colored LED will light up next to the button. Based on its color you must release the button at a specific point in time:

This may look like the button you know and love, but don't be fooled! It's a brilliantly disguised imposter foiled only by a single mistake: It's the wrong shape.
Follow these rules in the order they are listed. Perform the first action that applies:
Communication was dangerous back in the days. Can you figure out what the original message was?
Decipher the characters on the display with the help of Caesar’s tactics. There’s no delete button, so press those buttons carefully!
For example: if the offset is -2, D becomes B and L becomes J. The table below can be used to calculate the required offset. If the offset column contains an = sign, that value should be used, regardless of other rules that apply.
| Condition | Offset |
|---|---|
| Serial number contains a vowel | -1 |
| Number of batteries | +1 per battery |
| The last digit of the serial number is even | +1 |
| Indicator with label CAR is present | +1 |
| Parallel port and lit indicator with label NSA is present | =0 |

Who in the world is purchasing something at a time like this?
| Item | Price | Category |
|---|---|---|
| Bananas | $0.87 per lb | Fruit |
| Broccoli | $1.39 per lb | Vegetable |
| Candy Canes | $3.51 | Sweet |
| Canola Oil | $2.28 | Oil |
| Cereal | $4.19 | Grain |
| Cheese | $4.49 | Dairy |
| Chicken | $1.99 per lb | Protein |
| Chocolate Bar | $2.10 | Sweet |
| Chocolate Milk | $5.68 | Dairy |
| Coffee Beans | $7.85 | Other |
| Cookies | $2.00 | Sweet |
| Deodorant | $3.97 | Care Product |
| Fruit Punch | $2.08 | Sweet |
| Grape Jelly | $2.98 | Sweet |
| Grapefruit | $1.08 per lb | Fruit |
| Gum | $1.12 | Sweet |
| Honey | $8.25 | Sweet |
| Item | Price | Category |
|---|---|---|
| Ketchup | $3.59 | Other |
| Lemons | $1.74 per lb | Fruit |
| Lettuce | $1.10 per lb | Vegetable |
| Lollipops | $2.61 | Sweet |
| Lotion | $7.97 | Care Product |
| Mayonnaise | $3.99 | Oil |
| Mints | $6.39 | Sweet |
| Mustard | $2.36 | Other |
| Oranges | $0.80 per lb | Fruit |
| Paper Towels | $9.46 | Care Product |
| Pasta Sauce | $2.30 | Vegetable |
| Peanut Butter | $5.00 | Protein |
| Pork | $4.14 per lb | Protein |
| Potato Chips | $3.25 | Oil |
| Potatoes | $0.68 per lb | Vegetable |
| Shampoo | $4.98 | Care Product |
| Socks | $6.97 | Other |
| Soda | $2.05 | Sweet |
| Spaghetti | $2.92 | Grain |
| Steak | $4.97 per lb | Protein |
| Sugar | $2.08 | Sweet |
| Tea | $2.35 | Water |
| Tissues | $3.94 | Care Product |
| Tomatoes | $1.80 per lb | Fruit |
| Toothpaste | $2.50 | Care Product |
| Turkey | $2.98 per lb | Protein |
| Water Bottles | $9.37 | Water |
| White Bread | $2.43 | Grain |
| White Milk | $3.62 | Dairy |

Under pressure, chess can feel more like a game of battleships.
This module is based on a 6×6 chessboard (referenced on the following page) and all pieces follow the standard FIDE movement rules.
The module will present a display and two rows of six buttons each.
Position #1: Monarchy vs TheocracyOccupied by a king if Position #5 is occupied by a queen. Otherwise, the field is occupied by a bishop. |
Position #2: Commander of the ArmyOccupied by a rook if the last digit of the serial number is odd. Otherwise, the field is occupied by a knight. |
Position #3: A Matter of RegentsOccupied by a queen if there are less than two rooks on the board. Otherwise, the field is occupied by a king. |
Position #4: The Iron TowerAlways occupied by a rook. |
Position #5: Conflict between Good and EvilOccupied by a queen if the field is white. Otherwise, the field is occupied by a rook. |
Position #6: The Scepter, the Sword, and the CrosierOccupied by a queen if there are no other queens on the board. Otherwise, occupied by a knight if there are no other knights on the board. Otherwise, the field is occupied by a bishop. |
Use the following graphic as a reference for the chess board layout
Use the following paraphrase from article 3 of the FIDE 2018 Laws of Chess to determine the possible movements for each piece

They say that anything goes in jazz, but I didn't know that includes long boring tables!
See the next page for chord quality lookup.
| Root to Quality | |
|---|---|
| A | -Δ7♯5 |
| A♯ | Δ7♯5 |
| B | -7 |
| C | ø |
| C♯ | -add9 |
| D | Δ7 |
| D♯ | 7♯9 |
| E | 7sus |
| F | add9 |
| F♯ | 7 |
| G | -Δ7 |
| G♯ | 7♯5 |
| Quality to Root | |
|---|---|
| 7 | G |
| -7 | G♯ |
| Δ7 | A♯ |
| -Δ7 | F |
| 7♯9 | A |
| ø | C♯ |
| add9 | D♯ |
| -add9 | E |
| 7♯5 | F♯ |
| Δ7♯5 | C |
| 7sus | D |
| -Δ7♯5 | B |
Use the following table to look up which notes are in a chord of a particular quality. Each note in the chord is represented by an “ ” in the row of its interval. The offset from the root (in semitones) of each row is provided in the left-most column. Note that an offset of +12 is the same as an offset as +0.
| Off. | 7 | ‑7 | Δ7 | ‑Δ7 | 7♯9* | ø | add9 | ‑add9 | 7♯5 | Δ7♯5 | 7sus | ‑Δ7♯5 |
|---|---|---|---|---|---|---|---|---|---|---|---|---|
| +0 | ||||||||||||
| +1 | ||||||||||||
| +2 | ||||||||||||
| +3 | ||||||||||||
| +4 | ||||||||||||
| +5 | ||||||||||||
| +6 | ||||||||||||
| +7 | ||||||||||||
| +8 | ||||||||||||
| +9 | ||||||||||||
| +10 | ||||||||||||
| +11 |
*Omit the 5th note of this chord at +7

While I wait for you to input, I'll just make myself a sandwich.
Start with the serial number. Convert every letter to a number, where A = 1, B = 2, etc. Include the numbers as well.
Modulo each result by 16.
Separate the numbers into 3 groups of 2. The first pair is the red value, second pair is the green value, and third pair is the blue value.
For each pair, multiply the first number in it by 16, then add the second number.
Input each number using the large buttons and then press submit. If you submit an incorrect color, or increase a color value above 255, the module state will reset and you will receive a strike.
The multiplier has a default value of 1. When it is clicked, the multiplier cycles between 1, 10 and 100. When you click the large colored buttons, the multiplier’s value is added to that color’s value.

There is order in chaos. A pattern in the colors. Find it, and all will become clear.
See Appendix SQUARE for identifying modules in Colored Squares family.
| Currently White Squares | Previous Group of Squares Pressed | ||||||
|---|---|---|---|---|---|---|---|
| Red | Blue | Green | Yellow | Magenta | Row | Column | |
| 1 | Blue | Column | Red | Yellow | Row | Green | Magenta |
| 2 | Row | Green | Blue | Magenta | Red | Column | Yellow |
| 3 | Yellow | Magenta | Green | Row | Blue | Red | Column |
| 4 | Blue | Green | Yellow | Column | Red | Row | Magenta |
| 5 | Yellow | Row | Blue | Magenta | Column | Red | Green |
| 6 | Magenta | Red | Yellow | Green | Column | Blue | Row |
| 7 | Green | Row | Column | Blue | Magenta | Yellow | Red |
| 8 | Magenta | Red | Green | Blue | Yellow | Column | Row |
| 9 | Column | Yellow | Red | Green | Row | Magenta | Blue |
| 10 | Green | Column | Row | Red | Magenta | Blue | Yellow |
| 11 | Red | Yellow | Row | Column | Green | Magenta | Blue |
| 12 | Column | Blue | Magenta | Red | Yellow | Row | Green |
| 13 | Row | Magenta | Column | Yellow | Blue | Green | Red |
| 14 | Red | Blue | Magenta | Row | Green | Yellow | Column |
| 15 | Column | Row | Column | Row | Column | Row | Column |

It’s only five switches. How hard can it be?
See Appendix CSw for identifying modules in Colored Switches family.

So many colors!
| LED No. | Blue | Green | Purple | Yellow | White | Magenta | Red | Orange | Gray | Black |
|---|---|---|---|---|---|---|---|---|---|---|
| 1 | 6 | 1 | 2 | 4 | 9 | 0 | 8 | 5 | 3 | 7 |
| 2 | 8 | 1 | 9 | 4 | 3 | 6 | 0 | 5 | 7 | 2 |
| 3 | 4 | 1 | 9 | 7 | 0 | 2 | 5 | 3 | 8 | 6 |
| 4 | 6 | 8 | 7 | 5 | 4 | 9 | 1 | 3 | 0 | 2 |
| LED No. | Blue | Green | Purple | Yellow | White | Magenta | Red | Orange | Gray | Black |
|---|---|---|---|---|---|---|---|---|---|---|
| 1 | 0 | 6 | 5 | 4 | 3 | 7 | 9 | 8 | 1 | 2 |
| 2 | 2 | 9 | 8 | 0 | 5 | 3 | 4 | 7 | 1 | 6 |
| 3 | 5 | 0 | 6 | 4 | 2 | 7 | 9 | 3 | 8 | 1 |
| 4 | 5 | 4 | 2 | 9 | 8 | 6 | 7 | 1 | 3 | 0 |
| Digit No. | 0-1 Batteries | 2-3 Batteries | 4-5 Batteries | 6+ Batteries |
|---|---|---|---|---|
| 1 (MSD) | First digit in serial number | 0 | Amount of vowels in serial number | DVI-D port counts |
| 2 | Amount of unlit indicators | PS/2 port counts | Amount of battery holders | 5 |
| 3 | 9 | Amount of letters in serial number | Serial port counts | Amount of consonants in serial number |
| 4 (LSD) | RJ-45 port counts | Last digit in serial number | 4 | Amount of lit indicators |
| LED No. | 0 | 1 | 2 | 3 | 4 |
|---|---|---|---|---|---|
| 1 | Gray | Green | Orange | White | Purple |
| 2 | Blue | Green | Black | Purple | Magenta |
| 3 | Magenta | Yellow | Blue | Gray | Red |
| 4 | Gray | Blue | Purple | Red | Yellow |
| LED No. | 5 | 6 | 7 | 8 | 9 |
|---|---|---|---|---|---|
| 1 | Blue | Magenta | Black | Yellow | Red |
| 2 | Red | Gray | Yellow | Orange | White |
| 3 | Black | Green | Purple | Orange | White |
| 4 | Magenta | Black | Orange | Green | White |

-- .- - .... / .. ... / ..-. ..- -. !
| Color | Action |
| Red | If the number is odd, double it. Otherwise, halve it. |
| Orange | If the number is divisible by 3, divide by 3. Otherwise, add the number of lights that flash either red, yellow, or blue. |
| Yellow | Square the number. |
| Green | Swap the position of the parentheses to be around the 2nd and 3rd light if they are around the 1st and 2nd light, or vice versa. |
| Blue | Triple the number and take the digital root until the number is a single digit. |
| Purple | Subtract the number from 10. |

See Appendix M for more detailed Morse code information.

It’s easy to identify colours. Red, Blue, Green, etc. Turns out it’s a bit harder when you display a word colour in a different colour though...
|
The colour of the last word in the sequence is Red:
If Green is used as the word at least three times in the sequence, press Yes on the third time Green is used as either the word or the colour of the word in the sequence.
Otherwise, if Blue is used as the colour of the word exactly once, press No when the word Magenta is shown.
Otherwise, press Yes the last time White is either the word or the colour of the word in the sequence.
|
|
The colour of the last word in the sequence is Yellow:
If the word Blue is shown in Green colour, press Yes on the first time Green is used as the colour of the word.
Otherwise, if the word White is shown in either White or Red colour, press Yes on the second time in the sequence where the colour of the word does not match the word itself.
Otherwise, count the number of times Magenta is used as either the word or the colour of the word in the sequence (the word Magenta in Magenta colour only counts as one), and press No on the colour in the total’s position (e.g. a total of 4 means the fourth colour in sequence).
|
Continuation of previous table...
|
The colour of the last word in the sequence is Green:
If a word occurs consecutively with different colours, press No on the fifth entry in the sequence.
If Magenta is used as the word at least three times in the sequence, press No on the first time Yellow is used as either the word or the colour of the word in the sequence.
Otherwise, press Yes on any colour where the colour of the word matches the word itself.
|
|
The colour of the last word in the sequence is Blue:
If the colour of the word does not match the word itself three times or more in the sequence, press Yes on the first time in the sequence where the colour of the word does not match the word itself.
If the word Red is shown in Yellow colour, or the word Yellow is shown in White colour, press No when the word White is shown in Red colour.
Otherwise, press Yes the last time Green is either the word or the colour of the word in the sequence.
|
|
The colour of the last word in the sequence is Magenta:
If a colour occurs consecutively with different words, press Yes on the third entry in the sequence.
If the number of times the word Yellow appears is greater than the number of times that the colour of the word is Blue, press No the last time the word Yellow is in the sequence.
Otherwise, press No on the first time in the sequence where the colour of the word matches the word of the seventh entry in the sequence.
|
|
The colour of the last word in the sequence is White:
If the colour of the third word matches the word of the fourth word or fifth word, press No the first time that Blue is used as the word or the colour of the word in the sequence.
If the word Yellow is shown in Red colour, press Yes on the last time Blue is used as the colour of the word.
Otherwise, press No.
|

This looks like a combination lock. I thought I was disarming this bomb, not unlocking it.
See Appendix B for battery identification reference.
See Appendix Two Factor for two factor identification reference.
Like a typical combination lock, this requires 3 numbers to unlock. Turn the dial to the right to the first number. Then turn it to the left for the second number.
Finally, turn it to the right for the last number. That will unlock it!
If sequential numbers in the code are the same, perform a full revolution back to the same number.
How to decode the combination:
Each number ranges from 0–19. Refer to the table to determine each number. Be careful if there are two factor codes present because they change periodically!
First number:
|
Second number:
|
Third number:
|

These buttons aren’t like the others. The good news is that we’ve found a concise set of instructions on what to do about it! Maybe too concise...
| Letter | Instruction |
|---|---|
| P | Press the button |
| D | Do not press the button |
| R | Press the button if the serial number contains two or more repeated characters |
| S | Press the button if the bomb has a serial port |
| B | Press the button if the bomb has two or more battery holders |
| Label of First Button |
0–1 Batteries | 2–3 Batteries | 4–5 Batteries | 6+ Batteries | |
|---|---|---|---|---|---|
| Button order: | Press | 1, 2, 3 | 2, 3, 1 | 3, 1, 2 | 1, 2, 3 |
| Hold | 2, 1, 3 | 3, 2, 1 | 1, 3, 2 | 2, 3, 1 | |
| Detonate | 3, 1, 2 | 1, 2, 3 | 2, 1, 3 | 3, 1, 2 |

Column first or row first?
Picture a two-dimensional grid of rows and columns. To disarm this module, determine the size of the grid, determine the positions on the grid that are indicated by the module, and find out which position is duplicated.
Use the left and right arrows on the module to cycle through the clues. One of the clues indicates the size of the grid, the rest is a set of positions on the grid. Select one of the two clues that refer to the same grid position and use the middle button to submit it. Then select the other of those two clues and submit it.
To determine the size of the grid, find the clue that is represented in any of the formats described in Table 1. The italicized letters in the table stand in for a number on the module.
The grid locations may be notated in any of the formats listed in Table 2. The module may also describe locations using words such as “top”, “bottom”, “left”, “right”, “up”, “down”, “center”, “middle”, cardinal directions or clockface directions.
| Format | How to interpret |
|---|---|
| x | The number x is a product of two primes. The grid’s width is the larger prime, the height the smaller. |
| (x) | Same as x, but width and height are swapped. |
| x×y | x is the width, y the height of the grid. |
| x by y | x is the height, y the width of the grid. |
| x*y | x is the total size of the grid, y the height. |
| x : y | x is the total size of the grid, y the width. |
| [x,y] | Column, then row; top-left is [0,0]. |
|---|---|
| letter number | Column, then row; top-left is A1. |
| <x, y> | Row, then column; top-left is <0, 0>. |
| x, y | Row, then column; top-left is 1, 1. |
| (x,y) | Column, then row; bottom-left is (0,0). |
| letter-number | Column, then row; bottom-left is A-1. |
| “x, y” | Row, then column; bottom-left is “0, 0”. |
| x/y | Row, then column; bottom-left is 1/1. |
| [x] | Cell number in scanline order[1]; top-left is [0]. |
| xth | Cell number in scanline order[1]; top-left is 1st. |
| #x | Cell number in Cartesian order[2]; bottom-left is #1. |
| 四十七 | Cell number in Chinese reading order[3]; top-right is 一. See Table 3 for Chinese numerals reference. The example shown here represents the number 47. |
| 一 | 1 | 六 | 6 |
|---|---|---|---|
| 二 | 2 | 七 | 7 |
| 三 | 3 | 八 | 8 |
| 四 | 4 | 九 | 9 |
| 五 | 5 | 十 | 10 |
[1] Scanline order, also known as reading order, starts at the top-left, moves right across the row, and then continues likewise with each row from top to bottom.
[2] Cartesian order, also known as geometric order, starts at the bottom-left, moves right across the row, and then continues likewise with each row from bottom to top.
[3] Traditional Chinese reading order starts at the top-right, moves down the column, and then continues likewise with each column from right to left.

Nothing. Literally nothing. Blank. Nada.
| Display | Action |
| ← ← → ← → → | 5/4 |
| 1 3 2 4 | 3/2 |
| LEFT ARROW LEFT WORD RIGHT ARROW LEFT WORD RIGHT ARROW RIGHT WORD | 5/8 |
| BLANK | 1/3 |
| LITERALLY BLANK | 1/5 |
| FOR THE LOVE OF ALL THAT IS GOOD AND HOLY PLEASE FULLSTOP FULLSTOP. | 9/0 |
| AN ACTUAL LEFT ARROW LITERAL PHRASE | 5/3 |
| FOR THE LOVE OF - THE DISPLAY JUST CHANGED, I DIDN'T KNOW THIS MOD COULD DO THAT. DOES IT MENTION THAT IN THE MANUAL? | 8/7 |
| ALL WORDS ONE THREE TO FOR FOR AS IN THIS IS FOR YOU | 4/0 |
| LITERALLY NOTHING | 1/4 |
| NO, LITERALLY NOTHING | 2/5 |
| THE WORD LEFT | 7/0 |
| HOLD ON IT'S BLANK | 1/9 |
| SEVEN WORDS FIVE WORDS THREE WORDS THE PUNCTUATION FULLSTOP | 0/5 |
| THE PHRASE THE WORD STOP TWICE | 9/1 |
| THE FOLLOWING SENTENCE THE WORD NOTHING | 2/7 |
| ONE THREE TO FOR | 3/9 |
| THREE WORDS THE WORD STOP | 7/3 |
| DISREGARD WHAT I JUST SAID. FOUR WORDS, NO PUNCTUATION. ONE THREE 2 4. | 3/1 |
| 1 3 2 FOR | 1/0 |
| DISREGARD WHAT I JUST SAID. TWO WORDS THEN TWO DIGITS. ONE THREE 2 4. | 0/8 |
| WE JUST BLEW UP | 4/2 |
| Display | Action |
| NO REALLY. | 5/2 |
| ← LEFT → LEFT → RIGHT | 5/6 |
| ONE AND THEN 3 TO 4 | 4/7 |
| STOP TWICE | 7/6 |
| LEFT | 6/9 |
| .. | 8/5 |
| PERIOD PERIOD | 8/2 |
| THERE ARE THREE WORDS NO PUNCTUATION READY? STOP DOT PERIOD | 5/0 |
| NOVEBMER OSCAR SPACE, LIMA INDIGO TANGO ECHO ROMEO ALPHA LIMA LIMA YANKEE SPACE NOVEMBER OSCAR TANGO HOTEL INDEGO NOVEMBER GOLF | 2/9 |
| FIVE WORDS THREE WORDS THE PUNCTUATION FULLSTOP | 1/9 |
| THE PHRASE: THE PUNCTUATION FULLSTOP | 9/3 |
| EMPTY SPACE | 1/6 |
| ONE THREE TWO FOUR | 3/7 |
| IT'S SHOWING NOTHING | 2/3 |
| LIMA ECHO FOXTROT TANGO SPACE ALPHA ROMEO ROMEO OSCAR RISKY SPACE SIERRA YANKEE MIKE BRAVO OSCAR LIMA | 1/2 |
| ONE 3 2 4 | 3/4 |
| STOP. | 7/4 |
| .PERIOD | 8/1 |
| NO REALLY STOP | 5/1 |
| 1 3 TOO 4 | 2/0 |
| PERIOD TWICE | 8/3 |
| Display | Action |
| 1 3 TOO WITH 2 OHS FOUR | 4/2 |
| 1 3 TO 4 | 3/0 |
| STOP DOT PERIOD | 5/0 |
| LEFT LEFT RIGHT LEFT RIGHT RIGHT | 6/7 |
| IT LITERALLY SAYS THE WORD ONE AND THEN THE NUMBERS 2 3 4 | 4/5 |
| ONE IN LETTERS 3 2 4 IN NUMBERS | 3/5 |
| WAIT FORGET EVERYTHING I JUST SAID, TWO WORDS THEN TWO SYMBOLS THEN TWO WORDS: ← ← RIGHT LEFT → → | 1/6 |
| 1 THREE TWO FOUR | 3/6 |
| PERIOD | 7/9 |
| .STOP | 7/8 |
| NOVEBMER OSCAR SPACE, LIMA INDIA TANGO ECHO ROMEO ALPHA LIMA LIMA YANKEE SPACE NOVEMBER OSCAR TANGO HOTEL INDIA NOVEMBER GOLF | 0/7 |
| LIMA ECHO FOXTROT TANGO SPACE ALPHA ROMEO ROMEO OSCAR WHISKEY SPACE SIERRA YANKEE MIKE BRAVO OSCAR LIMA | 6/5 |
| NOTHING | 1/2 |
| THERE'S NOTHING | 1/8 |
| STOP STOP | 7/5 |
| RIGHT ALL IN WORDS STARTING NOW ONE TWO THREE FOUR | 4/9 |
| THE PHRASE THE WORD LEFT | 7/1 |
| LEFT ARROW SYMBOL TWICE THEN THE WORDS RIGHT LEFT RIGHT THEN A RIGHT ARROW SYMBOL | 5/9 |
| LEFT LEFT RIGHT ← RIGHT → | 5/7 |
| NO COMMA LITERALLY NOTHING | 2/4 |
| HOLD ON CRAZY TALK WHILE I DO THIS NEEDY | 2/1 |
| Display | Action |
| THIS ONE IS ALL ARROW SYMBOLS NO WORDS | 2/8 |
| ← | 6/3 |
| THE WORD STOP TWICE | 9/4 |
| ← ← RIGHT LEFT → → | 6/1 |
| THE PUNCTUATION FULLSTOP | 9/2 |
| 1 3 TOO WITH TWO OS 4 | 4/1 |
| THREE WORDS THE PUNCTUATION FULLSTOP | 9/9 |
| OK WORD FOR WORD LEFT ARROW SYMBOL TWICE THEN THE WORDS RIGHT LEFT RIGHT THEN A RIGHT ARROW SYMBOL | 6/0 |
| DOT DOT | 8/6 |
| LEFT ARROW | 6/8 |
| AFTER I SAY BEEP FIND THIS PHRASE WORD FOR WORD BEEP AN ACTUAL LEFT ARROW | 7/2 |
| ONE THREE 2 WITH TWO OHS 4 | 4/3 |
| LEFT ARROW SYMBOL | 6/4 |
| AN ACTUAL LEFT ARROW | 6/2 |
| THAT'S WHAT IT'S SHOWING | 2/1 |
| THE PHRASE THE WORD NOTHING | 2/6 |
| THE WORD ONE AND THEN THE NUMBERS 3 2 4 | 4/8 |
| ONE 3 2 FOUR | 3/8 |
| ONE WORD THEN PUNCTUATION. STOP STOP. | 0/9 |
| THE WORD BLANK | 0/1 |
| FULLSTOP FULLSTOP | 8/4 |

Let there be life!
Using the chart below, determine the starting element based on the weather pattern of Day 1:
| Weather | Element |
|---|---|
Rain |
Water |
Wind |
Air |
Heat Wave |
Fire |
Meteor Shower |
Earth |
Based on the starting element’s position on the display, look up the correct permutation number in the following table:
| Upper-Left | Upper-Right | Bottom-Left | Bottom-Right | |
|---|---|---|---|---|
| Water | [2] | [1] | [4] | [3] |
| Air | [1] | [2] | [3] | [4] |
| Earth | [4] | [3] | [1] | [2] |
| Fire | [3] | [4] | [2] | [1] |
| Clear weather has a permutation of [0] | ||||
Use this number to determine which lifeform to create.
| Bomb has 3 or more battery holders: |
|---|
| If any lit indicators are present, AND all batteries are Double A, the lifeform will be:
[0] Bird | [1] Dinosaur | [2] Turtle | [3] Lizard | [4] Worm |
| Otherwise, if any lit indicators are present, the lifeform will be:
[0] Dinosaur | [1] Turtle | [2] Lizard | [3] Worm | [4] Bird |
| Otherwise, if any unlit indicators are present, AND all batteries are D cell, the lifeform will be:
[0] Turtle | [1] Lizard | [2] Worm | [3] Bird | [4] Dinosaur |
| Otherwise, if any unlit indicators are present, the lifeform will be:
[0] Lizard | [1] Worm | [2] Bird [3] Dinosaur | [4] Turtle |
| Otherwise, the lifeform will be:
[0] Worm | [1] Bird | [2] Dinosaur | [3] Turtle | [4] Lizard |
| Bomb has 2 or fewer battery holders: |
|---|
| If there are more port plates than battery holders:
[0] [4] Ghost | [1] Plankton | [2] Seeds | [3] Mushroom |
| Otherwise, if there are any duplicate ports:
[0] [4] Plankton | [1] Seeds | [2] Mushroom | [3] Ghost |
| Otherwise, if there are more unlit Indicators than lit Indicators:
[0] [4] Seeds | [1] Mushroom | [2] Ghost | [3] Plankton |
| Otherwise, the lifeform will be:
[0] [4] Mushroom | [1] Ghost | [2] Plankton | [3] Seeds |
| Weather Rules: Check the forecast in the top-left corner of the module, next to “Day #” |
|---|
| If it’s raining, all “Water” must be substituted by “Fire.” |
| If it’s windy, all “Air” must be substituted by “Earth.” |
| If there’s a heat wave, all “Fire” must be substituted by “Water.” |
| If there is a meteor shower, all “Earth” must be substituted by “Air.” |
| If the weather is clear, then no substitutions are required. Enjoy the sunshine! |
| GEN. 1 | Earth | Air | Fire | Water |
|---|---|---|---|---|
| Earth | Dust | Lava | Swamp | |
| Air | Dust | Energy | Steam | |
| Fire | Lava | Energy | Alcohol | |
| Water | Swamp | Steam | Alcohol |
| GEN. 2 | Fire | Dust | Swamp | Energy | Lava | Water |
|---|---|---|---|---|---|---|
| Fire | Ash | Tar | Plasma | Gen. 1 | ||
| Dust | Ash | Pollen | Volcano | Cement | ||
| Swamp | Tar | Pollen | Life | Lily Pad | ||
| Energy | Plasma | Life | ||||
| Lava | Volcano | Stone | ||||
| Water | Gen. 1 | Cement | Lily Pad | Stone |
| GEN. 3 | Swamp | Life | Stone | Plasma | Fire | Water | Air | Earth |
|---|---|---|---|---|---|---|---|---|
| Swamp | Bacteria | Gen. 2 | Gen. 2 | |||||
| Life | Bacteria | Ghost | Weeds | Egg | ||||
| Stone | Metal | Sand | Sand | |||||
| Plasma | Ghost | |||||||
| Fire | Gen. 2 | Metal | Gen. 1 | Gen. 1 | Gen. 1 | |||
| Water | Gen. 2 | Weeds | Sand | Gen. 1 | Gen. 1 | Gen. 1 | ||
| Air | Sand | Gen. 1 | Gen. 1 | Gen. 1 | ||||
| Earth | Egg | Gen. 1 | Gen. 1 | Gen. 1 |
| GEN. 4 | Air | Egg | Earth | Swamp | Weeds | Bacteria | Water | Life |
|---|---|---|---|---|---|---|---|---|
| Air | Bird | Gen. 1 | Gen. 1 | |||||
| Egg | Bird | Dinosaur | Lizard | Seeds | Turtle | |||
| Earth | Gen. 1 | Dinosaur | Mushroom | Gen. 1 | ||||
| Swamp | Lizard | Moss | Worm | Gen. 2 | Gen. 3 | |||
| Weeds | Seeds | Mushroom | Moss | |||||
| Bacteria | Worm | Plankton | ||||||
| Water | Gen. 1 | Turtle | Gen. 1 | Gen. 2 | Plankton | Gen. 3 | ||
| Life | Gen. 3 | Gen. 3 |

The devil’s interval approaches...
See Appendix A for indicator identification reference.
See Appendix B for battery identification reference.
See Appendix C for port identification reference.
See the third page for serialism & music terminology reference.
Table 1.
| # | Prime 12-tone Sequence | # | Prime 12-tone Sequence |
| 0 | F D F# G# C B A# C# G E D# A | 5 | C D# F# D F C# B A G A# E G# |
| 1 | A# A C E C# D D# G B F# G# F | 6 | G# C A# C# E G B D# A D F F# |
| 2 | F# B A G# D C G C# F D# E A# | 7 | E A C# B G G# A# D# F# F C D |
| 3 | E D# D F# F A# G# C# C B G A | 8 | G# D# D E A# C# F# G F A C B |
| 4 | D E A A# C B C# G# F F# D# G | 9 | D# G# C B D C# F# A# F G A E |
Table 2.
| Required Symbol(s) | Further Requirements | Lookup Index | Transformation |
 and T and T |
2 or more indicators (lit or unlit) | Left-most digit in serial number | RI |
# or  |
An empty port plate | Number of battery holders* | P, transpose down by 'x' semitones, where 'x' = number of minutes remaining |
U or  |
2 or more of a certain type of port | Least significant digit of number of completed modules | I |
B and  |
2 or more port plates | 9 minus the number of unlit indicators† | R |
| C or c | Serial contains 1 or more vowels | Least significant digit of number of strikes | R, transpose down by 3 semitones |
| n or m | Even number of batteries | DVI-D present: 7 Otherwise: 3 |
P, transpose up by 'x' semitones, where 'x' = number of ports‡ |
b or  |
An indicator with no vowels in the label | 8 | I |
| or |
Less than 2 ports‡ | 4 | R |
| or |
(No other requirements) | 5 | P |
If none of these rules apply, refer to the manual for Piano Keys and play the given note sequence according to its rules. |
|||
Notes:
*: If the number of battery holders exceeds 9, continually subtract 10 until you have a result in the 0 to 9 range (inclusive).
†: If the result is negative, continually add 10 until you have a result in the 0 to 9 range (inclusive).
‡: The Stereo RCA port does not count as 2 separate ports; the Red & White connectors are part of the same singular port.
To clarify, the note below a C would be a B, and similarly, the note after a B would be a C. The 12 tones on the piano essentially wrap around.
The Prime sequence (or 'P' for short), is the original or base form of the 12-tone row. No transformation takes place.
The Retrograde sequence (or 'R' for short), takes the Prime sequence, but executes it in reverse order. For example, the Retrograde of the Prime row A B C D E would be E D C B A.
The Inverse sequence (or 'I' for short), takes the Prime sequence, but the intervals between the notes are inverted. For example, take the interval from A to B; the interval is +2 semitones, as it takes you 2 semitones to get from A to B (A goes to A# then B). The inversion of this interval would be -2 semitones. Therefore, the inverted sequence would be A then G, as G is -2 semitones away from A (A goes to G# then G).
As an extended example, the Inversion of the Prime row A B C D E would be A G F# E D; the first note always remains the same, and all the other notes get inverted relative to that note.
The Retrograde Inverse sequence (or 'RI' for short), takes the Inverse sequence in Retrograde. For example, the Retrograde Inverse of the Prime row A B C D E would take the Inverse first (which is A G F# E D), and then the Retrograde of this Inverse would be D E F# G A.
Transpositions apply a translation of the tone row up or down by a given number of semitones. For example, the Prime row A B C D E transposed up by 1 semitone would be A# C C# D# F.
An Interval is the tonal distance between two distinct notes and is usually measured in semitones. For example, the interval from G to B is up 4 semitones.

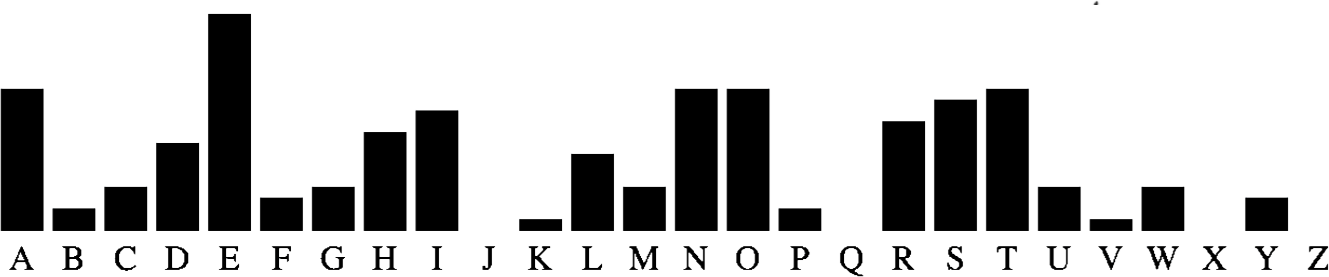
WLMY ETGXFD EQCD ED PQKW WT CMFF EZYDFB.
SEE TABLE CD43 FOR AN EXCERPT OF “A CHRISTMAS CAROL”.
SEE TABLE CD44 FOR FREQUENT LETTERS AND WORDS.
This module will display ciphertext which contains a sentence from Charles Dickens’ “A Christmas Carol” (aka the plaintext). The plaintext has been encrypted via a substitution cipher, meaning each letter in the alphabet is substituted for a different letter.
NOTE: The meaning of the word colors is currently unknown, however you can safely ignore them.
Excerpt from Charles Dickens’ “A Christmas Carol”.
Scrooge knew he was dead? Of course he did. How could it be otherwise? Scrooge and he were partners for I don’t know how many years. Scrooge was his sole executor, his sole administrator, his sole assign, his sole residuary legatee, his sole friend, and sole mourner. And even Scrooge was not so dreadfully cut up by the sad event, but that he was an excellent man of business on the very day of the funeral, and solemnised it with an undoubted bargain. The mention of Marley’s funeral brings me back to the point I started from. There is no doubt that Marley was dead. This must be distinctly understood, or nothing wonderful can come of the story I am going to relate. If we were not perfectly convinced that Hamlet’s Father died before the play began, there would be nothing more remarkable in his taking a stroll at night, in an easterly wind, upon his own ramparts, than there would be in any other middle-aged gentleman rashly turning out after dark in a breezy spot -- say Saint Paul’s Churchyard for instance -- literally to astonish his son’s weak mind.
Scrooge never painted out Old Marley’s name. There it stood, years afterwards, above the warehouse door: Scrooge and Marley. The firm was known as Scrooge and Marley. Sometimes people new to the business called Scrooge Scrooge, and sometimes Marley, but he answered to both names. It was all the same to him.
Oh! But he was a tight-fisted hand at the grind-stone, Scrooge! A squeezing, wrenching, grasping, scraping, clutching, covetous, old sinner! Hard and sharp as flint, from which no steel had ever struck out generous fire; secret, and self-contained, and solitary as an oyster. The cold within him froze his old features, nipped his pointed nose, shrivelled his cheek, stiffened his gait; made his eyes red, his thin lips blue and spoke out shrewdly in his grating voice. A frosty rime was on his head, and on his eyebrows, and his wiry chin. He carried his own low temperature always about with him; he iced his office in the dogdays; and didn’t thaw it one degree at Christmas.
External heat and cold had little influence on Scrooge. No warmth could warm, no wintry weather chill him. No wind that blew was bitterer than he, no falling snow was more intent upon its purpose, no pelting rain less open to entreaty. Foul weather didn’t know where to have him. The heaviest rain, and snow, and hail, and sleet, could boast of the advantage over him in only one respect. They often ‘came down’ handsomely, and Scrooge never did. Nobody ever stopped him in the street to say, with gladsome looks, ‘My dear Scrooge, how are you? When will you come to see me?’ No beggars implored him to bestow a trifle, no children asked him what it was o’clock, no man or woman ever once in all his life inquired the way to such and such a place, of Scrooge. Even the blind men’s dogs appeared to know him; and when they saw him coming on, would tug their owners into doorways and up courts; and then would wag their tails as though they said, ‘No eye at all is better than an evil eye, dark master!’
But what did Scrooge care! It was the very thing he liked. To edge his way along the crowded paths of life, warning all human sympathy to keep its distance, was what the knowing ones call ‘nuts’ to Scrooge.
Word and Letter Frequency in Charles Dickens’ “A Christmas Carol”.
| Frequent 2 letter words | Frequent 3 letter words |
|---|---|
|
|
| Frequent 4 letter words | Frequent 5 letter words |
|
|
| Frequent 6 letter words | Frequent 7 letter words |
|
|
| Frequent 8 letter words | Frequent 9 letter words |
|
|
| Sentence | Letter count per word |
|---|---|
| A frosty rime was on his head, and on his eyebrows, and his wiry chin. | 164323432383344 |
| A squeezing, wrenching, grasping, scraping, clutching, covetous, old sinner! | 199889836 |
| Oh! | 2 |
| If we were not perfectly convinced that Hamlet’s Father died before the play began, there would be nothing more remarkable in his taking a stroll at night, in an easterly wind, upon his own ramparts, than there would be in any other middle-aged gentleman rashly turning out after dark in a breezy spot -- say Saint Paul’s Churchyard for instance -- literally to astonish his son’s weak mind. | 2243994764634 555274A236162 52284433845522 35A967354216 435538928 3444 |
| It was all the same to him. | 2333423 |
| It was the very thing he liked. | 2334525 |
| To edge his way along the crowded paths of life, warning all human sympathy to keep its distance, was what the knowing ones call ‘nuts’ to Scrooge. | 24335375247358 2438343744427 |
| he iced his office in the dogdays; and didn’t thaw it one degree at Christmas. | 2436237 |
| No wind that blew was bitterer than he, no falling snow was more intent upon its purpose, no pelting rain less open to entreaty. | 244438422743464 372744428 |
| Of course he did. | 2623 |
| No warmth could warm, no wintry weather chill him. | 265426753 |
| He carried his own low temperature always about with him; | 27333B6543 |
| No beggars implored him to bestow a trifle, no children asked him what it was o’clock, no man or woman ever once in all his life inquired the way to such and such a place, of Scrooge. | 278326262853423 6232544233483324 341527 |
| But he was a tight-fisted hand at the grind-stone, Scrooge! | 3231B413A6 |
| The firm was known as Scrooge and Marley. | 34352736 |
| But what did Scrooge care! | 34374 |
| and when they saw him coming on, would tug their owners into doorways and up courts; | 34433625356483 26 |
| and then would wag their tails as though they said, ‘No eye at all is better than an evil eye, dark master!’ | 3453552634232326 424346 |
| The cold within him froze his old features, nipped his pointed nose, shrivelled his cheek, stiffened his gait; | 346353386374 A35934 |
| And even Scrooge was not so dreadfully cut up by the sad event, but that he was an excellent man of business on the very day of the funeral, and solemnised it with an undoubted bargain. | 347332A322335342 32932823432373 A24297 |
| How could it be otherwise? | 35229 |
| The mention of Marley’s funeral brings me back to the point I started from. | 37277524235174 |
| The heaviest rain, and snow, and hail, and sleet, could boast of the advantage over him in only one respect. | 38434343555239 432437 |
| made his eyes red, his thin lips blue and spoke out shrewdly in his grating voice. | 434334443538237 5 |
| Hard and sharp as flint, from which no steel had ever struck out generous fire; | 43525452534638 4 |
| Even the blind men’s dogs appeared to know him; | 435448243 |
| This must be distinctly understood, or nothing wonderful can come of the story I am going to relate. | 442AA2793423 512526 |
| When will you come to see me?’ | 4434232 |
| They often ‘came down’ handsomely, and Scrooge never did. | 4544A3753 |
| Foul weather didn’t know where to have him. | 47545243 |
| There is no doubt that Marley was dead. | 52254634 |
| There it stood, years afterwards, above the warehouse door: Scrooge and Marley. | 5255A539473 6 |
| secret, and self-contained, and solitary as an oyster. | 63D38226 |
| Nobody ever stopped him in the street to say, with gladsome looks, ‘My dear Scrooge, how are you? | 64732362348524 7333 |
| Scrooge and he were partners for I don’t know how many years. | 732443244345 |
| Scrooge was his sole executor, his sole administrator, his sole assign, his sole residuary legatee, his sole friend, and sole mourner. | 7334834D3463 497346347 |
| Scrooge knew he was dead? | 74234 |
| Scrooge never painted out Old Marley’s name. | 7573374 |
| External heat and cold had little influence on Scrooge. | 832436927 |
| Sometimes people new to the business called Scrooge Scrooge, and sometimes Marley, but he answered to both names. | 96323867739 6328245 |

I want to major in anything that takes this combination of classes together.
| Serial character in the same position is | Even | PHYSICS | PHILOSOPHY | PROGRAMMING | LINGUISTICS | LOGIC |
|---|---|---|---|---|---|---|
| Odd | MATHS | LITERATURE | ECONOMY | MANAGEMENT | ELECTRONICS |
| Name | Condition | Effect |
|---|---|---|
| Mathlete | Last digit of the serial is 0 | Can’t take lectures on Tuesday |
| Party Animal | Five or more ports present | Can’t take lectures in the last slot of each day |
| Part-Timer | Empty port plate present | Can’t take lectures on either Thursday or Friday |
| Sleepy Gary | No indicators present | Can’t take lectures in the first slot of each day |
| Band Practice | Three or more batteries present | Can’t take lectures in the second halves of Monday and Wednesday |
| Freshman Year | None of the other conditions apply | Can’t take lectures in the second half of Friday |
| If you have no strikes AND at least 1 solved module on the bomb, your schedule can have 1 conflict. CAUTION: Lectures on the conditionally affected hours are not considered conflicts and should be empty regardless of your BOOKWORM situation. |
|---|

A module, please. Shaken, not stirred. Stupid piece of junk; broken display, broken buttons...
NOTE: This module is old, and the last digit glitches out when the first digit is zero. In addition, the wiring for the buttons is acting up, so the functions of the buttons may be swapped. Fortunately, the strikes from the submit button are only registered by the bomb if the displayed number is less than 10.
| 60 | 02 | 15 | 57 | 36 | 83 | 48 | 71 | 24 |
| 88 | 46 | 31 | 70 | 22 | 64 | 07 | 55 | 13 |
| 74 | 27 | 53 | 05 | 41 | 18 | 86 | 30 | 62 |
| 52 | 10 | 04 | 43 | 85 | 37 | 61 | 28 | 76 |
| 33 | 65 | 78 | 21 | 00 | 56 | 12 | 44 | 87 |
| 47 | 81 | 26 | 68 | 14 | 72 | 50 | 03 | 35 |
| 06 | 38 | 42 | 84 | 63 | 20 | 75 | 17 | 51 |
| 25 | 73 | 67 | 16 | 58 | 01 | 34 | 82 | 40 |
| 11 | 54 | 80 | 32 | 77 | 45 | 23 | 66 | 08 |

Math is easy. But is it easy when the numbers are in another language? Let’s find out.
Decipher the characters on the display into numbers and solve the answer to the question. Enter the answer with the keypad and press ‘=’ to submit it. Use ‘-’ to toggle the negative sign for negative answers. There’s no delete button so press those buttons carefully!
For example: =(+=( translates to 1+1
The answer to enter is 2.
| Character | Number |
|---|---|
| :) | 0 |
| =( | 1 |
| (: | 2 |
| )= | 3 |
| :( | 4 |
| ): | 5 |
| =) | 6 |
| (= | 7 |
| :| | 8 |
| |: | 9 |

You’ve lived all your life writing however you wanted without giving a second thought to who would be reading what you misspelled. But now, your life depends on your grammar and orthography, and this bomb is very nitpicky. You should of paid more attention in you’re English class.
...Oh, carp.
See Table: Grammar for more information.
This table contains a brief overview of some grammatical distinctions in English.
The subject is what is doing the action, and the object is what is receiving the action. e.g. In “I buy milk.” I is the subject and milk is the object.
| their: belonging to them; there: that place; they're: they are |
| your: belonging to you; you're: you are |
| I, he, she, we, they: used in subjects; me, him, her, us, them: used in objects |
| less: used with uncountable nouns; fewer: used with countable nouns |
| who: used in subjects; whom: used in objects |
| defiantly: rebelliously; definitely: without doubt |
| lead: the metal or the present tense; led: the past tense and past participle |
| cite: declare a quoted source; site: location; sight: a view or vision |
|
When you don't lay something else down, you lie down. The past tense of lay is laid. Confusingly, the past tense of lie is lay! |
| accept: This is fine; except: One of these things is not like the others |
| ad: short for advertisement; add: opposite of subtract |
| affect: usually a verb, but noun when it means “display of emotion”; effect: almost always a noun; impact: physical force |
| allot: partition; a lot: very much; alot: (never correct) |
| aloud: not quiet; allowed: with permission |
| altar: table used for making sacrifices; alter: to make changes |
| arc: a curve, electrical discharge, or development of a theme in a story; ark: large boat, or a sacred chest |
| baited: past tense of “bait”; bated: anxiously, or excitedly |
| base: a foundation upon which other things are built; bass: low-frequency tones in music, or the instruments with which those are created |
| Literally means word for word. If you had “literally died” watching a video, your family and friends would be crying at your funeral about now. |
|
If you write “should of”, “could of”, “would of”, or “might of”, no educated gentleman will take you seriously. Remember, “I do” is to “I have done” as “I could do” is to “I could have done”. (Exceptions apply, but very very rarely!) |
| its: belonging to it; it's: it is |
| capital: main city in a territory, money you put up to borrow something, or THIS KIND OF LETTER; capitol: big building, usually in a capital |
| affect: usually a verb, but noun when it means “display of emotion”; effect: almost always a noun; impact: physical force |
| i.e.: short for Latin id est, or “that is”; e.g.: short for Latin exemplī grātiā, or “for example” |
| peak: summit; peek: sneak a look; pique: excite (usually interest) |
| allot: partition; a lot: very much; alot: (never correct) |
| lose: opposite of gain; loose: opposite of tight |
| than: (used to compare two things); then: at the time, or right after that |
| complement: when two parts complete each other; compliment: You look good today! |
| farther: physical distance; further: figurative distance |
| number: used for countable nouns; amount: used for uncountable nouns |
| to: used in infinitives or destination; too: as well, or overly; two: 2 |
| accept: This is fine; except: One of these things is not like the others |
| threw: past tense of “throw”; through: in at one side/end and out at the other |
| defuse: stop a bomb; diffuse: light softening out. Use "defuse" for tension. |
| statue: monument; stature: body height; statute: code of law |
| stationary: completely still; stationery: writing utensils |
| by: beside, from the mind of, etc.; buy: trade money for goods; bye: see you later |
| breath: the noun; breathe: the verb |
| drink: present tense; drank: past tense; drunk: past participle and adjective |
| discreet: secret or carefully subtle; discrete: separate |
| seas: plural of sea; sees: a form of “to see”; seize: to grab or take by force; C’s: more than one C |
| weather: condition of the outside air; whether: if it is or if it isn't |
| raise: to make something go up; rays: narrow beams of light; raze: get rid of hair with a razor, or similarly destroy a wide area |
| wander: frolic; wonder: ponder |
| die: stop living, or a small cube for randomness; dice: more than one die |
| meat: flesh; meet: to see someone else; mete: to deal out something unpleasant |
| palate: roof of your mouth; palette: board to mix paint on, or a combination of colors; pallet: plates that cargo gets placed on |
| In this module, racket: a loud noise; racquet: a netted stick or paddle with which to hit a ball. (Especially in US English, racket can be used for both senses.) |
| perfect: 100% good or correct; prefect: person in a position of power, like an official or a heir |
Other pairs/sets of words include: ad/add, aloud/allowed, altar/alter, arc/ark, baited/bated, base/bass, blew/blue, brake/break, carat/caret/carrot/karat, ceiling/sealing, cent/scent/sent, cereal/serial, choral/coral/corral, coarse/course, creak/creek, dear/deer, discussed/disgust, elicit/illicit, everyday/every day, faint/feint, faze/phase, find/fined, flair/flare, flea/flee, gait/gate, idle/idol/idyll, lighting/lightning/lightening, loan/lone/lend, oar/or/ore, pail/pale, pair/pare/pear, poor/pore/pour, praise/prays/preys, precedence/precedents/presidents, right/rite/wright/write, road/rode/rowed, ring/wring, role/roll, seam/seem, stairs/stares, steal/steel, straight/strait, though/thought/through/thorough, vain/vane/vein, vary/very, wait/weight, and weak/week.
For lack of space, the differences for these words have been omitted, but they should be fairly common knowledge to most English speakers.
See Appendix Grammar for more detailed information.
| blew: past tense of “blow”; blue: a color |
| brake: slow down, or a device used for slowing down; break: to make or become broken, or a rest |
| breath: the noun; breathe: the verb |
| by: beside, from the mind of, etc.; buy: trade money for goods; bye: see you later |
| capital: main city in a territory, money you put up to borrow something, or THIS KIND OF LETTER; capitol: big building, usually in a capital |
| carat: a unit of weight for precious stones; caret: a mark in text to indicate insertions; carrot: a vegetable; karat: a measure of the purity of gold |
| ceiling: the top of a room; sealing: to close up |
| cent: one hundredth of a currency unit; scent: a smell; sent: past tense of “send” |
| cereal: food; serial: forming a series |
| choral: relating to a chorus or choir; coral: animal living in the sea; corral: an enclosure for livestock |
| cite: declare a quoted source; site: location; sight: a view or vision |
| coarse: rough; course: a route |
| complement: when two parts complete each other; compliment: You look good today! |
| creak: a high-pitched sound; creek: a narrow waterway |
| dear: beloved; deer: an animal |
| defiantly: rebelliously; definitely: without doubt |
| defuse: stop a bomb; diffuse: light softening out. Use "defuse" for tension. |
| die: stop living, or a small cube for randomness; dice: more than one die |
| discussed: talked about; disgust: a feeling of revulsion, or to cause this feeling |
| drink: present tense; drank: past tense; drunk: past participle and adjective |
| elicit: evoke; illicit: forbidden |
| discreet: secret or carefully subtle; discrete: separate |
| everyday: daily; every day: each day |
| faint: slight, or to lose consciousness; feint: to make a deceptive movement |
| faze: disturb; phase: a distinct period or stage in a series of events |
| find: discover; fined: past tense of “fine” |
| flair: talent, or stylishness; flare: a burst of bright flames or light |
| flea: an insect; flee: run away from danger |
| farther: physical distance; further: figurative distance |
| gait: a manner of walking; gate: an entryway in a wall or fence |
| I, he, she, we, they: used in subjects; me, him, her, us, them: used in objects |
| i.e.: short for Latin id est, or “that is”; e.g.: short for Latin exemplī grātiā, or “for example” |
| idle: doing nothing; idol: a greatly admired person; idyll: a peaceful situation, or a short poem |
| its: belonging to it; it's: it is |
| When you don't lay something else down, you lie down. The past tense of lay is laid. Confusingly, the past tense of lie is lay! |
| lead: the metal or the present tense; led: the past tense and past participle |
| less: used with uncountable nouns; fewer: used with countable nouns |
| lighting: the equipment or arrangement of lights; lightning: electrical discharge during a thunderstorm; lightening: reduce weight |
| Literally means word for word. If you had “literally died” watching a video, your family and friends would be crying at your funeral about now. |
| loan: the object when lending something to someone; lone: single; lend: The action of granting someone a loan |
| lose: opposite of gain; loose: opposite of tight |
| meat: flesh; meet: to see someone else; mete: to deal out something unpleasant |
| number: used for countable nouns; amount: used for uncountable nouns |
| oar: the paddle for rowing a boat; or: a conjunction to link alternatives; ore: material in nature from which metals or minerals can be extracted |
| If you write “should of”, “could of”, “would of”, or “might of”, no educated gentleman will take you seriously. Remember, “I do” is to “I have done” as “I could do” is to “I could have done”. (Exceptions apply, but very very rarely!) |
| pail: bucket; pale: light in color |
| pair: a set of two things, or to combine; pare: trim by cutting away the outer edges; pear: a fruit |
| palate: roof of your mouth; palette: board to mix paint on, or a combination of colors; pallet: plates that cargo gets placed on |
| peak: summit; peek: sneak a look; pique: excite (usually interest) |
| perfect: 100% good or correct; prefect: person in a position of power, like an official or a heir |
| poor: opposite of rich; pore: a small opening in a surface, or to be absorbed in reading; pour: to flow in a steady stream |
| praise: approval or honour, or to give approval or honour; prays: address a deity; preys: hunt and kill for food, or an animal that is hunted and killed for food |
| precedence: more importance; precedents: earlier examples; presidents: leaders of a republic or organization, sometimes depicted on money |
| In this module, racket: a loud noise; racquet: a netted stick or paddle with which to hit a ball. (Especially in US English, racket can be used for both senses.) |
| raise: to make something go up; rays: narrow beams of light; raze: get rid of hair with a razor, or similarly destroy a wide area |
| right: correct, or the opposite of left; rite: ceremony; wright: a maker or builder; write: compose text |
| road: a path leading somewhere; rode: past tense of “ride”; rowed: past tense of “row” |
| ring: a circular thing, or to make a resonant sound; wring: twist and squeeze to extract liquid |
| role: a part played by a person or thing; roll: movement in a steady direction or circular motion, can be both a verb and a noun |
| seas: plural of sea; sees: a form of “to see”; seize: to grab or take by force; C’s: more than one C |
| seam: the line where two pieces of material touch each other, or to create such a line; seem: give an impression |
| stairs: steps used for going up or down; stares: a form of “to stare” |
| stationary: completely still; stationery: writing utensils |
| statue: monument; stature: body height; statute: code of law |
| steal: take without permission, or the act of taking without permission; steel: the metal |
| straight: without a curve or bend; strait: narrow passage of water connecting two large bodies of water |
| than: (used to compare two things); then: at the time, or right after that |
| their: belonging to them; there: that place; they're: they are |
| though: however; thought: past tense of “think”, or what is produced by thinking; through: in at one side/end and out at the other; thorough: rigorous |
| threw: past tense of “throw”; through: in at one side/end and out at the other |
| to: used in infinitives or destination; too: as well, or overly; two: 2 |
| vain: useless; vane: a rotating blade pushed by wind or water; vein: a vessel through which blood flows |
| vary: differ; very: in a high degree |
| wander: frolic; wonder: ponder |
| wait: stand by until something occurs; weight: how much something weighs, or to make heavier |
| weak: opposite of strong; week: seven days |
| weather: condition of the outside air; whether: if it is or if it isn't |
| who: used in subjects; whom: used in objects |
| your: belonging to you; you're: you are |

AAAAAA. No? AAAAAC. Wait, did we do "AAAAAB"? *sigh* AAAAAA...
| adjust | anchor | bowtie | button |
| cipher | corner | dampen | demote |
| enlist | evolve | forget | finish |
| geyser | global | hammer | helium |
| ignite | indigo | jigsaw | juliet |
| karate | keypad | lambda | listen |
| matter | memory | nebula | nickel |
| overdo | oxygen | peanut | photon |
| quartz | quebec | resist | riddle |
| sierra | strike | teapot | twenty |
| untold | ultima | victor | violet |
| wither | wrench | xenons | xylose |
| yellow | yogurt | zenith | zodiac |

Gotta go fast!
| Right letter: | A | B | C | D | E | G | K | N | P | S | T | X | Z | |
|---|---|---|---|---|---|---|---|---|---|---|---|---|---|---|
| Left letter: | A | 25 | 11 | 53 | 97 | 02 | 42 | 51 | 97 | 12 | 86 | 55 | 73 | 33 |
| B | 54 | 07 | 32 | 19 | 84 | 33 | 27 | 78 | 26 | 46 | 09 | 13 | 58 | |
| C | 86 | 37 | 44 | 01 | 05 | 26 | 93 | 49 | 18 | 69 | 23 | 40 | 22 | |
| D | 54 | 28 | 77 | 93 | 11 | 00 | 35 | 61 | 27 | 48 | 13 | 72 | 80 | |
| E | 99 | 36 | 23 | 95 | 67 | 05 | 26 | 17 | 44 | 60 | 26 | 41 | 67 | |
| G | 74 | 95 | 03 | 04 | 56 | 23 | 54 | 29 | 52 | 38 | 10 | 76 | 98 | |
| K | 88 | 46 | 37 | 96 | 02 | 52 | 81 | 37 | 12 | 70 | 14 | 36 | 78 | |
| N | 54 | 43 | 12 | 65 | 94 | 03 | 47 | 23 | 16 | 62 | 73 | 46 | 21 | |
| P | 07 | 33 | 26 | 01 | 67 | 26 | 27 | 77 | 83 | 14 | 27 | 93 | 09 | |
| S | 63 | 64 | 94 | 27 | 48 | 84 | 33 | 10 | 16 | 74 | 43 | 99 | 04 | |
| T | 35 | 39 | 03 | 25 | 47 | 62 | 38 | 45 | 88 | 48 | 34 | 31 | 27 | |
| X | 67 | 30 | 27 | 71 | 09 | 11 | 44 | 37 | 18 | 40 | 32 | 15 | 78 | |
| Z | 13 | 23 | 26 | 85 | 92 | 12 | 73 | 56 | 81 | 07 | 75 | 47 | 99 | |

I don’t know if this counts as faulty... or just plain mean.
This module at first looks like a Backgrounds module, except there are two ‘Push Me’ buttons. One of them is the correct color, the other is not. Follow the rules below to determine which button is correct.
This module will present you with two colored buttons, a counter, and a submit button. However, the backing may be a certain color. There are two ‘Push Me’ buttons. One of them is the correct color, the other is not. Follow the rules below to determine which button is correct.
Once you’ve determined which button is the fake, follow the instructions in the regular Backgrounds manual.
Once you’ve determined which button is the fake, follow the instruction on the next page.
Based on the color of the backing and the color of the button, press the button until the counter matches a certain number and press submit.
Use the rules in Table B to determine your letter pair, finding the first two conditions that apply, using the first letter from the first rule and the second letter from the second rule.
With the letter pair found in Step 1 and Table A, use the first letter along the left and the second letter along the top to find the number of times to press the button before pressing submit.
| A | B | C | D | E | F | |
| A | 3 |
2 |
9 |
1 |
7 |
4 |
| B | 7 |
9 |
8 |
8 |
2 |
3 |
| C | 5 |
1 |
7 |
4 |
4 |
6 |
| D | 6 |
4 |
2 |
6 |
8 |
5 |
| E | 5 |
1 |
5 |
3 |
9 |
9 |
| F | 1 |
2 |
3 |
6 |
7 |
8 |
(Please note that if you press the button when the counter reads 9, the counter will reset to 0.)
TABLE B: Priority rules
| RULE | FIRST LETTER | SECOND LETTER |
| If the color of the backing matches the color of the button | A |
C |
| Otherwise, if the button or the backing (but not both) are white or black | D |
B |
| Otherwise, if there are no D batteries present on the bomb * | C |
E |
| Otherwise, if there are no AA batteries present on the bomb | D |
D |
| Otherwise, if the button and the backing are primary colors ** | B |
F |
| Otherwise, if the color of the button is a secondary color *** | F |
E |
| Otherwise, if there is an unlit SND indicator present on the bomb | E |
B |
| Otherwise, if the bomb contains a Serial port | B |
C |
| Otherwise, if the backing's color mixed with blue creates the button's color **** | C |
D |
| Otherwise, use this rule (This rule can be used twice) | E |
A |
*: D batteries are detected as any battery holder with exactly one battery. **: Primary colors are Red, Yellow, and Blue ***: Secondary colors are Orange, Green, and Purple ****: Mixing Red and Yellow will make Orange, Blue and Yellow will make Green, and Red and Blue will make Purple. Mixing Blue and White will not make Blue.
Let’s all gather round for a family sing-a-long!
See Appendix A for indicator identification reference.
See Appendix B for battery identification reference.
See Appendix C for port identification reference.
| Required Symbol(s) | Further Requirements | Note Sequence |
|---|---|---|
| " | More even digits in the serial number than odd | Eb F Eb C Ab F Eb |
| % or x | Any duplicate characters or digits in serial number | C# B A F# G# A G# F# |
| m and * | (No other requirements) | G A G E G A G E |
| v or |
At most 2 types of port | Eb Eb Db Ab Eb Eb F Db |
| ^ | Lit indicator with vowel | B A G Eb D A B A G |
| or x |
3 or more AA batteries | F# G A A D B A G E D |
| w and |
(No other requirements) | G E F G C B C D C B A G |
| > or ^ or v | Serial number contains 1 or 9 | G G G G G G G Bb Eb F G |
| % or B or " | (No other requirements) | D D D C# C# C# B C# B F# |
| (No requirement) | (No other requirements) | Bb A Bb G (Play sequence x times, where x equals largest digit in serial + 1) |

Why put a classic schoolyard game on a bomb? Wait... that's odd...
| Condition | red | green | blue | yellow | white |
|---|---|---|---|---|---|
| 3 or more battery holders are present on the bomb. | 7 | 3 | 2 | 4 | 5 |
| At least one Serial and Parallel port are present on the bomb. | 3 | 4 | 9 | 2 | 8 |
| 3 letters and 3 digits are present in the serial number. | 4 | 5 | 8 | 8 | 2 |
| At least one DVI-D and Stereo RCA port are present on the bomb. | 2 | 3 | 7 | 9 | 1 |
| 2 or more strikes are present on the bomb. | 6 | 6 | 1 | 2 | 8 |
| 5 or more batteries are present on the bomb. | 1 | 2 | 2 | 5 | 3 |
| None of the above apply. | 3 | 1 | 8 | 3 | 4 |

I hope you're good at geography as this is a flag quiz that doesn't make any sense!
The module consists of a screen with a main flag, a screen with 7 flags that can be navigated using the left and right buttons, and a screen displaying a number between 1 and 7.
Submitting a wrong flag will incur a strike. Submitting the correct flag will disarm the module.
First, sort the 7 flags by applying the first rule that follows its condition:
If there are any flags that have the same information, sort the flags with duplicate information by their country name in alphabetical order.
A number will be displayed at the top right. After sorting the flags, submit the flag in the position of the displayed number in your sorted list of flags.
BUT if there is an unlit BOB indicator, and the serial number contains any character from the phrase "WHITE FLAG" while France is in the 7 flags, ignore all above instructions and simply submit the flag of France.
Use the table in the next pages to get information about flags and countries.
| Flag | Country | Continent | Capital | Currency | ISO Code | Dial Code |
 |
Algeria | North Africa | Algiers | DZD | DZA | +213 |
 |
Australia | Oceania | Canberra | AUD | AUS | +61 |
 |
Austria | Europe | Vienna | EUR | AUT | +43 |
 |
Belgium | Europe | Brussels | EUR | BEL | +32 |
 |
Brazil | South America | Brasília | BRL | BRA | +55 |
 |
Canada | North America | Ottawa | CAD | CAN | +1 |
 |
Chile | South America | Santiago | CLP | CHL | +56 |
 |
China | East Asia | Beijing | CNY | CHN | +86 |
 |
Colombia | South America | Bogotá | COP | COL | +57 |
 |
Cuba | North America | Havana | CUP | CUB | +53 |
 |
Czech Republic | Europe | Prague | CZK | CZE | +420 |
 |
Denmark | Europe | Copenhagen | DKK | DNK | +45 |
 |
Finland | Europe | Helsinki | EUR | FIN | +358 |
 |
France | Europe | Paris | EUR | FRA | +33 |
 |
Germany | Europe | Berlin | EUR | DEU | +49 |
 |
Greenland | North America | Nuuk | DKK | GRL | +299 |
 |
Iceland | Europe | Reykjavík | ISK | ISL | +354 |
 |
India | South Asia | New Delhi | INR | IND | +91 |
| Flag | Country | Continent | Capital | Currency | ISO Code | Dial Code |
 |
Japan | East Asia | Tokyo | JPY | JPN | +81 |
 |
Mexico | North America | Mexico City | MXN | MEX | +52 |
 |
Morocco | North Africa | Rabat | MAD | MAR | +212 |
 |
Netherlands | Europe | Amsterdam | EUR | NLD | +31 |
 |
New Zealand | Oceania | Wellington | NZD | NZL | +64 |
 |
Norway | Europe | Oslo | NOK | NOR | +47 |
 |
Panama | Central America | Panama City | PAB | PAN | +507 |
 |
Peru | South America | Lima | PEN | PER | +51 |
 |
Poland | Europe | Warsaw | PLN | POL | +48 |
 |
Samoa | Oceania | Apia | WST | WSM | +685 |
 |
Senegal | West Africa | Dakar | XOF | SEN | +221 |
 |
South Korea | East Asia | Seoul | KRW | KOR | +82 |
 |
Spain | Europe | Madrid | EUR | ESP | +34 |
 |
Sudan | North Africa | Khartoum | SDG | SDN | +249 |
 |
Sweden | Europe | Stockholm | SEK | SWE | +46 |
 |
Thailand | Southeast Asia | Bangkok | THB | THA | +66 |
 |
United Kingdom | Europe | London | GBP | GBR | +44 |
 |
United States | North America | Washington, D.C. | USD | USA | +1 |

Child’s play. Just follow the leader. Only if you fail to follow, the penalty is somewhat more explosive.
This module contains 8-12 wires connecting numerically labeled plugs in a loop. Each wire leads from one plug to another plug in clockwise order. In this manual, wires are numbered according to the plug they lead from; a wire from plug 1 to plug 2 is considered to be “wire 1”, while a wire from plug 12 to plug 1 is considered to be “wire 12”.
Progress through the module by first cutting the starting wire, then cutting each applicable wire in the order of the sequence. Each wire will need to be either cut or left uncut based on the state of the previous wire(s) in the sequence. Avoid cutting wires out of sequence.
Follow the first rule below that applies:
| Step | Cut this wire if: |
|---|---|
| A or N | The previous wire is not yellow or blue or green. |
| B or O | The previous wire leads to an even numbered plug. |
| C or P | The previous wire should be cut. |
| D or Q | The previous wire is red or blue or black. |
| E or R | At least two of the previous three wires share a color. |
| F or S | Exactly one of the previous two wires is the same color as this wire. |
| G or T | The previous wire is yellow or white or green. |
| H or U | The previous wire should not be cut. |
| I or V | The previous wire skips a plug. |
| J or W | The previous wire is not white or black or red. |
| K or X | The previous two wires are different colors. |
| L or Y | The previous wire does not lead to a position labeled 6 or less. |
| M or Z | Exactly one or neither of the previous two wires are white or black. |

If bombs were stock brokers...
Defusing this module requires the expert to have a device that can connect to the World Wide Web.
This module has the ability to connect to the internet and query the state of foreign exchange rates. There should be a three times three grid of keys, each with a light emitting diode. DO NOT PRESS ANY KEY ON THIS MODULE WHILE THE LIGHT EMITTING DIODES ARE FLASHING IN SEQUENCE.
The keys are grouped by rows:
| Top row: ISO 4217 alphabetic code for the base currency.[1][2] |
| Middle row: ISO 4217 alphabetic code for the target currency.[1][2] |
| Bottom row: Value of currency to convert. |
Enter the following uniform resource locator into your internet capable device:
https://fer.eltrick.uk/latest?base=XXX&symbols=YYY
Replace XXX with the ISO 4217 alphabetic code for the base currency.
Replace YYY with the ISO 4217 alphabetic code for the target currency.
You will receive data in a Javascript object notation format, look for {“YYY”: NUMBER}, where NUMBER will be the exchange rate. Using the exchange rate,
convert the number in the bottom row to the target currency, round that number
down and take note of the 2nd digit from the left[4]. Press the Nth key where N is
the noted number (count keys from left to right, top to bottom)[5].
In this case the module failed to query today’s currency rates. Get the ISO 4217 numeric code for the target currency’s country and take note the 2nd digit from the right. Press the Nth key where N is the noted number (count keys from left to right, top to bottom)[5].
[1]: If there is more than one battery on the bomb, the base currency code and target currency code is swapped.
[2]: This may instead be the ISO 4217 numeric code.
[3]: Note the currency rates are updated around 4PM CET.
[4]: In the case the converted currency is less than 10, the noted number is 0.
[5]: In the case the noted number is 0, press the top left key.
See Appendix ISO 4217 for alphabetic and numeric currency code identification.
The following is a list of active ISO 4217 codes of currencies, excluding complementary currencies and funds codes.
| Alpha. | Num. | Currency |
|---|---|---|
| AED | 784 | United Arab Emirates dirham |
| AFN | 971 | Afghan afghani |
| ALL | 008 | Albanian lek |
| AMD | 051 | Armenian dram |
| ANG | 532 | Netherlands Antillean guilder |
| AOA | 973 | Angolan kwanza |
| ARS | 032 | Argentine peso |
| AUD | 036 | Australian dollar |
| AWG | 533 | Aruban florin |
| AZN | 944 | Azerbaijani manat |
| BAM | 977 | Bosnia and Herzegovina convertible mark |
| BBD | 052 | Barbados dollar |
| BDT | 050 | Bangladeshi taka |
| BGN | 975 | Bulgarian lev |
| BHD | 048 | Bahraini dinar |
| BIF | 108 | Burundian franc |
| BMD | 060 | Bermudian dollar |
| BND | 096 | Brunei dollar |
| BOB | 068 | Bolivian Boliviano |
| BRL | 986 | Brazilian real |
| BSD | 044 | Bahamian dollar |
| BTN | 064 | Bhutanese ngultrum |
| BWP | 072 | Botswana pula |
| BYN | 933 | Belarusian ruble |
| BZD | 084 | Belize dollar |
| CAD | 124 | Canadian dollar |
| CDF | 976 | Congolese franc |
| CHF | 756 | Swiss franc |
| CLP | 152 | Chilean peso |
| Alpha. | Num. | Currency |
|---|---|---|
| CNY | 156 | Renminbi |
| COP | 170 | Colombian peso |
| CRC | 188 | Costa Rican colon |
| CUP | 192 | Cuban peso |
| CVE | 132 | Cape Verdean escudo |
| CZK | 203 | Czech koruna |
| DJF | 262 | Djiboutian franc |
| DKK | 208 | Danish krone |
| DOP | 214 | Dominican peso |
| DZD | 012 | Algerian dinar |
| EGP | 818 | Egyptian pound |
| ERN | 232 | Eritrean nakfa |
| ETB | 230 | Ethiopian birr |
| EUR | 978 | Euro |
| FJD | 242 | Fiji dollar |
| FKP | 238 | Falkland Islands pound |
| GBP | 826 | Pound sterling |
| GEL | 981 | Georgian lari |
| GHS | 936 | Ghanaian cedi |
| GIP | 292 | Gibraltar pound |
| GMD | 270 | Gambian dalasi |
| GNF | 324 | Guinean franc |
| GTQ | 320 | Guatemalan quetzal |
| GYD | 328 | Guyanese dollar |
| HKD | 344 | Hong Kong dollar |
| HNL | 340 | Honduran lempira |
| HTG | 332 | Haitian gourde |
| HUF | 348 | Hungarian forint |
| IDR | 360 | Indonesian rupiah |
| ILS | 376 | Israeli new shekel |
| Alpha. | Num. | Currency |
|---|---|---|
| INR | 356 | Indian rupee |
| IQD | 368 | Iraqi dinar |
| IRR | 364 | Iranian rial |
| ISK | 352 | Icelandic króna |
| JMD | 388 | Jamaican dollar |
| JOD | 400 | Jordanian dinar |
| JPY | 392 | Japanese yen |
| KES | 404 | Kenyan shilling |
| KGS | 417 | Kyrgyzstani som |
| KHR | 116 | Cambodian riel |
| KMF | 174 | Comoro franc |
| KPW | 408 | North Korean won |
| KRW | 410 | South Korean won |
| KWD | 414 | Kuwaiti dinar |
| KYD | 136 | Cayman Islands dollar |
| KZT | 398 | Kazakhstani tenge |
| LAK | 418 | Lao kip |
| LBP | 422 | Lebanese pound |
| LKR | 144 | Sri Lankan rupee |
| LRD | 430 | Liberian dollar |
| LSL | 426 | Lesotho loti |
| LYD | 434 | Libyan dinar |
| MAD | 504 | Moroccan dirham |
| MDL | 498 | Moldovan leu |
| MGA | 969 | Malagasy ariary |
| MKD | 807 | Macedonian denar |
| MMK | 104 | Myanmar kyat |
| MNT | 496 | Mongolian tögrög |
| MOP | 446 | Macanese pataca |
| MRU | 929 | Mauritanian ouguiya |
| MUR | 480 | Mauritian rupee |
| MVR | 462 | Maldivian rufiyaa |
| MWK | 454 | Malawian kwacha |
| MXN | 484 | Mexican peso |
| Alpha. | Num. | Currency |
|---|---|---|
| MYR | 458 | Malaysian ringgit |
| MZN | 943 | Mozambican metical |
| NAD | 516 | Namibian dollar |
| NGN | 566 | Nigerian naira |
| NIO | 558 | Nicaraguan córdoba |
| NOK | 578 | Norwegian krone |
| NPR | 524 | Nepalese rupee |
| NZD | 554 | New Zealand dollar |
| OMR | 512 | Omani rial |
| PAB | 590 | Panamanian balboa |
| PEN | 604 | Peruvian sol |
| PGK | 598 | Papua New Guinean kina |
| PHP | 608 | Philippine peso[11] |
| PKR | 586 | Pakistani rupee |
| PLN | 985 | Polish złoty |
| PYG | 600 | Paraguayan guaraní |
| QAR | 634 | Qatari riyal |
| RON | 946 | Romanian leu |
| RSD | 941 | Serbian dinar |
| RUB | 643 | Russian ruble |
| RWF | 646 | Rwandan franc |
| SAR | 682 | Saudi riyal |
| SBD | 090 | Solomon Islands dollar |
| SCR | 690 | Seychelles rupee |
| SDG | 938 | Sudanese pound |
| SEK | 752 | Swedish krona (plural: kronor) |
| SGD | 702 | Singapore dollar |
| SHP | 654 | Saint Helena pound |
| SLL | 694 | Sierra Leonean leone |
| SOS | 706 | Somalian shilling |
| SRD | 968 | Surinamese dollar |
| SSP | 728 | South Sudanese pound |
| STN | 930 | São Tomé and Príncipe dobra |
| Alpha. | Num. | Currency |
|---|---|---|
| SVC | 222 | Salvadoran colón |
| SYP | 760 | Syrian pound |
| SZL | 748 | Swazi lilangeni |
| THB | 764 | Thai baht |
| TJS | 972 | Tajikistani somoni |
| TMT | 934 | Turkmenistan manat |
| TND | 788 | Tunisian dinar |
| TOP | 776 | Tongan paʻanga |
| TRY | 949 | Turkish lira |
| TTD | 780 | Trinidad and Tobago dollar |
| TWD | 901 | New Taiwan dollar |
| TZS | 834 | Tanzanian shilling |
| UAH | 980 | Ukrainian hryvnia |
| UGX | 800 | Ugandan shilling |
| USD | 840 | United States dollar |
| UYU | 858 | Uruguayan peso |
| UZS | 860 | Uzbekistani sum |
| VES | 928 | Venezuelan sovereign bolívar |
| VND | 704 | Vietnamese đồng |
| VUV | 548 | Vanuatu vatu |
| WST | 882 | Samoan tala |
| XAF | 950 | CFA franc BEAC |
| XAG | 961 | Silver (one troy ounce) |
| XAU | 959 | Gold (one troy ounce) |
| XCD | 951 | East Caribbean dollar |
| XDR | 960 | Special drawing rights |
| XOF | 952 | CFA franc BCEAO |
| XPD | 964 | Palladium (one troy ounce) |
| XPF | 953 | CFP franc |
| XPT | 962 | Platinum (one troy ounce) |
| YER | 886 | Yemeni rial |
| ZAR | 710 | South African rand |
| ZMW | 967 | Zambian kwacha |
| ZWL | 932 | Zimbabwean dollar (fifth) |

Hey. I could defuse this bomb in ten seconds flat.
 |
 |
 |
 |
 |
 |
 |
 |
 |
 |
 |
 |
 |
 |
||
|---|---|---|---|---|---|---|---|---|---|---|---|---|---|---|---|
 | J | G | U | K | V | 8 | L | C | H | 4 | W | P | M | R |  |
 | 7 | S | 8 | U | N | J | 9 | Y | F | P | Q | C | R | 4 |  |
 | Q | R | H | 4 | F | 7 | J | E | 8 | T | N | 9 | A | X |  |
 | D | 3 | S | H | U | E | T | P | V | J | L | A | 4 | 7 |  |
 | A | F | 3 | T | M | P | R | W | S | X | U | N | G | B |  |
 | V | K | G | P | Q | D | U | L | 3 | H | M | R | E | C |  |
 | 4 | 9 | T | F | B | X | D | U | Y | 3 | R | L | H | M |  |
 | G | 4 | 9 | J | 8 | 3 | X | K | A | Y | S | W | 7 | D |  |
 | K | T | F | B | J | Q | 3 | S | E | C | P | U | W | L |  |
 | S | M | A | C | 7 | H | E | B | G | F | V | X | L | N |  |
 | 8 | 7 | V | L | 9 | R | K | D | T | Q | B | Y | X | A |  |
 | W | 8 | 4 | Q | G | Y | V | T | 7 | N | 3 | B | C | P |  |
| M | A | W | 9 | H | K | Y | J | N | D | X | E | 8 | F |  | |
 | Y | N | B | G | W | S | M | Q | K | 9 | C | V | D | E |  |
 |
 |
 |
 |
 |
 |
 |
 |
 |
 |
 |
 |
 |
 |

Live a colorful life, they say. They’re wrong. Colors just make life cruel.
The module will display a grid of squares colored either black, white, red, orange, yellow, green, blue, purple or brown. To defuse this module, the rules of Conway’s Game of Life (shown in table A) will need to be applied to the grid once. Note that the rules need to be applied to all the squares at the same time for each generation.
The state of each square can be toggled by clicking on it. Note that colored squares are to be converted into either black or white, according to table B, before applying the rules from table A. Black and White are not considered colors.
Entering the correct final configuration by pressing Submit will solve the module. Entering the wrong configuration this way will induce a strike. At any time, by pressing Reset, the module will return to its initial state.
BUT if the bomb has exactly 6 batteries in 3 holders, and an unlit BOB, ignore all the rules. Bob has returned to help you once again. Just press the Submit button during the initial state. Thanks, Bob!
Table A
A square is considered neighbouring if it is adjacent to another square, including diagonally.
| White neighbouring squares < 3 or > 3 | Stay black |
| White neighbouring squares = 3 | Turn white |
| White neighbouring squares < 2 or > 3 | Turn black |
| White neighbouring squares = 2 or = 3 | Stay white |
| Color of square: | Turns white if: |
|---|---|
| Red | At least one strike*, unless there are no batteries |
| Orange | Less than half of the bomb’s original time limit is displayed on the timer*, unless a CAR indicator is present |
| Yellow | There are more lit than unlit indicators, unless an RJ-45 port is present |
| Green | Even number of solved modules*, unless a CLR indicator is present |
| Blue | Serial number contains at least one letter in common with the word “Sea” or “Sky”, unless an SND indicator is present |
| Purple | There are more unlit than lit indicators, unless there are at least 4 batteries |
| Brown | There are at least 3 different port types, unless there are no indicators |
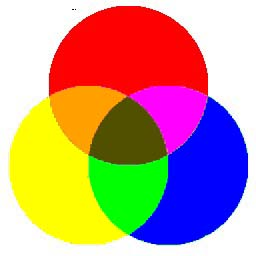
Diagram source: http://www.tomjewett.com/colors/paint.html
Game of Life Cruel
Diagram source: http://www.tomjewett.com/colors/paint.html

Solving this module is a matter of life and death!
The module will display a grid of squares colored either black or white. To defuse this module, the rules of Conway’s Game of Life (shown below) will need to be applied to the grid once. Note that the rules need to be applied to all the squares at the same time for each generation.
The state of each square can be toggled by clicking on it.
Entering the correct final configuration by pressing Submit will solve the module. Entering the wrong configuration this way will induce a strike.
At any time, by pressing Reset, the module will return to its initial state.
A square is considered neighbouring if it is adjacent to another square, including diagonally.
If square is black:| White neighbouring squares < 3 or > 3 | Stay black |
| White neighbouring squares = 3 | Turn white |
| White neighbouring squares < 2 or > 3 | Turn black |
| White neighbouring squares = 2 or = 3 | Stay white |

What is this, some kind of circuit visualization? I don’t even care anymore...
To determine the right chart on the next page you will need a character of the bomb’s serial number. Use the following rules to find out which character you need. Then, on the next page, search for that character in the codes that label the charts. The chart with a code containing your character is the chart you are looking for.
|
If the numbers on this module are all different, use the last character of the serial number.
Otherwise, if there is more than one “1” on the module, look at the first character of the serial number.
Otherwise, if there is more than one “7” on the module, look at the last character of the serial number.
Otherwise, if there are at least three “2” on the module, look at the second character of the serial number.
Otherwise, if there is no “5” on the module, look at the fifth character of the serial number.
Otherwise, if there are exactly two “8”s on the module, look at the third character of the serial number.
Otherwise, if there are more than 6 batteries or no batteries on the bomb, look at the last character of the serial number.
Otherwise, count the number of batteries on the bomb. Use that number to decide which character of the serial number you should look at. E.g.: if there are 3 batteries, look at the third character of the serial number.
|

Even a traffic jam isn’t this stop and go.
| Movement | Blue | Green | Yellow | Red |
|---|---|---|---|---|
| △ | ||||
| ◇ | ||||
| ⎔ | ||||
| ☆ |
|
|
||||||||||||||||||||||||||||||||||||||||||||||||||
|
|

Dammit Jim, I’m a doctor, not a honeybee!
Find the submaze of side length 4 with matching markings. The submaze on the bomb (and its markings) may be a rotation of the maze as it is shown above.
Refer to the color chart in the top left and navigate the pawn out of the submaze through an exit on the side indicated by the pawn’s color.
Warning: Do not cross the lines shown in the maze. These lines are invisible on the bomb.

Just like management... ignore the problem about to blow up, and care more about the small details like personnel.
The module will show 10 employees, half current employees (green), and half applicants (red). It will also show 5 personality types in a combination of red and green.
First, an employee needs to be terminated, due to repeated complaints. The 3 personality types in red are descriptors used in those complaints. For each descriptor, use the table to find out which MBTI personality type[1] matches that descriptor.
Consider each of the four traits measured by the MBTI types. If the same trait is shared by all three descriptors (e.g., they all have E for the first classification), that trait is REQUIRED. If the trait differs between the 3, the more common trait is PREFERRED.
Of all current employees, terminate the employee having the most REQUIRED traits. If multiple employees have the most REQUIRED traits, of those employees ONLY, terminate the employee with the most PREFERRED traits. If there is still a tie, any such employee may be terminated. Terminate an employee by selecting them, and hitting the Hire/Fire button.
After termination, a new applicant must be hired to keep counts up. The same process used to terminate an employee will be followed to find the applicant (red) to hire — using the 2 personality types in green, in addition to the personality type of the employee terminated, instead of the red ones.
| Person | MBTI Type | Descriptor | Person | MBTI Type | Descriptor |
|---|---|---|---|---|---|
| Rebecca | INTJ | Intellectual | Ashley | ENTJ | Director |
| Damian | INTP | Deviser | Tim | ENTP | Designer |
| Jean | INFJ | Confidant | Eliott | ENFJ | Educator |
| Mike | INFP | Helper | Ursula | ENFP | Advocate |
| River | ISTJ | Auditor | Silas | ESTJ | Manager |
| Samuel | ISTP | Innovator | Noah | ESTP | Showman |
| Yoshi | ISFJ | Defender | Quinn | ESFJ | Contributor |
| Caleb | ISFP | Chameleon | Dylan | ESFP | Entertainer |
[1] https://en.wikipedia.org/wiki/Myers%E2%80%93Briggs_Type_Indicator

Are you the hunter? Or are you the hunted?
| Table A | |
| 1 | 2 |
| 3 | 4 |
| Table B | |
| 4 | 3 |
| 2 | 1 |
The two pictograms on the display on the module's upper left correspond to the row and column of a grid entry in the below table. This grid entry indicates one decoy. Use the appropriate Table as described below to determine the actual decoy pictogram.
In each later stage, an additional pair of row and column pictograms is displayed to indicate another decoy in addition to the earlier grid entries. In the last stage there will be four grid entries to reference in total.
To progress to the next stage, press any button not labeled with a decoy. The module is disarmed after the fourth stage is complete. Pressing a button labeled with a decoy resets the module.
If the current stage's column pictogram appears to the left of the row pictogram, use Table A on the right to determine which position all of the grid entries use this stage to determine the decoy pictograms. Otherwise, use Table B. The numbers in the tables refer to the current stage.
 |
 |
 |
 |
|||||
 |
||||||||
 |
||||||||
 |
||||||||
 |
||||||||

Simon screams for ice cream!
|
|
* Fruit pieces include strawberries, bananas, cherries, and raspberries.
** None of the customers are allergic to vanilla flavouring.
*** Having a fruit allergy implies you are also allergic to strawberries, raspberries, and cherries.
To find out which ingredients the customer is allergic to, use the allergy table.
The rows are the customers, and the columns are the last digit of the serial number.
Allergy Table:
| 0-1 | 2-3 | 4-5 | 6-7 | 8-9 | |
|---|---|---|---|---|---|
| Mike | 1-5-0 | 6-8-3 | 0-7-1 | 4-3-2 | 3-6-1 |
| Tim | 0-8-3 | 2-1-4 | 4-3-5 | 2-6-7 | 1-4-3 |
| Tom | 8-4-5 | 1-6-7 | 2-5-6 | 3-7-5 | 3-6-1 |
| Dave | 2-6-7 | 0-1-4 | 8-2-3 | 7-8-1 | 5-7-3 |
| Adam | 3-4-1 | 3-6-2 | 0-2-1 | 2-4-7 | 8-5-6 |
| Cheryl | 1-6-3 | 7-5-2 | 1-4-5 | 4-2-0 | 3-7-5 |
| Sean | 4-6-1 | 2-3-6 | 1-5-7 | 6-8-2 | 2-7-4 |
| Ashley | 6-2-5 | 4-1-7 | 0-8-2 | 1-2-6 | 3-6-7 |
| Jessica | 4-2-6 | 1-2-3 | 0-3-4 | 6-5-0 | 4-7-8 |
| Taylor | 6-3-5 | 5-1-2 | 4-2-6 | 7-1-0 | 3-7-2 |
| Simon | 0-3-5 | 1-6-4 | 5-4-8 | 2-0-7 | 7-3-6 |
| Sally | 4-6-3 | 1-0-2 | 6-7-4 | 2-5-8 | 0-3-1 |
| Jade | 3-7-1 | 0-8-2 | 7-1-3 | 6-7-8 | 4-5-1 |
| Sam | 2-4-1 | 7-8-0 | 3-4-6 | 1-0-3 | 6-5-2 |
| Gary | 1-2-5 | 6-8-0 | 3-2-1 | 7-4-5 | 1-8-4 |
| Victor | 0-3-1 | 2-5-7 | 3-4-6 | 6-7-1 | 5-3-0 |
| George | 8-1-2 | 6-4-8 | 0-4-3 | 1-6-4 | 3-2-5 |
| Jacob | 7-3-2 | 1-5-6 | 5-4-7 | 3-4-0 | 6-2-1 |
| Pat | 5-6-2 | 1-3-6 | 3-4-7 | 2-0-5 | 8-1-3 |
| Bob | 5-6-8 | 2-1-0 | 4-8-2 | 4-2-5 | 0-5-1 |
To find out which flavours to sell to the customer first, use the following table of flavour lists.
Read the table in normal reading order (left to right, then top to bottom) and choose the first applicable list.
| If there are more lit than unlit indicators: | Otherwise, if there is an empty port plate present on the bomb: |
|---|---|
|
|
| Otherwise, if there are 3 or more batteries: | Otherwise: |
|
|

Time to turn detective; there’s a criminal on the loose.
The module consists of four displays and a convict button.
The guilty suspect is the only person for whom all three character traits will appear.
Correctly identify the guilty suspect and their character traits, set the displays and press the convict button to disarm the module.
| Suspect Name | Hair Colour | Build | Attire |
|---|---|---|---|
| Andy | Brown | Hunched | Suit |
| Ben | Grey | Tall | T-shirt |
| Chrissie | Red | Hunched | Hoodie |
| Dylan | Blonde | Short | Tank top |
| Eddie | Grey | Slim | Suit |
| Fiona | Brown | Tall | Hoodie |
| Gemma | Grey | Short | Blazer |
| Harriet | Black | Fat | T-shirt |
| Ian | White | Tall | Jumper |
| James | Red | Muscular | Tank top |
| Kayleigh | White | Short | Tank top |
| Louise | Blonde | Fat | Suit |
| Megan | Brown | Slim | Blazer |
| Nate | Red | Fat | Jumper |
| Oscar | Black | Slim | Hoodie |
| Penny | Blonde | Muscular | T-shirt |
| Quentin | White | Hunched | Blazer |
| Rhiannon | Black | Muscular | Jumper |

Somebody has welded a smart phone onto a bomb. Nobody tell Apple - it’s probably a crime in certain states.
The module consists of six apps and a home button.
To disarm the module, the iPhone must be factory reset by entering the correct PIN on the settings app. The individual digits of the PIN are acquired by solving the apps.
| App Name | Appearance | PIN Digit Given |
|---|---|---|
| Angry Birds | 1st | |
| Messages | 2nd | |
| Photos | 3rd | |
| Tinder | 4th | |
| Phone | NA | |
| Settings | NA |
The phone can be used to dial a "cheat code" for each of the four solvable apps at the cost of a strike.
The home button to the right of the screen is used to return to the home screen.
Upon obtaining a strike, the Tinder app will reset.
You will be presented with four "character buttons". These buttons will be one of the following images:
| Image Name | Appearance | Image Name | Appearance |
|---|---|---|---|
| Red Angry Bird | Regular Pig | ||
| Yellow Angry Bird | Helmet Pig | ||
| Blue Angry Bird | Moustached Pig | ||
| White Angry Bird | King Pig | ||
| Black Angry Bird | Black Eyed Pig |
To obtain the PIN digit, you must press the correct button in accordance with the below instructions. Pressing the wrong button causes a strike.
Upon pressing the correct button, three stars will appear. The first digit of the PIN will be contained within the centre star.
| Table A, B, C Rules | A | B | C |
|---|---|---|---|
| If there are three or more batteries... | D | G | J |
| Otherwise, if there are three or more indicators... | E | H | K |
| Otherwise... | F | I | L |
| Table D, E, F Rules | D | E | F |
|---|---|---|---|
| If a Yellow Angry Bird is on top of any Pig... | Top Right | Bottom Left | Top Left |
| Otherwise, if a Black Angry Bird is right of a Red Angry Bird... | Top Left | Top Right | Bottom Right |
| Otherwise, if a White Angry Bird is present... | Bottom Left | Bottom Right | Top Right |
| Otherwise... | Bottom Right | Top Left | Bottom Left |
| Table G, H, I Rules | G | H | I |
|---|---|---|---|
| If all buttons are different... | Bottom Left | Bottom Right | Top Right |
| Otherwise, if there is no King Pig... | Top Right | Bottom Left | Top Left |
| Otherwise, if there is a Helmet or Moustached Pig left of any Bird... | Top Left | Top Right | Bottom Right |
| Otherwise... | Bottom Right | Top Left | Bottom Left |
| Table J, K, L Rules | J | K | L |
|---|---|---|---|
| If a Regular Pig and a White or Blue Angry Bird are on the top row... | Top Left | Bottom Left | Top Right |
| Otherwise, if a Black or Red Angry Bird is below any Pig... | Bottom Left | Top Right | Bottom Right |
| Otherwise, if each button is unique... | Bottom Right | Top Left | Bottom Left |
| Otherwise... | Top Right | Bottom Right | Top Left |
You have received four messages, one each from Phil H, Rob N, Mick K and Andy L.
One message contains the true second digit of the PIN. The other three are guesses and most likely false.
Use the below table and the content of the messages to determine which person is telling the truth. The # denotes a PIN digit.
| Phil’s Truths | Rob’s Truths | Mick’s Truths | Andy’s Truths |
|---|---|---|---|
| The 2nd number is #. | # | It’s # | Probably # |
| Not sure. Maybe #? | # is the second number. | #? No...yes, # | # you numpty! |
| # mate. | I think it’s #. | #? | #! |
There are eight photos which can be cycled using the arrow keys. Some may look quite similar but they are all different.
Only one of the below photos will be included on the app. The number of that photo represents the third digit of the PIN.
| PIN Digit | Image | Description | PIN Digit | Image | Description | |
|---|---|---|---|---|---|---|
| 0 |  |
Beach | 5 |  |
Castle | |
| 1 |  |
Christmas Tree | 6 |  |
Spaniel | |
| 2 |  |
Computer | 7 |  |
Football team | |
| 3 |  |
Porsche | 8 |  |
Band | |
| 4 |  |
Composer | 9 |  |
Roast Dinner |
You will see a Tinder profile. Use the below table to calculate the match score. Use the number of strikes on the bomb at the time when the profile appeared.
If the match score is positive, swipe right. If the match score is negative, swipe left. If the match score is zero, swipe right if your match’s name has five or more letters and swipe left if their name has four or fewer letters.
Correctly match three profiles consecutively to unlock the fourth digit of the PIN. A mismatch will incur a strike and reset the current profile, as well as discounting any previous correct matches.
| For 0 strikes: | For 1 strike: | For 2+ strikes: | ||
|---|---|---|---|---|
| A G E |
18–22 | +3 | -2 | -1 |
| 23–28 | +2 | -1 | -1 | |
| 29–35 | +1 | +3 | -2 | |
| 36–41 | -1 | +2 | +3 | |
| 42+ | -2 | -1 | +2 | |
| S T A R S I G N |
Virgo | +2 | +1 | +1 |
| Leo | +2 | +2 | -1 | |
| Scorpio | -2 | -1 | +1 | |
| Capricorn | -2 | -2 | -1 | |
| Cancer | +1 | +2 | +1 | |
| Gemini | -1 | -1 | -1 | |
| H O B B I E S |
Badminton | +1 | +2 | -1 |
| Golf | -1 | +1 | +1 | |
| Cinema | +1 | -1 | -2 | |
| Theatre | -2 | +1 | +2 | |
| Dancing | -3 | -2 | +3 | |
| Clubbing | +2 | -2 | -3 | |
| P E T S |
Cat | +3 | +1 | -1 |
| Dog | +2 | -3 | -2 | |
| Goldfish | -1 | +1 | +2 | |
| Gerbil | -2 | +2 | -2 | |
| Hamster | -2 | -2 | +3 |
You may be assisted in your hunt for the PIN by using the Phone app to cheat. Dial the appropriate number followed by the hash key to execute the cheat code. You may not clear the screen after you have begun, so type carefully.
Each time you press the hash key, you will incur a strike, irrespective of whether the code is correct or not.
The PIN digits will manifest themselves in different ways but in each instance, you will need to return to the relevant app to see it:
| App Name | If the serial number contains a vowel: | If the serial number does not contain a vowel: |
|---|---|---|
| Angry Birds | 52716 | 43892 |
| Messages | 60138 | 15397 |
| Photos | 81606 | 79431 |
| Tinder | 30962 | 21486 |
Once you have acquired all four digits of the PIN, enter them on the Settings app to reset the iPhone’s factory settings and disarm the module.
Much like with the Phone app, you cannot clear the display once you have started typing. Entering an incorrect PIN will cause a strike.

P-A-R-T-Why? Because if you don’t, we’re going to explode.
The module consists of a jukebox with three lyrics and three vinyl buttons.
Use the given lyrics to work out which song has been selected.
Enter the song lyrics in the order they appear in the song.
Certain words may appear in multiple songs, but all three will only appear in any one song.
If a word appears more than once in a song, use the first instance of its usage.
| Song Title | Artist | Lyrics |
|---|---|---|
| A Little Less Conversation | Elvis vs. JXL | A little less conversation, a little more action please. All this aggravation and satisfaction in me. |
| Africa | Toto | I hear the drums echoing tonight; she hears only whispers of some quiet conversation. |
| All the Small Things | Blink 182 | All the small things, true care, truth brings. I’ll take one lift, your ride, best trip. |
| Do You Hear the People Sing? | (from) Les Misérables | Do you hear the people sing, singing the song of angry men? It is the music of a people who will not be slaves again. |
| Free Bird | Lynyrd Skynyrd | If I leave here tomorrow will you still remember me? ’Cause I must be travelling on now ’cause there’s too many places I’ve got to see. |
| Friday I’m in Love | The Cure | I don’t care if Monday’s blue. Tuesday’s grey and Wednesday too. Thursday, I don’t care about you. It’s Friday, I’m in love. |
| Goodbye Mr. A | The Hosiers | There’s a hole in your logic, you who know all the answers. You claim science ain’t magic and expect me to buy it. |
| Heal the World | Michael Jackson | There’s a place in your heart and I know that it is love. And this place could be much brighter than tomorrow. |
| Hello | Adele | Hello, it’s me. I was wondering if after all these years you’d like to meet? |
| How to Save a Life | The Fray | Step one, you say we need to talk. He walks. You say, ’sit down, it’s just a talk’. |
| Make Your Own Kind of Music | Mama Cass Elliot | Nobody can tell ya there’s only one song worth singing. |
| Oh My God | Kaiser Chiefs | Time on your side, it’ll never end. The most beautiful thing you can ever spend, but you work in a shirt with your nametag on it. |
| Perfect | Ed Sheeran | I found a love for me. Darling just dive right in and follow my lead. |
| Pure Shores | All Saints | I’ve crossed the deserts for miles, swam water for time, searching places to find a piece of something to call mine. |
| Save Rock’n’Roll | Fall Out Boy (ft. Elton John) | I need more dreams and less life. I need that dark in a little more light. |
| Say Something | A Great Big World | Say something, I’m giving up on you. I’ll be the one, if you want me to. |
| Skin | Rag’n’Bone Man | When I heard that sound, when the walls came down I was thinking about you. |
| Take a Chance on Me | ABBA | If you change your mind, I’m the first in line. Honey I’m still free; take a chance on me. |
| Take Me to Church | Hozier | My lover’s got humour, she’s the giggle at a funeral. Knows everybody’s disapproval; I should have worshipped her sooner. |
| Take on Me | a-Ha | We’re talking away, I don’t know what I’m to say. I’ll say it anyway. Today’s another day to find you shying away. |
| The Flood | Take That | Standing on the edge of forever at the start of whatever shouting love at the world. |
| Up Where We Belong | Joe Cocker & Jennifer Warnes | Who knows what tomorrow brings in a world few hearts survive. |
| Who Wants to Live Forever? | Queen | There’s no time for us. There’s no place for us. What is this thing that builds our dreams, yet slips away from us? |
| Y.M.C.A | The Village People | Young man, there’s no need to feel down. I said young man, get yourself off the ground. I said young man, ’cause you’re in a new town. |
| You Don’t Know Me | Michael Bublé | You give your hand to me and then you say hello. And I can hardly speak, my heart is beating so. |
I'm not sure what these symbols are, but I suspect they have something to do with occult.
 |
 |
 |
 |
 |
|
|||||
 |
|
 |
 |
 |
|
|||||
 |
 |
 |
 |
|
 |
|||||
 |
|
 |
 |
 |
 |
|||||
|
 |
 |
|
|
|
|||||
 |
|
|
 |
 |
 |
|||||
|
|
|
|
 |
 |

I think someone tried to make this module look really cool, but failed.
 |
 |
 |
 |
 |
 |
 |
 |
|
|
 |
 |
|
 |
 |
 |
|
 |
 |
|
|
 |
 |
 |
|
|
|
 |
 |
|
|
 |
|
 |
 |
|
|
 |
 |
|
 |
 |

Sorting and folding are the least of your worries.
All the messes from the previous explosions must be cleaned up. Using the Laundry Symbol Reference L4UHDR9 and the rules below, determine the correct setting on the machine panel. Once satisfied, insert a coin. On error, a sock will be lost, and a strike gained.
Determine the piece of clothing that has to be cleaned with the tables below. For all values higher than 5, subtract 6 from the total until the new number is less than 6. For all negative values, add 6 until you have a value between 0–5.
Use washing instructions based on the material, drying instructions based on the color, and use ironing and special instructions based on the item. But, prioritize the following rules from top to bottom:
Input the solution through putting The Washing Symbol top-left, The Drying top-right, Ironing on the top display and Special on the bottom display.
| CLOTHING ITEM | WASHING | DRYING | IRONING | SPECIAL | |
|---|---|---|---|---|---|
| 0 | Corset | 140°F | Dry Flat | 2 dots | |
| 1 | Shirt | 105°F | No steam | No Tetrachlorethylene | |
| 2 | Skirt | 30°C | Hang To Dry | Reduced Moisture | |
| 3 | Skort | Tumble Dry | 3 Dots | Circle Top Left | |
| 4 | Shorts | Do Not Wring | Shade | 150°C | |
| 5 | Scarf | 95°C | Dry | Do not Dry Clean |
| CLOTHING MATERIAL | WASHING | DRYING | IRONING | SPECIAL | |
|---|---|---|---|---|---|
| 0 | Polyester | 50°C | No Heat | 2 dots | |
| 1 | Cotton | Medium Heat | Iron | Do Not Dry Clean | |
| 2 | Wool | Handwash | 390°F | Reduced Moisture | |
| 3 | Nylon | 30°C | Drip Dry | Low Heat | |
| 4 | Corduroy | 105°F | 110°C | W | |
| 5 | Leather | Do Not Wash | Do Not Dry | Do Not Iron |
| CLOTHING COLOR | WASHING | DRYING | IRONING | SPECIAL | |
|---|---|---|---|---|---|
| 0 | Ruby Fountain | 140°F | Do Not Iron | ||
| 1 | Star Lemon Quartz | Dry Flat | Iron | ||
| 2 | Sapphire Springs | 80°F | Tumble Dry | ||
| 3 | Jade Cluster | 30°C | 300°F | ||
| 4 | Clouded Pearl | Low Heat | No steam | ||
| 5 | Malinite | 60°C | Medium Heat |
 machine wash permanent press |
 machine wash gentle or delicate |
 hand wash |
 do not wash |
 30°C or 80°F |
 40°C or 105°F |
 50°C or 120°F |
 60°C or 140°F |
 70°C or 160°F |
 95°C or 200°F |
 30°C or 80°F |
 40°C or 105°F |
 50°C or 120°F |
 60°C or 140°F |
 70°C or 160°F |
 95°C or 200°F |
 do not wring |
 tumble dry |
 low heat |
 medium heat |
 high heat |
 no heat |
 hang to dry |
 drip dry |
 dry flat |
 dry in the shade |
 do not dry |
 do not tumble dry |
 dry |
 iron |
 do not iron |
 110°C 230°F |
 150°C 300°F |
 200°C 390°F |
 no steam |
 bleach |
 do not bleach |
 non-chlorine bleach |
 dryclean |
 any solvent |
 any solvent except tetrachlorethylene |
 petroleum solvent only |
 wet cleaning |
 do not dryclean |
 short cycle |
 reduced moisture |
 low heat |
 no steam finishing |

Ooooh, shiny lights and buttons. Touchy touchy!
| Red | Green | Blue | Yellow | Purple | Orange |
| 2 | 3 | 4 | 5 | 6 | 7 |

Maybe they were Christmas lights in a previous life?
|
For 0 unlit LEDs: If there are no orange LEDs, press C, D, A, B. Otherwise, if there are three or more red LEDs, press D, A, C, B. Otherwise, if there are two or more pairs, press B, A, C, D. Otherwise, if the bottom row is all the same colour, press A, C, D, B. Otherwise, press B, C, D, A. |
|
For 1 unlit LED: If every LED is unique, press D, C, B, A. Otherwise, if the top row is all the same colour, press A, D, B, C. Otherwise, if there are exactly three red, three pink or three purple LEDs, press C, B, A, D. Otherwise, if there is exactly one white, two blue or three yellow LEDs, press B, A, D, C. Otherwise, press D, B, A, C. |
|
For 2 unlit LEDs: If there are three or more purple LEDs, press A, D, C, B. Otherwise, if there are exactly two pairs, press B, C, A, D. Otherwise, if there is at least one white, one orange and one pink LED, press D, B, C, A. Otherwise, if there is exactly one green, two yellow, three red or four blue LEDs, press C, A, D, B. Otherwise, press C, D, B, A. |
|
For 3 unlit LEDs: If there are exactly two orange LEDs, press B, D, A, C. Otherwise, if there is more than one pair, press C, A, B, D. Otherwise, if there are no purple LEDs, press D, C, A, B. Otherwise, there is at least one red and one yellow LED, press A, C, B, D. Otherwise, press B, D, C, A. |
|
For 4 unlit LEDs: If the centre row is all the same colour, press B, C, D, A. Otherwise, if there are two or more green LEDs, press A, B, D, C. Otherwise, if there are exactly two pairs, press C, B, D, A. Otherwise, if there are no pink LEDs, press D, A, B, C. Otherwise, press A, B, C, D. |

I haven’t thought of anything yet...
See Appendix A for indicator identification reference.
See Appendix B for battery identification reference.

The name “blinkenlights” was taken.
There are six colored LEDs in a row which continuously flash in sequence from left to right. To disarm this module, determine a sequence of colors, then input that sequence by pressing the button when each color is lit. (For example, to enter the color red, press the button when the red LED is lit.)
Determine the correct sequence of colors as follows:
| A, B, C | D, E, F | G, H, I | J, K, L | M, N, O | P, Q, R | S, T, U | V, W, X | Y, Z, 0 | 1, 2, 3 | 4, 5, 6 | 7, 8, 9 | |
|---|---|---|---|---|---|---|---|---|---|---|---|---|
| A | 5/B | B/R | M/G | Y/5 | 4/1 | R/W | 6/4 | 1/6 | 2/3 | 3/M | G/Y | W/2 |
| B | 2/R | 6/M | 4/3 | 5/B | R/5 | Y/2 | 1/G | M/Y | W/6 | 3/4 | B/W | G/1 |
| C | M/Y | 2/4 | Y/R | 3/5 | W/2 | G/B | 1/W | R/3 | 5/G | 4/6 | B/M | 6/1 |
| D | 5/6 | 6/3 | 1/4 | M/2 | R/Y | 2/M | W/R | B/G | Y/W | 3/B | G/1 | 4/5 |
| E | B/R | W/2 | 2/3 | 1/4 | M/B | 5/6 | Y/W | R/M | G/Y | 6/G | 3/5 | 4/1 |
| F | R/Y | 2/G | 1/M | Y/5 | 5/R | W/B | 6/3 | B/1 | M/4 | G/6 | 3/2 | 4/W |
| G | Y/1 | 5/4 | 2/W | R/Y | 1/R | B/3 | 6/G | G/6 | M/B | W/5 | 4/2 | 3/M |
| H | 3/5 | W/Y | G/2 | 2/B | 5/G | M/R | B/3 | 1/4 | 4/6 | Y/M | 6/W | R/1 |
| I | R/M | 4/5 | 5/W | B/1 | M/6 | 3/2 | W/B | G/Y | Y/R | 1/4 | 6/G | 2/3 |
| J | W/B | R/6 | 5/Y | 4/1 | 2/5 | Y/3 | M/W | 3/2 | B/G | G/M | 1/R | 6/4 |
| K | 6/4 | B/2 | W/G | R/5 | G/1 | 2/Y | Y/R | M/B | 1/6 | 3/W | 5/3 | 4/M |
| L | 6/4 | B/5 | W/6 | 1/G | R/2 | 4/R | G/W | 3/M | 2/B | Y/3 | 5/Y | M/1 |
| M | W/3 | 3/G | 2/4 | Y/M | M/2 | R/5 | 6/R | B/6 | G/Y | 5/B | 1/W | 4/1 |
| N | 1/Y | 6/M | 2/1 | G/R | 3/G | 5/B | R/4 | 4/3 | W/2 | Y/W | B/5 | M/6 |
| O | R/5 | 3/G | 2/3 | W/4 | B/2 | 1/M | 5/6 | M/1 | 4/Y | G/B | 6/R | Y/W |
| P | 1/4 | 4/B | 6/2 | 3/W | M/R | Y/6 | B/Y | 2/G | 5/M | G/5 | R/3 | W/1 |
| Q | 5/G | M/B | 4/W | Y/2 | R/M | W/4 | 6/1 | 3/6 | B/Y | 1/5 | G/R | 2/3 |
| R | M/G | 5/6 | G/M | W/5 | Y/2 | R/4 | B/1 | 1/B | 2/R | 4/3 | 6/W | 3/Y |
| S | R/Y | 6/5 | 5/G | G/B | W/M | 4/3 | 1/W | B/1 | 3/6 | 2/4 | Y/2 | M/R |
| T | G/3 | B/2 | 6/W | M/B | 1/5 | Y/4 | 5/M | W/R | 4/6 | 3/Y | 2/G | R/1 |
| U | 5/1 | W/3 | 4/5 | 3/4 | Y/W | 1/Y | B/G | 6/2 | M/6 | G/R | 2/M | R/B |
| V | M/6 | 6/B | 1/G | 3/5 | W/R | B/4 | G/M | R/1 | 2/W | 5/2 | 4/Y | Y/3 |
| W | Y/M | B/1 | 5/3 | 2/G | 3/2 | R/5 | 1/4 | W/6 | 4/W | G/R | M/Y | 6/B |
| X | 4/2 | R/B | W/5 | Y/M | 2/Y | 5/1 | B/R | G/3 | M/G | 3/6 | 6/W | 1/4 |
| Y | G/Y | 1/R | 5/4 | 4/G | 3/B | M/6 | 2/5 | Y/2 | R/1 | W/3 | B/W | 6/M |
| Z | G/B | B/G | 1/5 | M/1 | 3/M | R/3 | Y/W | 6/Y | 5/2 | 4/6 | W/R | 2/4 |
| 0 | 2/R | R/B | 5/G | W/2 | Y/1 | 4/Y | 3/5 | 1/M | B/W | G/6 | 6/4 | M/3 |
| 1 | R/4 | W/6 | 3/2 | 2/W | 4/Y | 6/5 | B/R | 5/G | Y/B | G/M | M/1 | 1/3 |
| 2 | 4/B | B/3 | 6/4 | W/1 | M/Y | R/6 | G/5 | Y/W | 5/2 | 2/R | 3/G | 1/M |
| 3 | B/6 | M/3 | 4/B | 1/4 | 2/5 | Y/1 | G/Y | R/W | W/G | 5/2 | 6/M | 3/R |
| 4 | M/R | 2/B | W/5 | 6/Y | B/3 | 4/2 | G/1 | Y/6 | 5/G | 3/M | R/W | 1/4 |
| 5 | Y/1 | 5/6 | 1/W | W/4 | B/G | G/5 | 4/M | 2/B | 3/R | 6/3 | M/2 | R/Y |
| 6 | 3/4 | W/B | Y/G | 5/M | R/1 | G/W | 1/2 | 6/Y | B/R | M/6 | 4/3 | 2/5 |
| 7 | 4/G | 6/5 | Y/4 | G/B | 3/1 | M/Y | 5/3 | 1/M | 2/R | R/2 | B/W | W/6 |
| 8 | Y/B | R/2 | W/R | 5/3 | 1/W | 3/5 | B/M | G/4 | 6/Y | 4/G | 2/1 | M/6 |
| 9 | G/Y | 3/1 | 5/M | R/2 | 6/W | M/B | Y/6 | 2/4 | 4/G | B/5 | 1/R | W/3 |
| A, B, C | D, E, F | G, H, I | J, K, L | M, N, O | P, Q, R | S, T, U | V, W, X | Y, Z, 0 | 1, 2, 3 | 4, 5, 6 | 7, 8, 9 |

“Why did we send a deaf person to defuse a bomb?” — Person who is no longer alive.
Press the play button to play a sound clip through the speaker. Each sound clip has a corresponding code that contains any of the four symbols $ * & #. Match the sound clip to the table below and enter the code via the four button keypad.
| Taxi Dispatch | &&&** | Dial-up Internet | *#&*& |
| Cow | &$#$& | Police Radio Scanner | **### |
| Extractor Fan | $#$*& | Censorship Bleep | &&$&* |
| Train Station | #$$** | Medieval Weapons | &$**& |
| Arcade | $#$#* | Door Closing | #$#&$ |
| Casino | **$*# | Chainsaw | &#&&# |
| Supermarket | #$$&* | Compressed Air | $$*$* |
| Soccer Match | ##*$* | Servo Motor | $&#$$ |
| Tawny Owl | $#*$& | Waterfall | &**$$ |
| Sewing Machine | #&&*# | Tearing Fabric | $&&*& |
| Thrush Nightingale | **#** | Zipper | &$&## |
| Car Engine | &#**& | Vacuum Cleaner | #&$*& |
| Reloading Glock 19 | $&**# | Ballpoint Pen Writing | $*$** |
| Oboe | &#$$# | Rattling Iron Chain | *#$&& |
| Saxophone | $&&** | Book Page Turning | ###&$ |
| Tuba | #&$## | Table Tennis | *$$&$ |
| Marimba | &*$*$ | Squeaky Toy | $*&## |
| Phone Ringing | &$$&* | Helicopter | #&$&& |
| Tibetan Nuns | #&&&& | Firework Exploding | $&$$* |
| Throat Singing | **$$$ | Glass Shattering | *$*$* |
| Beach | *&*&& |
Note: pressing play also clears whatever code you have entered.

Logic is easy, but logic AND bomb defusal might not.
See Appendix A for indicator identification reference.
See Appendix B for battery identification reference.
See Appendix C for port identification reference.
| Letter | Statement | Letter | Statement |
|---|---|---|---|
| A | Number of batteries = number of indicators | N | More than 2 battery holders |
| B | Serial number has more letters than digits | O | Has both lit and unlit indicators |
| C | Has IND indicator | P | Has parallel port |
| D | Has FRK indicator | Q | Exactly 2 ports |
| E | Exactly 1 unlit indicator | R | Has PS/2 port |
| F | More than 1 port type | S | Sum of digits in serial number > 10 |
| G | 2 batteries or more | T | Has MSA indicator |
| H | Less than 2 batteries | U | Exactly 1 battery holder |
| I | Last digit of serial number is odd | V | Serial number contains vowels |
| J | More than 4 batteries | W | No indicators |
| K | Exactly 1 lit indicator | X | Exactly 1 indicator |
| L | More than 2 indicators | Y | More than 5 ports |
| M | No duplicate ports | Z | Less than 2 ports |
| Logical Connective | Symbol | Logic Gate Equivalent | Meaning |
|---|---|---|---|
| Conjunction | ∧ | AND | Returns true if all inputs are true. Else returns false. |
| Disjunction | ∨ | OR | Returns true if any input is true. Else returns false. |
| Exclusive Disjunction | ⊻ | XOR | Returns true if exactly one input is true. Else returns false. |
| Alternative Denial | | | NAND | Returns false if all inputs are true. Else returns true. |
| Joint Denial | ↓ | NOR | Returns false if any input is true. Else returns true. |
| Biconditional | ↔ | XNOR | Returns false if exactly one input is true. Else returns true. |
| Implication (Left) | → | - | Returns false when left input is true and right input is false. Else returns true. |
| Implication (Right) | ← | - | Returns false when left input is false and right input is true. Else returns true. |

Godfather is him, Mafia is her, kill them, save them. I’m innocent! ….AHHHHH!
In this module, there are 8 named people that sit around a gallows. It’s your job to deduce who is the Godfather, whom you then have to execute. To figure out who is the Godfather, follow the following instructions:
*FRP = First Ruled-out Person
*LRP = Last Ruled-out Person
*SSN = Same Side Neighbor (Person who is on the same side of the module with them: top 2, bottom 2, left 2, right 2)
| # | Name | Innocent/Godfather Condition | Otherwise, Godfather is... |
|---|---|---|---|
| 1 | Rob | Innocent if the serial number contains a vowel. | Person clockwise after Rob. |
| 2 | Tim | Innocent if there is a “Friendship”, “Only Connect”, “Battleship” or “Marble Tumble”. | FRP |
| 3 | Mary | Innocent if Bob, Walter or Cher is present. | Person on the left in the top pair, SSN if it is Mary. |
| 4 | Briane | Innocent if there is a Two Factor or lit CAR indicator. | LRP |
| 5 | Hunter | Innocent if there are more ports than batteries. | Rick, or 4th ruled-out player if Rick is absent. |
| 6 | Macy | Innocent if Tommy is present. | Tommy |
| 7 | John | Innocent if John is the only person on the module whose name starts with “J”. | SSN |
| 8 | Will | Innocent if there is a PS/2 or DVI port and at least one even number in the serial number. | 5th person ruled out. |
| 9 | Lacy | Innocent if there is a “Boolean Venn Diagram”, “Bitwise Operations”, or any module containing “Logic” in its name. | SSN |
| 10 | Claire | Innocent if there are less than 20 modules. | LRP |
| 11 | Kenny | Innocent if there are no unlit indicators. | Person clockwise after FRP (skip Kenny) |
| 12 | Rick | Innocent if there is an empty port plate. | Person counterclockwise from Rick. |
| 13 | Walter | Innocent if serial number contains any letters from Walter’s name. | FRP |
| 14 | Bonnie | Innocent if there is another person on the module whose name starts with “B”. | First person clockwise from Bonnie whose name starts with “B”. |
| 15 | Luke | Always Innocent. | Person with lowest number (excluding Luke). |
| 16 | Bill | Innocent if last number of serial number is prime or zero. | Person with highest number (excluding Bill). |
| N# | Name | Innocent/Godfather Condition | Otherwise, Godfather is... |
|---|---|---|---|
| 17 | Sarah | Innocent if there is a colored indicator, HDMI port, or if “S”, “H”, or “3” is in the serial number. | LRP |
| 18 | Larry | Larry is colorblind. Innocent if there are no modules containing “Color” in their name. | FRP |
| 19 | Kate | Innocent if there is an “L”, “O”, “S”, or “T” in the serial number, or if “The Swan” is present. | John; SSN if John is absent |
| 20 | Stacy | Innocent if there are fewer modules than starting time in minutes. | FRP |
| 21 | Diane | Innocent if there is a VGA or USB port, or if there is “The Screw”. | LRP |
| 22 | Mac | Innocent if there is a parallel port on the same plate as a serial port. | 6th person ruled out |
| 23 | Jim | Jim is a musician. Innocent if there is a “Chord Qualities”, “Rhythms”, or any module with “Piano Keys”, “Jukebox” or “Guitar Chords” in the name. | SSN |
| 24 | Clyde | Innocent if Bonnie is present. | Bonnie |
| 25 | Tommy | Innocent if there are neither batteries nor ports. | 4th person ruled out |
| 26 | Lenny | Innocent if SSN’s name does not contain exactly 3 letters. | SSN |
| 27 | Molly | Innocent if there is no module apart from Mafia whose name starts with “M” or “The M”. | Person clockwise after Molly. |
| 28 | Benny | Innocent if Hunter, Cher, or Nick are not the FRP. | The third person after Benny in clockwise order. |
| 29 | Phil | Innocent if not on the right of the bottom two. | Person on the right of the bottom two. |
| 30 | Bob | Innocent if there is “Laundry”, “Morse-A-Maze”, “Big Circle”, “Painting”, “Dr. Doctor”, “The Code”, or a BOB indicator. Thanks for everything, Bob! |
3rd person ruled out. |
| 31 | Gary | Gary is lazy and likes to eat. Innocent if there is a “Cheap Checkout”, “Ice Cream” or “Cooking”. | LRP |
| 32 | Ted | Ted is an astronaut. Innocent if there is a “Black Hole”, “The Sun”, “The Moon”, “Lightspeed” or “Astrology”. | SSN |
| 33 | Kim | Innocent if FRP’s number is 25 or less. | FRP |
| N# | Name | Innocent/Godfather Condition | Otherwise, Godfather is... |
|---|---|---|---|
| 34 | Nate | Innocent if there are more lit indicators than unlit. | Person clockwise after Nate. |
| 35 | Cher | Innocent if there is no needy module and 1 or more ports. | LRP |
| 36 | Ron | Innocent if letters of the serial number share letters with any indicator on the bomb. | SSN |
| 37 | Thomas | Thomas doesn’t like being stuck in mazes. Innocent if there is no module with “maze” in the name. | Second person counterclockwise after Thomas. |
| 38 | Sam | Innocent if there is “Creation”, “The Gamepad”, “Minesweeper” or “Skewed Slots”. | LRP |
| 39 | Duke | Innocent if LRP’s number is greater than 25. | LRP |
| 40 | Jack | Innocent if SSN has 4 letters in their name. | SSN |
| 41 | Ed | Innocent if the total number of “Gridlock”, “Human Resources”, “Lasers” and modules containing “Double-Oh” is exactly one. | 2nd person ruled out. |
| 42 | Ronny | Innocent if there are no vanilla modules or there are 4 or more ports. | FRP |
| 43 | Terry | Innocent if there are 3 or more batteries on the bomb. | 3rd person ruled out. |
| 44 | Claira | Innocent if there are at least two port plates that have at least an RJ, RCA, or PS/2 port on them. | SSN |
| 45 | Nick | Innocent if there is no “Zoo”, “Nonogram”, “Murder” or “X01”. | FRP |
| 46 | Cob | Cob loves inception. Innocent if there are 2 or more of the same module. | First person clockwise from Cob with the most letters in their name. |
| 47 | Ash | Innocent if there are any modules pertaining to Monsplodes. | LRP |
| 48 | Don | Always guilty. | N/A |
| 49 | Jerry | Innocent if “The Clock”, “Rubik’s Clock”, “The Stopwatch”, “Timezone” or “The Time Keeper” is present. | Person counterclockwise after Jerry. |
| 50 | Simon | Simon likes to be alone. Innocent if there are no modules with Simon’s name. | SSN |

How to repair your car. Step 1: Call a mechanic. There is no step 2…
The module consists of a number plate, a job scroller, a fix button and a memo with the number of jobs that require completion: 2, 3 or 4.
Use the number plate tables to calculate information about the car.
Use the Venn diagram and Ordering Rules to determine the number of jobs that require maintenance and the order in which they should be completed.
The number plate is broken down into three parts.
The first two letters tell you the model of the car.
| Plate Ref | Model | Multiplier | Plate Ref | Model | Multiplier |
|---|---|---|---|---|---|
| HN | Honda | 2 | AD | Audi | 7 |
| RN | Renault | 3 | BN | Mercedes-Benz | 8 |
| FD | Ford | 4 | PC | Porsche | 9 |
| MA | Mazda | 5 | FR | Ferrari | 10 |
| BM | BMW | 6 | - | - | - |
The two numbers tell you when the car was manufactured. New UK number plates are released in March and September. To find the car’s value, multiply the base value of the year by the model multiplier.
| Plate Ref | Manufactured | Base Value | Plate Ref | Manufactured | Base Value |
|---|---|---|---|---|---|
| 51 | Sept 2001 | £50 | 55 | Sept 2005 | £90 |
| 02 | Mar 2002 | £60 | 06 | Mar 2006 | £100 |
| 52 | Sept 2002 | £60 | 56 | Sept 2006 | £100 |
| 03 | Mar 2003 | £70 | 07 | Mar 2007 | £125 |
| 53 | Sept 2003 | £70 | 57 | Sept 2007 | £125 |
| 04 | Mar 2004 | £80 | 08 | Mar 2008 | £150 |
| 54 | Sept 2004 | £80 | 58 | Sept 2008 | £150 |
| 05 | Mar 2005 | £90 | 09 | Mar 2009 | £175 |
| Plate Ref | Manufactured | Base Value | Plate Ref | Manufactured | Base Value |
|---|---|---|---|---|---|
| 59 | Sept 2009 | £175 | 15 | Mar 2015 | £600 |
| 10 | Mar 2010 | £200 | 65 | Sept 2015 | £600 |
| 60 | Sept 2010 | £200 | 16 | Mar 2016 | £700 |
| 11 | Mar 2011 | £250 | 66 | Sept 2016 | £700 |
| 61 | Sept 2011 | £250 | 17 | Mar 2017 | £800 |
| 12 | Mar 2012 | £300 | 67 | Sept 2017 | £800 |
| 62 | Sept 2012 | £300 | 18 | Mar 2018 | £900 |
| 13 | Mar 2013 | £400 | 68 | Sept 2018 | £900 |
| 63 | Sept 2013 | £400 | 19 | Mar 2019 | £1,000 |
| 14 | Mar 2014 | £500 | 69 | Sept 2019 | £1,000 |
| 64 | Sept 2014 | £500 | - | - | - |
The final three letters of the number plate are random. The final letter will tell you the insurance company.
N.B. the letters I, O, Q & Z are never used in UK number plates.
| Last Letter | Insurance Company | Last Letter | Insurance Company |
|---|---|---|---|
| A, B, C | Admiral | N, P, R | Aviva |
| D, E, F | Swift | S, T, U | RAC |
| G, H, J | Axa | V, W | AA |
| K, L, M | Swinton | X, Y | Hastings Direct |
Below, you will find a list of jobs you may encounter and their rates. Jobs designated with an [H] are considered "heavy" jobs.
| Job # | Job | Price | Job # | Job | Price |
|---|---|---|---|---|---|
| 1 | Wash | £3 | 7 | One tyre | £80 |
| 2 | Headlight bulb | £6 | 8 | Windscreen replacement [H] | £150 |
| 3 | Wiper replacement | £10 | 9 | Two tyres | £160 |
| 4 | Oil change | £15 | 10 | Four tyres | £320 |
| 5 | Brake fluid change | £25 | 11 | Exhaust welding [H] | £500 |
| 6 | Windscreen chip | £40 | 12 | Head gasket replacement [H] | £750 |
Occasionally, a car may be deemed to be a write-off. If this is the case, irrespective of how many or which jobs are required, select the "Write-off" option in the job scroller.
A car is considered a write-off if either of the following conditions are met:
Insurance companies may cover different elements of the maintenance. The maintenance must still be undertaken even if its cost is covered.
| Job | Covered by: | Job | Covered by |
|---|---|---|---|
| Oil change | Hastings Direct, Swift & AA | Windscreen chip | Axa, RAC, Swinton & AA |
| One tyre | Swift & Aviva | Windscreen replacement | RAC |
| Two tyres | Aviva | Brake fluid change | AA & Admiral |
Use the Venn diagram and table to determine which jobs need to be done. Take the first 2, 3 or 4 jobs from the list in the table as required.
| Letter | Job Order | Letter | Job Order |
|---|---|---|---|
| A | 5 – 1 – 9 – 11 | I | 1 – 7 – 6 – 11 |
| B | 2 – 12 – 8 – 10 | J | 7 – 11 – 1 – 2 |
| C | 3 – 2 – 1 – 6 | K | 1 – 10 – 11 – 12 |
| D | 4 – 10 – 6 – 1 | L | 7 – 3 – 5 – 8 |
| E | 6 – 4 – 10 – 2 | M | 2 – 9 – 11 – 3 |
| F | 8 – 4 – 5 – 12 | N | 1 – 2 – 3 – 4 |
| G | 1 – 7 – 3 – 6 | O | 11 – 9 – 2 – 5 |
| H | 12 – 5 – 3 – 8 | P | 8 – 7 – 5 – 3 |
All jobs should be done from cheapest to dearest with the following exceptions:

Let’s see here, 96 + 3 = 99. Oh god.
This module will show a math problem. Solve the math problem and press the "Push!" button that many times.[1][2] If the number of presses exceeds 99, you will get a strike and the number of presses will go to zero. If you submit a wrong answer you will get a strike and the number of presses will go back to 0.
[1] If the number is bigger than 99, subtract 50 until it’s a number between 0 and 99.
[2] If the number is less than 0, add 50 until it’s a number between 0 and 99.

The game from your childhood. Only advanced. And harder to memorize. And the feedback isn’t what it used to be...
Each query will generate two numbers on the display. These numbers each represent the total sum of two of the values listed in the table below.
A = Number of correct colors in the correct positions.
B = Number of correct colors in the wrong positions.
C = Number of colors not in the solution at all.
| Color on the display: | Left number | Right number | |
|---|---|---|---|
| White | Left color: | A | B |
| Right color: | # of batteries | # of solved modules | |
| Magenta | Left color: | C | A |
| Right color: | # of lit indicators | Last digit of the serial number | |
| Yellow | Left color: | B | C |
| Right color: | Sum of all numbers in the serial number | # of ports | |
| Green | Left color: | B | A |
| Right color: | # of modules on the bomb | # of unlit indicators | |
| Red | Left color: | C | B |
| Right color: | # of distinct port types | # of strikes | |
| Blue | Left color: | A | C |
| Right color: | First numeral digit in the serial number | # of battery holders |
The classic code-breaking game, with a twist. Can you remember everything?
This seems to be some kind of maze, probably stolen off of a restaurant placemat.


I’d wash your hands after this one...
Red Input
| Yellow Input
|
Green Input
| Blue Input
|
Red Output
| Yellow Output
|
Green Output
| Blue Output
|
Memory is a fragile thing but so is everything else when a bomb goes off, so pay attention!
If the display is 1, press the button in the second position.
If the display is 2, press the button in the second position.
If the display is 3, press the button in the third position.
If the display is 4, press the button in the fourth position.
If the display is 1, press the button labeled "4".
If the display is 2, press the button in the same position as you pressed in stage 1.
If the display is 3, press the button in the first position.
If the display is 4, press the button in the same position as you pressed in stage 1.
If the display is 1, press the button with the same label you pressed in stage 2.
If the display is 2, press the button with the same label you pressed in stage 1.
If the display is 3, press the button in the third position.
If the display is 4, press the button labeled "4".
If the display is 1, press the button in the same position as you pressed in stage 1.
If the display is 2, press the button in the first position.
If the display is 3, press the button in the same position as you pressed in stage 2.
If the display is 4, press the button in the same position as you pressed in stage 2.
If the display is 1, press the button with the same label you pressed in stage 1.
If the display is 2, press the button with the same label you pressed in stage 2.
If the display is 3, press the button with the same label you pressed in stage 4.
If the display is 4, press the button with the same label you pressed in stage 3.
This one likes attention, but not too much attention.
First number:
|
Second number:
|
All other numbers:
|

It’s called “micro”-controller, yet this thing in there is pretty big. Probably because it can cause a pretty big explosion...
Strike (STRK) Controller:


Diode (LEDS) Controller:


Countdown (CNTD) Controller:


Explosion (EXPL) Controller:


| Input Voltage (VCC) | Analog Input (AIN) | Digital Input (DIN) | Pulse Width Modulation (PWM) | Reset (RST) | |
|---|---|---|---|---|---|
| If the last digit of the controller's serial number is 1 or 4 | Yellow | Magenta | Green | Blue | Red |
| Otherwise, if there is a lit indicator "SIG" or a RJ-45 port | Yellow | Red | Magenta | Green | Blue |
| Otherwise, if the bomb's serial number contains C, L, R, X, 1 or 8 | Red | Magenta | Green | Blue | Yellow |
| Otherwise, if the second numerical digit of the controller's serial number matches the number of batteries on the bomb | Red | Blue | Yellow | Green | Magenta |
| Otherwise | Green | Red | Yellow | Blue | Magenta |
Note: Ground (GND) is always coded with white.

Somehow Minesweeper on a bomb feels oddly redundant.
| Color | # | |
|---|---|---|
| Red | 5 | |
| Orange | 2 | |
| Yellow | 3 | |
| Green | 1 | |
| Blue | 6 | |
| Purple | 4 | |
The first cell to dig will be one of the colored squares. Start with the second digit in the serial number. If it is zero, substitute 10. Count that many colored squares in reading order, wrapping around to the top left of the grid if necessary.
Use the color found to look up a value in the table. Add this number to the numeric value of the first letter in the serial number, with A = 1, B = 2, etc. Starting from the bottom right corner, count that many colored squares in reverse reading order, looping back if necessary. This gives you the first location to dig.
NOTE: You cannot dig other cells until you have dug the correct starting cell and digging an incorrect starting cell will give you a strike, regardless of whether it’s a mine or not.
Each number on the grid represents how many mines there are in the surrounding 8 cells. Use these numbers to figure out where each mine is. Once you have achieved either all non-mine cells dug or all mine filled cells flagged, the module will solve. Digging up a cell with a mine under it will expose the mine and a strike will be given.
NOTE: Clicking on a number while digging will dig all cells around it that aren’t flagged. Holding down on a cell will flag it instead of digging it.

The Roman warlord Caesar had his own personal way to encrypt his data. We could think about him as the father of the modern cryptography. But you are a qualified soldier so you won’t have problems in decoding our message, don’t you?
You are given an encrypted word. Decrypt it, write it in the second box and press OK to solve the module.
To decrypt the word start by finding the key.
Add every digit on the serial and then, referring to “Letter-Number Relation” below, follow the cases to find your word.
Keep in mind that if you have strikes*, you must add those strikes to the resulting key.
|
Case 01: The serial number contains a vowel: Every letter of the word must be shifted backwards by the key Keep in mind that if you go under the 0, the next number will be 25 because numbers go only from 0 to 25. |
|
Case 02: The bomb contains more than 3 batteries: Every letter of the word must be shifted forwards by the key Keep in mind that if you go over the 25, the next number will be 0 because numbers go only from 0 to 25. |
|
Case 03: There is a serial port: If this is your first word, refer to Case 01, otherwise go on. Add to the key the number of letters of the last word you decrypted, then proceed as in Case 01. Keep in mind that if you go under the 0, the next number will be 25 because numbers go only from 0 to 25. |
|
Case 04: None of the previous cases matches: Add to the key the number of solved modules at the moment of the word generation then proceed as in Case 02. Keep in mind that if you go over the 25, the next number will be 0 because numbers go only from 0 to 25. |
| Letter | Number |
|---|---|
| Q | 0 |
| W | 1 |
| E | 2 |
| R | 3 |
| T | 4 |
| Y | 5 |
| U | 6 |
| I | 7 |
| O | 8 |
| P | 9 |
| A | 10 |
| S | 11 |
| D | 12 |
| F | 13 |
| G | 14 |
| H | 15 |
| J | 16 |
| K | 17 |
| L | 18 |
| Z | 19 |
| X | 20 |
| C | 21 |
| V | 22 |
| B | 23 |
| N | 24 |
| M | 25 |

Some of these modules are really inhumane. What should you do then? Just laugh in their faces.
This module includes two sets of cards, 10 cards in each set. The first two cards that you see (one black, one white) are referred to as initial cards and they both are considered to be set at number 1. Each card can be set to a number between 1 and 10.
See Modules Against Humanity for a card reference.
If you can spell the word POOP from the letters of one of the initial cards, set that card (or both, if applicable) to number 2.
Otherwise, the secondary black card’s position is determined by number of unlit indicators + number of ports; and the secondary white card’s position is determined by number of lit indicators + number of batteries.
If only the secondary black card refers to a module that you have on the bomb, adjust the secondary white card by +2.
If only the secondary white card refers to a module that you have on the bomb, adjust the secondary black card by +1.
If both secondary cards refer to modules that you have on the bomb, adjust the secondary black card by +4 and the secondary white card by +3.
If neither of the secondary cards refers to a module that you have on the bomb:
Once you have the final cards, press the submit button.
Black cards have black background and white letters; white cards have white background and black letters.
Adjusting by a positive value means cycling the card to the right by the specified number. Adjusting by a negative value means cycling the card to the left by the specified number.
If the number of a card value is 0, set the card to the number 10. If it is above 10, subtract 10. If it is less than 1, add 10.
Pressing the reset button will return the module to the initial state.
Pressing the reset button will not cause a strike.
Upon a strike, the module will reset itself to the initial state. All the cards on the module will remain the same.
| Module Name | Card Text |
|---|---|
| 3D Maze | Want to see this in 3D? There are special glasses for it. |
| Adjacent Letters | Bomb exploded. I was adjacent to it. |
| Adventure Game | That's okay. There will be another adventure waiting for you soon. |
| Alphabet | Never try tongue twisters before you learn alphabet. |
| Anagrams | The instructions were clear and not in anagrams; you're an idiot. |
| Astrology | No success? I guess your zodiac was under the wrong planet's influence. |
| Backgrounds | Are you sure you want that background for your photo? |
| Battleship | This bomb is a true battle, just not on a ship. |
| Big Circle | You blow up, you die. The big circle of life. |
| Bitmaps | Lost in this bomb? Here's a bit of a map. |
| Blind Alley | You're done. No way out from this blind alley. |
| Blind Maze | You'll feel like a blind man in this maze. |
| Braille | The bomb blew your eyes out. Start learning Braille. |
| Broken Buttons | Pressing these buttons is useless. They’re broken. |
| Burglar Alarm | This burglar alarm is distracting me from defusing. |
| Button Sequences | You can't just press all the buttons, it has to be the correct sequence. |
| Module Name | Card Text |
|---|---|
| Caesar Cipher | You dealt with it like a true Caesar. |
| Cheap Checkout | Check out this bomb sale! It's so cheap! |
| Chess | I would play even Billy the Puppet if that game was chess. |
| Chord qualities | You struck the wrong chords. Kaboom. |
| Colored Squares | It's cool to be square but only if your colored. |
| Colored Switches | Let's switch on these colours. |
| Colour Flash | That almost got you dead. Your whole life flashed before your eyes. |
| Combination Lock | Are you sure this is the combination you need? |
| Complicated Buttons | Pressing buttons should be easy, not complicated. |
| Complicated Wires | Cut all the wires! It's not that complicated after all. |
| Connection Check | Bomb exploded due to bad wifi connection. |
| Cooking | You blew me up even though I cooked for you! |
| Coordinates | You're walking funny. Have you lost your coordinates? |
| Crazy Talk | You're talking crazy. Get out. |
| Creation | God created the world and you blew it up. Shame on you. |
| Cryptography | Your mind is so cryptic, I can't read it. |
| Double-Oh | Who cares about Double As or Double Ds when you can have Double Os? |
| Emoji Math | Did you know your texts can include words, and not just emojis? |
| Module Name | Card Text |
|---|---|
| English Test | Do you know the difference between your crap and you're crap? |
| European Travel | Europe is a great destination for travels. |
| Faulty Backgrounds | You bombed that selfie cause of faulty background. |
| Filibuster | Remember the title and just keep talking. |
| Follow the Leader | If this bomb explodes, you're following the wrong political leader. |
| Foreign Exchange Rates | No currency exchange point? You should've taken your card. |
| Forget Me Not | Well done. You forgot it not. |
| Friendship | They say Monopoly ruins friendships. They have not tried KTANE. |
| Game of Life Cruel | Life is cruel. So are games. |
| Game of Life Simple | I want to play a game. A game of life and death. |
| Hexamaze | Someone must have put a-maze-ing hex on you. |
| HTTP Response | 404. The bomb not found. |
| Hunting | If you explode, I'm gonna hunt you down. |
| Ice Cream | I scream, you scream, but only I love it. |
| Keypad | If you recognize any of these symbols, you're a smart fella. |
| Laundry | Friends are coming over. Quick, hide all your dirty laundry! |
| Letter Keys | Wait, now keys have letters on them? What is this sorcery? |
| Light Cycle | Dark in the room? Just cycle through the lights. |
| Module Name | Card Text |
|---|---|
| Lights Out | Lights are out. Bomb's unavailable for 10 seconds. |
| Listening | Just got a strike. You need to listen to your experts better. |
| Logic | Do you have at least a pinch of logic in that head of yours? |
| Maze | I know you feel lost. Sadly, this is not a maze so there's no way out. |
| Memory | Nope, that doesn't work. Try memorizing the manual next time. |
| Microcontroller | Trust your experts, don’t micro control them. |
| Modules Against Humanity | Yes, this bomb is very inhumane. Deal with it. |
| Monsplode, Fight! | Why fight your family when you can fight Monsplodes? |
| Monsplode Trading Cards | Who cares about Monsplodes? Trade them away! |
| Morse Code | If you're bad with words, try Morse code instead. |
| Morsematics | If you're bad with words, try Morsematics code instead. |
| Mortal Kombat | The kombat with this bomb is a mortal one. |
| Motion Sense | Moves like Jagger? Not with that motion sense of yours. |
| Mouse In The Maze | Tsk. Poor little mouse, can't do anything right. |
| Murder | If this doesn't get you murdered, I don't know what will. |
| Mystic Square | You need serious help. From a shaman or a mystic, nothing less. |
| Module Name | Card Text |
|---|---|
| Needy Capacitor | You're on the dishonorable discharge, Take your capacitor and leave. |
| Needy Knob | You can play with this knob even when you're done with the bomb. |
| Needy Math | Math is hard. |
| Needy Quiz | I know you hate answering questions, but we do have to test you. |
| Needy Rotary Phone | Here, phone a friend for help. Old school style. |
| Needy Vent Gas | Stop venting your emotions. Vent gas instead. |
| Neutralization | Your goal is to neutralize this bomb. |
| Number Pad | Keypad here, keypad there. I want a keypad with numbers! |
| Orientation Cube | Bad luck with your crush? Maybe it’s just their sexual orientation. |
| Password | You need to know the secret password to defuse this bomb. |
| Perspective Pegs | If you can't do it, try to look from a different perspective. |
| Piano Keys | Musical instruments? I recommend trying piano. |
| Plumbing | If you don't find a way out, try crawling through pipes. |
| Probing | Bad news. You're actually being probed by aliens. |
| Resistors | Don't resist the temptation. Just do it. |
| Rock-Paper-Scissors-L.-Sp. | You're fighting a lizard. But don't use caber, use scissors. |
| Module Name | Card Text |
|---|---|
| Round Keypad | You spin my head right round with those fancy symbols. |
| Safety Safe | This bomb is so valuable it should be locked in a safe. |
| Sea Shells | Who cares what she sells? She's not gonna sell it to you. |
| Semaphore | Just as I expected, you're waving a white flag already. |
| Shape Shift | Why be a human when you can shapeshift into an owl? |
| Silly Slots | You failed. What a silly slot you are. |
| Simon Says | Too late. simon says you should try again. |
| Simon Screams | Simon screams at your incompetence. |
| Simon States | Too late. Simon states you should try again. |
| Skewed Slots | Well, that's what happens when your world view is so skewed. |
| Souvenir | This explosion will leave a few souvenirs on your body. |
| Square Button | Push the square button. Galvanize. |
| Switches | It’s useless. Switch to another bomb. |
| Symbolic Coordinates | Coordination does not exist, it's only symbolic. |
| Symbolic Password | Your password must be 6 symbols long. |
| Tetris | If you're tired of bombs, you could always play Tetris instead. |
| Text Field | Who needs fields of gold when you have a field of text? |
| The Bulb | You think you have a great idea? Nah, that's just a bulb above your head. |
| Module Name | Card Text |
|---|---|
| The Button | Push the button. Galvanize. |
| The Clock | Tick tock, start the bomb clock. |
| The Gamepad | Two kinds of people: those who use gamepad and the boring ones. |
| The iPhone | Put down your iPhone and solve this bomb! |
| The Moon | Darkness all around, not even the moon is shining. |
| The Stopwatch | Stop the watch! Hammer time! |
| The Sun | It's so bright! Who turned the sun on? |
| The Swan | Your serial number is 4815162342. |
| Third Base | Don't tell me you're already in third base with this bomb? |
| Tic Tac Toe | Lots of love, XOXO, The Bomb. |
| Turn The Key | Just turn the key and leave the room. |
| Turn The Keys | Just turn the keys and leave the room. |
| Two Bits | Here's my two bits of information: you're gonna explode. |
| Who's on First | You're clearly the last, but who's first? |
| Who's That Monsplode? | Fighting Monsplodes? Identify them first. |
| Wire Placement | Be careful where you place those wires! |
| Wire Sequence | Trickier than it sounds; all the wires are hidden behind panels. |
| Wires | Cut all the wires! |
| Word Scramble | You got scrambled by your own sword. |
| Word Search | You’re searching for a word? It’s the bird. |
| Zoo | You're an animal. You should be in a zoo. |

A Bob in the hand is worth two in... the Buhar?
1. Identify the card’s initial value: Using the “Initial Value Reference Table”, find the row that contains your Monsplode’s™ name. Determine which of the following formats the first two characters of bomb’s serial number are in:
XX (e.g. KT, NE),
X# (e.g. C4, H8),
#X (e.g. 2A, 5D),
## (e.g. 20, 17)
This will give you your card’s initial value.
2. Adjust the card’s value: Look at the “Print Version” at the left side of the card. For each indicator on the bomb that contains the letter of the Print Version, add 1 to the card’s value if it’s lit and subtract 1 if it’s unlit. Continue adjusting the card’s value using the rules below:
If the bomb has no batteries, keep the card’s current value.
Otherwise, if the numeral of the Print Version is greater than the amount of batteries on the bomb, add 1 to the card’s current value.
Otherwise, if the numeral of the Print Version is less than the amount of batteries on the bomb, subtract 1 from the card’s current value.
Otherwise, add 2 to the card’s current value.
If the Print Version’s numeral is equal to the alphabetic position of its letter, the card is fake and has 0 value. This overrides everything.
3. Calculate the multiplier: Use the rules below based on the symbol in the card’s bottom-left corner and "Rarity Symbol Reference Table":
If the card is Common, the multiplier is 1.
Otherwise, if the card is Uncommon, the multiplier is 1.25.
Otherwise, if the card is Rare, the multiplier is 1.5.
Otherwise, if the card is Ultra Rare, the multiplier is 1.75.
If the card is a foil (has shiny spots on it), add 0.5 to the multiplier.
For each bent corner of the card subtract 0.25 from the multiplier.
Multiply the card’s adjusted value by the calculated multiplier.
If the card’s value is a negative number, it has 0 value.
If all of your cards have higher value than the offered card, press “Keep”.
Otherwise, trade your least valued card by pressing “Trade”.
If there are multiple cards with the least value, you can trade any of them.
| Common | Uncommon | Rare | Ultra Rare |
| ● | ♦ | ★ | ☆ |
| Monsplode™ | XX | X# | #X | ## |
|---|---|---|---|---|
| Aluga | 2 | 3 | 4 | 2 |
| Asteran | 2 | 5 | 2 | 2 |
| Bob | 2 | 4 | 2 | 5 |
| Buhar | 5 | 2 | 2 | 3 |
| Caadarim | 2 | 4 | 3 | 2 |
| Clondar | 3 | 2 | 4 | 5 |
| Cutie Pie | 2 | 4 | 2 | 4 |
| Docsplode | 2 | 4 | 2 | 5 |
| Flaurim | 2 | 3 | 4 | 2 |
| Gloorim | 5 | 2 | 2 | 2 |
| Lanaluff | 2 | 3 | 4 | 3 |
| Lugirit | 3 | 3 | 3 | 2 |
| Monsplode™ | XX | X# | #X | ## |
|---|---|---|---|---|
| Magmy | 4 | 3 | 2 | 3 |
| Melbor | 2 | 4 | 4 | 3 |
| Mountoise | 2 | 4 | 3 | 3 |
| Myrchat | 2 | 2 | 4 | 3 |
| Nibs | 3 | 3 | 2 | 4 |
| Percy | 3 | 3 | 2 | 4 |
| Pouse | 2 | 3 | 3 | 3 |
| Ukkens | 4 | 2 | 3 | 3 |
| Vellarim | 4 | 2 | 3 | 2 |
| Violan | 3 | 4 | 2 | 2 |
| Zapra | 3 | 4 | 2 | 3 |
| Zenlad | 4 | 2 | 2 | 4 |
| Monsplode™ | XX | X# | #X | ## |
|---|---|---|---|---|
| Aluga, The Fighter | 6 | 4 | 5 | 3 |
| Bob, The Ancestor | 5 | 6 | 4 | 4 |
| Monsplode™ | XX | X# | #X | ## |
|---|---|---|---|---|
| Buhar, The Protector | 6 | 5 | 3 | 4 |
| Melbor, The Web Bug | 4 | 4 | 4 | 6 |

Are you still a fan of some animated series from your childhood? It looks like you stumbled upon another fan.
| Monsplode™ | Name | Type | Special Rules |
|---|---|---|---|
 |
Buhar | WATER | Takes no damage from ROCK type moves. |
 |
Lanaluff | NORMAL | If its name has a common letter with the serial, takes +3 net damage from POISON type moves. |
 |
Bob | NORMAL | If there is a lit BOB indicator, only takes damage from NORMAL type moves. |
 |
Mountoise | ROCK | Its type is NORMAL if the bomb has a strike. |
 |
Nibs | NORMAL | Takes no damage from GRASS type moves. |
| Monsplode™ | Name | Type | Special Rules |
|---|---|---|---|
 |
Aluga | NORMAL | Takes +2 net damage from FIRE type moves. Takes -1 net damage from WATER type moves. |
 |
Lugirit | GHOST | Takes +2 net damage from WATER type moves. Takes -1 net damage from FIRE type moves. |
 |
Caadarim | NORMAL | If there is at least one port, takes no damage from NORMAL type moves. |
 |
Vellarim | WATER | If there is a Parallel port, takes no damage from NORMAL type moves. |
 |
Flaurim | FIRE | If there is a Serial port, takes no damage from NORMAL type moves. |
 |
Gloorim | DARK | If there is a DVI-D port, takes no damage from NORMAL type moves. |
 |
Melbor | DARK | If net damage of a move is exactly 6 or 8, it takes 0 damage instead. |
 |
Clondar | ELECTR | Takes +3 net damage from WATER type moves. |
 |
Docsplode | NORMAL | "Boom" will explode Docsplode instead of the bomb. It must be used if it's present. |
| Monsplode™ | Name | Type | Special Rules |
|---|---|---|---|
 |
Magmy | FIRE | If there are less than 3 batteries on the bomb, its type is ROCK. |
 |
Pouse | ELECTR | If net damage of a move is 6 or more, it takes 0 damage instead. |
 |
Ukkens | POISON | Takes no damage from WATER type moves. |
 |
Asteran | GRASS | If there is a CAR indicator present, its type is WATER. |
 |
Violan | GRASS | If there is a CLR indicator present, its type is WATER. |
 |
Zenlad | GRASS | Takes +3 damage from ELECTR type moves. |
 |
Zapra | ELECTR | If there is less than 3 batteries on the bomb, its type is NORMAL. |
 |
Myrchat | POISON | If there is no lit indicator on the bomb, its type is DARK. |
 |
Percy | WATER | Percy can't stand silliness. You must use "Splash" if it's present. |
 |
Cutie Pie | NORMAL | Cutie Pie is a friend! Deal the lowest possible damage instead. |
| Move Name | Move Type | Base Damage | Special Rules |
|---|---|---|---|
| Appearify | NORMAL | 4 | Damage is 10 if the opponent is a DARK type. |
| Battery Power | ELECTR | 0 | Add 2 damage for each battery on the bomb. |
| Bedrock | ROCK | 0 | Damage is number of modules on the bomb. |
| Boo | GHOST | 0 | Add 3 damage for each ‘0’ or ‘O’ in the serial number. |
| Boom | FIRE | 0 | Pressing this will detonate the bomb. |
| Bug Spray | POISON | 2 | Damage is 10 against Melbor and Zenlad. |
| Countdown | POISON | 0 | Damage is time left on the bomb in minutes, rounded down. |
| Dark Portal | DARK | 0 | Damage is the number of ports present. |
| Fiery Soul | FIRE | 0 | Damage is number of batteries multiplied by the number of battery holders. |
| Finale | GRASS | 2 | Damage is 10 if all other modules are disarmed before this one. |
| Freak Out | GHOST | 1 | Damage is 5 if there is a "FRK" or "FRQ" indicator. 10 if any of them are lit. |
| Glyph | NORMAL | 0 | Damage is letter count of the opponent’s name. |
| Last Word | GHOST | 0 | Damage is last digit of the serial number. |
| Sendify | NORMAL | 2 | Damage is 10 if the opponent is a ROCK or GRASS type. |
| Shock | ELECTR | 3 | Damage is 8 if there is an RJ-45 port on the bomb. |
| Shrink | NORMAL | 0 | Damage is the smallest digit of the serial number. |
| Sidestep | NORMAL | 0 | Damage is the letter count of the move displayed to the left or right of this move on the module. |
| Stretch | NORMAL | 0 | Damage is the largest digit of the serial number. |
| Void | DARK | 2 | Damage is 10 if no other module is disarmed before this one. |
| Defuse | ??? | ??? | Defuses the module. |
| Move Name | Move Type | Base Damage | Move Name | Move Type | Base Damage | |
|---|---|---|---|---|---|---|
| Candle | FIRE | 2 | Spectre | GHOST | 5 | |
| Cave In | ROCK | 3 | Splash | WATER | 0 | |
| Double Zap | ELECTR | 4 | Tac | NORMAL | 5 | |
| Earthquake | ROCK | 5 | Tangle | GRASS | 2 | |
| Flame Spear | FIRE | 6 | Tic | NORMAL | 3 | |
| Fountain | WATER | 6 | Toe | NORMAL | 1 | |
| Grass Blade | GRASS | 4 | Torchlight | FIRE | 4 | |
| Heavy Rain | WATER | 4 | Toxic Waste | POISON | 5 | |
| High Voltage | ELECTR | 6 | Venom Fang | POISON | 3 | |
| Hollow Gaze | DARK | 4 | Zap | ELECTR | 2 | |
| Ivy Spikes | GRASS | 6 | - | - | - |
| Opposing Type → |
N O R M A L |
P O I S O N |
R O C K |
G H O S T |
F I R E |
W A T E R |
G R A S S |
E L E C T R |
D A R K |
|---|---|---|---|---|---|---|---|---|---|
| Move Type ↓ |
|||||||||
| NORMAL | x1 | x1 | x1/2 | x0 | x1 | x1 | x1 | x1 | x1 |
| POISON | x1 | x1/2 | x1/2 | x1/2 | x1 | x1 | x2 | x1 | x1 |
| ROCK | x1 | x1 | x1 | x1 | x2 | x1 | x1 | x1 | x1 |
| GHOST | x0 | x1 | x1 | x2 | x1 | x1 | x1 | x1 | x1/2 |
| FIRE | x1 | x1 | x1/2 | x1 | x1/2 | x1/2 | x2 | x1 | x1 |
| WATER | x1 | x1 | x2 | x1 | x2 | x1/2 | x1/2 | x1 | x1 |
| GRASS | x1 | x1/2 | x2 | x1 | x1/2 | x2 | x1/2 | x1 | x1 |
| ELECTR | x1 | x1 | x1 | x1 | x1 | x2 | x1/2 | x1/2 | x1 |
| DARK | x1 | x1 | x1 | x2 | x1 | x1 | x1 | x1 | x1/2 |
An antiquated form of naval communication? What next? At least it's genuine Morse Code, so pay attention and you might just learn something.
| How to Interpret |
|---|
|
1. A short flash represents a dot. 2. A long flash represents a dash. 3. There is a long gap between letters. 4. There is a very long gap before the word repeats. |
 |
| If the word is: | Respond at frequency: |
|---|---|
| shell | 3.505 MHz |
| halls | 3.515 MHz |
| slick | 3.522 MHz |
| trick | 3.532 MHz |
| boxes | 3.535 MHz |
| leaks | 3.542 MHz |
| strobe | 3.545 MHz |
| bistro | 3.552 MHz |
| flick | 3.555 MHz |
| bombs | 3.565 MHz |
| break | 3.572 MHz |
| brick | 3.575 MHz |
| steak | 3.582 MHz |
| sting | 3.592 MHz |
| vector | 3.595 MHz |
| beats | 3.600 MHz |

It is AMazing that the status light got a life of its own.
Table 1:
count* |
|
||
assay* | Number of solved modules | bought* | Number of strikes |
rabbit | Number of battery holders | stench | Number of distinct port types |
submit | Total number of ports | salads | Number of lit indicators |
tribes | Number of unlit indicators | awards | Number of indicators |
sword | Number of port plates | apron | The last digit of the serial number |
county | The sum of the serial number digits | mosaic | Number of batteries |
summit | First serial number digit | things | Starting time in minutes |
music | Day of week at bomb start (Sunday = 0, Saturday = 6). | tacit | Number of empty port plates |
thinks | Position of first serial number letter minus one (A=0, B=1, C=2, ...) | ||
* - The maze for these words can change.
** - These colors may be different depending on how the bomb was configured or if it was set to Colorblind mode.
0 - pulses |
1 - pulse |
2 - cousin |
3 - brass |
4 - spurs |
5 - prove |
6 - guards |
7 - essays |
8 - strobe |
9 - stroke |
10 - tactic |
11 - counts |
12 - artist |
13 - opener |
14 - award |
15 - toast |
16 - stayed |
17 - prone |
*If Colorblind mode is enabled, the module will ensure that at least the Off State or the On State is set to Off.

It turns out an antiquated form of naval communication in a foreign language is next. At least it's still genuine Morse Code, so keep paying attention.
Use the tables to find the correct frequency, and pressing the transmit button. Use the language sticker on the module to help identify the correct language.
Refer to the original manual of Morse Code for instructions on how to disarm the module.
| Language | Button |
|---|---|
| CS | TX |
| DA | TX |
| DE | SENDEN |
| EN | TX |
| EO | SENDI |
| ES | TX |
| ET | TX |
| FI | LÄHETÄ |
| FR | TX |
| FY | TX |
| HE | שלח |
| IT | INVIA |
| JA | TX |
| KO | 전송 |
| NL | TX |
| NO | TX |
| PL | TX |
| PT | TX |
| RU | TX |
| SV | SÄND |
| TH | ส่ง |
| ZH | 发送 |
| Korean Morse Code Interpretation | ||||||||||||||||||||||||||||||||||||||||||||||||||||||||
|---|---|---|---|---|---|---|---|---|---|---|---|---|---|---|---|---|---|---|---|---|---|---|---|---|---|---|---|---|---|---|---|---|---|---|---|---|---|---|---|---|---|---|---|---|---|---|---|---|---|---|---|---|---|---|---|---|
|
| Numerals Morse Code Interpretation | ||||||||||||||||||||
|---|---|---|---|---|---|---|---|---|---|---|---|---|---|---|---|---|---|---|---|---|
|
| Thai Morse Code Interpretation | ||||||||||||||||||||||||||||||||||||||||||||||||||||||||||||||||||||||||||||||||||||||||||||||||||||||||||||||||||||||||
|---|---|---|---|---|---|---|---|---|---|---|---|---|---|---|---|---|---|---|---|---|---|---|---|---|---|---|---|---|---|---|---|---|---|---|---|---|---|---|---|---|---|---|---|---|---|---|---|---|---|---|---|---|---|---|---|---|---|---|---|---|---|---|---|---|---|---|---|---|---|---|---|---|---|---|---|---|---|---|---|---|---|---|---|---|---|---|---|---|---|---|---|---|---|---|---|---|---|---|---|---|---|---|---|---|---|---|---|---|---|---|---|---|---|---|---|---|---|---|---|---|
|
| Hebrew Morse Code Interpretation | ||||||||||||||||||||||||||||||||||||||||||||||||
|---|---|---|---|---|---|---|---|---|---|---|---|---|---|---|---|---|---|---|---|---|---|---|---|---|---|---|---|---|---|---|---|---|---|---|---|---|---|---|---|---|---|---|---|---|---|---|---|---|
|
| Hiragana Morse Code Interpretation | ||||||||||||||||||||||||||||||||||||||||||||||||||||||||||||||||||||||||||||||||||||||||||||||||||||
|---|---|---|---|---|---|---|---|---|---|---|---|---|---|---|---|---|---|---|---|---|---|---|---|---|---|---|---|---|---|---|---|---|---|---|---|---|---|---|---|---|---|---|---|---|---|---|---|---|---|---|---|---|---|---|---|---|---|---|---|---|---|---|---|---|---|---|---|---|---|---|---|---|---|---|---|---|---|---|---|---|---|---|---|---|---|---|---|---|---|---|---|---|---|---|---|---|---|---|---|---|
|
| Chinese Morse Code Interpretation | ||||||||||||||||||||||||||||||||||||||||||||||||||||
|---|---|---|---|---|---|---|---|---|---|---|---|---|---|---|---|---|---|---|---|---|---|---|---|---|---|---|---|---|---|---|---|---|---|---|---|---|---|---|---|---|---|---|---|---|---|---|---|---|---|---|---|---|
|
| Cyrillic Morse Code Interpretation | ||||||||||||||||||||||||||||||||||||||||||||||||||||||||||||||||
|---|---|---|---|---|---|---|---|---|---|---|---|---|---|---|---|---|---|---|---|---|---|---|---|---|---|---|---|---|---|---|---|---|---|---|---|---|---|---|---|---|---|---|---|---|---|---|---|---|---|---|---|---|---|---|---|---|---|---|---|---|---|---|---|---|
|
| Latin Morse Code Interpretation | ||||||||||||||||||||||||||||||||||||||||||||||||||||
|---|---|---|---|---|---|---|---|---|---|---|---|---|---|---|---|---|---|---|---|---|---|---|---|---|---|---|---|---|---|---|---|---|---|---|---|---|---|---|---|---|---|---|---|---|---|---|---|---|---|---|---|---|
| ||||||||||||||||||||||||||||||||||||||||||||||||||||
| Czech (CS) | ||||||||||||||||||||||||||||||||||||||||||||||||||||
| ||||||||||||||||||||||||||||||||||||||||||||||||||||
| German (DE) | ||||||||||||||||||||||||||||||||||||||||||||||||||||
| ||||||||||||||||||||||||||||||||||||||||||||||||||||
| Esperanto (EO) | ||||||||||||||||||||||||||||||||||||||||||||||||||||
| ||||||||||||||||||||||||||||||||||||||||||||||||||||
| Estonian (ET) | ||||||||||||||||||||||||||||||||||||||||||||||||||||
|
| Finnish (FI) | |||||||||||||||||||||||||
|---|---|---|---|---|---|---|---|---|---|---|---|---|---|---|---|---|---|---|---|---|---|---|---|---|---|
| |||||||||||||||||||||||||
| French (FR) | |||||||||||||||||||||||||
| |||||||||||||||||||||||||
| Western Frisian (FY) | |||||||||||||||||||||||||
| |||||||||||||||||||||||||
| Norwegian (NO) | |||||||||||||||||||||||||
| |||||||||||||||||||||||||
| Polish (PL) | |||||||||||||||||||||||||
|
See Appendix M for more detailed Morse code information.
| CS: | DA: | DE: | EN: | EO: | ES: | ET: | Frequency: |
|---|---|---|---|---|---|---|---|
| strach | afvis | hölle | shell | kontraŭ | biela | parras | 3.505 MHz |
| plomba | blandt | halle | halls | raŭka | broma | varras | 3.515 MHz |
| bronz | bomber | hülle | slick | ŝtono | ratas | varas | 3.522 MHz |
| sklep | brugt | heiß | trick | ĵetono | resma | emake | 3.532 MHz |
| houby | firma | siehe | boxes | risko | resta | kenake | 3.535 MHz |
| klouby | kalder | sichel | leaks | barako | brisa | nupud | 3.542 MHz |
| chleba | klart | leiche | strobe | rompi | trenes | taimer | 3.545 MHz |
| prach | klasse | eichel | bistro | piroj | tabla | vaikne | 3.552 MHz |
| shluk | klippe | fischer | flick | butono | senso | paigal | 3.555 MHz |
| strop | rekord | sicher | bombs | bombo | santos | puskar | 3.565 MHz |
| bomba | sidst | sicht | break | batalo | trato | ääres | 3.572 MHz |
| klenba | skarp | sticht | brick | betono | braile | ämblik | 3.575 MHz |
| brach | skifte | ventil | steak | radaro | bomba | kallis | 3.582 MHz |
| strup | skole | steak | sting | regulo | tronco | juurde | 3.592 MHz |
| papouch | slippe | brücke | vector | brilas | brinco | kuular | 3.595 MHz |
| klacek | vinder | rücken | beats | pulsi | mambo | öösel | 3.600 MHz |
| FI: | FR: | FY: | HE: | IT: | JA: | KO: | Frequency: |
|---|---|---|---|---|---|---|---|
| kenttä | coque | noard | סיסמה | daino | しそうか | 김밥 | 3.505 MHz |
| potku | salle | doarp | מהירות | attico | かんそう | 긴장 | 3.515 MHz |
| kettu | folie | stekt | אורות | antico | じてん | 간장 | 3.522 MHz |
| hissi | piège | trekt | תיאור | attesa | あかてん | 공장 | 3.532 MHz |
| katko | boîte | stean | רמזור | esame | かたいれ | 궁정 | 3.535 MHz |
| takoi | fuite | wykein | רמאות | saldi | えしやく | 집밥 | 3.542 MHz |
| rikos | flash | keamer | אותיות | salmo | とうざい | 잡담 | 3.545 MHz |
| pirinä | resto | ammerke | הפלמח | salame | がいとう | 적당 | 3.552 MHz |
| pentti | films | krekt | ההגנה | soldi | そうてん | 직장 | 3.555 MHz |
| heheh | bombe | stien | עכביש | suono | かおいろ | 족장 | 3.565 MHz |
| pihdit | casse | fabryk | ישראל | tazza | かつしや | 안장 | 3.572 MHz |
| koita | brique | brekt | אלפים | tassa | かいてん | 영장 | 3.575 MHz |
| tulos | foudre | hoecht | קופים | tatto | しんしや | 억장 | 3.582 MHz |
| pommi | fusée | hoanne | פיצוץ | zaino | しつかん | 인장 | 3.592 MHz |
| passi | bouton | brêge | גולני | tuono | ぶんかい | 인정 | 3.595 MHz |
| lahti | bruit | slope | גבעתי | trono | かくさん | 안정 | 3.600 MHz |
| NL: | NO: | PL: | PT: | Frequency: |
|---|---|---|---|---|
| stuur | morse | muszla | bossa | 3.505 MHz |
| buurt | økning | świnka | bomba | 3.515 MHz |
| truus | åpning | mamut | batom | 3.522 MHz |
| uurtje | signal | szprot | bombom | 3.532 MHz |
| trucs | pokal | skrzynki | burro | 3.535 MHz |
| broek | sterk | krzesło | dados | 3.542 MHz |
| bruin | stopp | praca | dossiê | 3.545 MHz |
| bruis | vondt | myszka | doido | 3.552 MHz |
| bruist | banan | katalog | morse | 3.555 MHz |
| ruist | start | bomba | módulo | 3.565 MHz |
| ruiste | vandre | przerwa | senha | 3.572 MHz |
| suist | andre | kostka | serial | 3.575 MHz |
| suiste | bombe | cegła | samba | 3.582 MHz |
| rijst | varsom | mięso | chave | 3.592 MHz |
| prijs | liksom | obszar | código | 3.595 MHz |
| prijst | sommer | bestia | conta | 3.600 MHz |
| RU: | SV: | TH: | ZH: | Frequency: |
|---|---|---|---|---|
| брать | skala | ระเบิด | 看关 | 3.505 MHz |
| брала | kalas | ระเหิด | 关门 | 3.515 MHz |
| борис | blick | ไข่ไก่ | 鱼吃 | 3.522 MHz |
| крала | stick | ไก่ไข่ | 狼吃 | 3.532 MHz |
| клара | dimma | บริการ | 还宁 | 3.535 MHz |
| поток | dekal | บริบาล | 穿贝 | 3.542 MHz |
| порог | ordlek | บริหาร | 手今 | 3.545 MHz |
| порок | rekord | บริบท | 杀手 | 3.552 MHz |
| покой | klick | สะสาง | 鳄吃 | 3.555 MHz |
| помой | dejta | เพิ่มพูน | 还片 | 3.565 MHz |
| попей | stark | ภาคภูมิ | 狗穿 | 3.572 MHz |
| рокер | drick | โอกาส | 狗吃 | 3.575 MHz |
| койка | steka | อากาศ | 鸡穿 | 3.582 MHz |
| росток | stiga | สัญญา | 鸡心 | 3.592 MHz |
| мостик | riktig | สัญญาณ | 凶了 | 3.595 MHz |
| токарь | bleka | สงสาร | 网乌 | 3.600 MHz |

Get it? Because it uses Morse and maths! I’ll see myself out...
Transmitted Morse is interpreted based on gaps between button holds.
Holding for more than double the length of the average gap is considered to be a dash, and anything shorter is considered a dot.
When transmitting, E and T are considered equal, as they are indistinguishable.
Take the 4th and 5th character of the serial number, this is your character pair.
Perform each step below in sequence, modifying your character pair progressively:
| How to Interpret |
|---|
|
1. A short flash represents a dot. 2. A long flash represents a dash. 3. There is a long gap between letters. 4. There is a very long gap before the word repeats. |
 |
| A | 1 | N | 14 | |
| B | 2 | O | 15 | |
| C | 3 | P | 16 | |
| D | 4 | Q | 17 | |
| E | 5 | R | 18 | |
| F | 6 | S | 19 | |
| G | 7 | T | 20 | |
| H | 8 | U | 21 | |
| I | 9 | V | 22 | |
| J | 10 | W | 23 | |
| K | 11 | X | 24 | |
| L | 12 | Y | 25 | |
| M | 13 | Z | 26 |

Test your might!
The module consists of two screens and a gamepad. The larger screen shows your character, the smaller shows your opponent.
To disarm the module, you must perform three attacks and a fatality. Use the tables below to determine your character’s attacks and the order in which they should be performed. Fatalities should not be performed until three successful attacks have been carried out. To determine the fatality, start at the top of the list and use the first one where the rule applies.
Entering the incorrect button combination during the initial three attacks will cause a strike and reset the successful attacks to 0. It may also reset your opponent’s character. Entering the incorrect button combination during the fatality stage will cause a strike but will not reset your previous attacks or your opponent’s character.
Characters that you may encounter are listed below.
| Name | Profile | Image |
|---|---|---|
| Johnny Cage | Johnny Cage was a struggling Hollywood action movie star who wanted to get his fame back. He has always been a brave and loyal warrior for Earthrealm. |  |
| Kano | As a mercenary and leader of the international crime cartel known as the Black Dragon, Kano rises beyond the level of mere brutality by also being sly and cunning. |  |
| Liu Kang | Liu Kang is one of Earthrealm’s greatest warriors, having defeated many to prove his valour. He became champion after the first Mortal Kombat tournament. |  |
| Raiden | Raiden is the eternal God of Thunder, protector of Earthrealm, and one of the most powerful characters in all of Mortal Kombat. |  |
| Scorpion | Hanzo Hasashi, also known as Scorpion, is a resurrected ninja seeking vengeance against those responsible for the destruction of his clan. |  |
| Sonya Blade | General of Earthrealm Special Forces, Sonya Blade is a stern, tough-as-nails General. A headstrong woman, she cares deeply about the lives of her comrades. |  |
| Sub-Zero | Sub-Zero possesses incredible control over the element of ice. He can easily deep freeze opponents to the point of them becoming brittle enough to shatter into pieces. |  |
| JOHNNY CAGE | Opponent, Move Order & Fatality Conditions | ||||||
|---|---|---|---|---|---|---|---|
| Move | Controls | Kano | Liu Kang | Raiden | Scorpion | Sonya Blade | Sub-Zero |
| Green Fireball | ⇦⇨A | 1 | 2 | 3 | 2 | 1 | 3 |
| Shadow Kick | ⇦⇨B | 3 | 1 | 2 | 3 | 2 | 1 |
| Nut Cracker | ⇩⇩C | 2 | 3 | 1 | 1 | 3 | 2 |
| Deadly Uppercut | ⇩⇩⇦C⇧B | Use if there is a parallel or a serial port. | Use if there is a lit CAR, CLR or MSA or unlit BOB, NSA or FRK. | ||||
| Torso Rip | ⇦⇦⇦BB⇧ | Otherwise, use if the last digit of the serial number is odd. | Otherwise, use if there are an even number of batteries. | ||||
| Stage | ⇩⇦⇧⇩AB | Otherwise, use. | Otherwise, use. | ||||
| KANO | Opponent, Move Order & Fatality Conditions | ||||||
|---|---|---|---|---|---|---|---|
| Move | Controls | Johnny Cage | Liu Kang | Raiden | Scorpion | Sonya Blade | Sub-Zero |
| Kanoball | ⇧⇩C | 3 | 2 | 1 | 3 | 2 | 1 |
| Knife Throw | ⇨⇨B | 1 | 1 | 2 | 2 | 3 | 3 |
| Chokehold | ⇩⇦A | 2 | 3 | 3 | 1 | 1 | 2 |
| Heart Rip | A⇩B⇧⇦C | Use if there are more D batteries than AA batteries. | Use if the serial number contains a vowel. | ||||
| Eye Laser | ⇧⇧⇨⇨CB | Otherwise, use if there are no unlit indicators present. | Otherwise, use if there is a DVI-D or RJ-45 port. | ||||
| Stage | ABC⇦⇦⇧ | Otherwise, use. | Otherwise, use. | ||||
| LIU KANG | Opponent, Move Order & Fatality Conditions | ||||||
|---|---|---|---|---|---|---|---|
| Move | Controls | Johnny Cage | Kano | Raiden | Scorpion | Sonya Blade | Sub-Zero |
| Dragon Fire | ⇨⇨C | 2 | 1 | 3 | 1 | 2 | 3 |
| Flying Dragon Kick | ⇨⇧A | 3 | 2 | 1 | 3 | 1 | 2 |
| Air Throw | ⇦⇩B | 1 | 3 | 2 | 2 | 3 | 1 |
| Butterfly Flip | ⇩⇨B⇦B⇩ | Use if there are any lit indicators present. | Use if the sum of the serial number digits is prime. | ||||
| Dragon’s Bite | ⇨⇨⇩A⇧C | Otherwise, use if there is a Stereo RCA or PS/2 port. | Otherwise, use if there are no D batteries. | ||||
| Stage | ⇨⇨⇦⇦⇧A | Otherwise, use. | Otherwise, use. | ||||
| RAIDEN | Opponent, Move Order & Fatality Conditions | ||||||
|---|---|---|---|---|---|---|---|
| Move | Controls | Johnny Cage | Kano | Liu Kang | Scorpion | Sonya Blade | Sub-Zero |
| Lightning Bolt | ⇦⇦B | 3 | 2 | 1 | 3 | 2 | 1 |
| Torpedo | ⇩⇨A | 2 | 3 | 3 | 1 | 1 | 2 |
| Teleport | ⇩⇧C | 1 | 1 | 2 | 2 | 3 | 3 |
| Electric Decapitation | AA⇦⇧⇨B | Use if there are four or fewer batteries. | Use if there are no indicators present. | ||||
| Explosive Uppercut | ⇩⇧⇩⇧BB | Otherwise, use if the serial number contains L, P or T. | Otherwise, use if there is more than one Serial port. | ||||
| Stage | C⇧⇦AB⇩ | Otherwise, use. | Otherwise, use. | ||||
| SCORPION | Opponent, Move Order & Fatality Conditions | ||||||
|---|---|---|---|---|---|---|---|
| Move | Controls | Johnny Cage | Kano | Liu Kang | Raiden | Sonya Blade | Sub-Zero |
| Spear | ⇦⇦A | 1 | 3 | 2 | 3 | 2 | 1 |
| Teleport Punch | ⇦⇨C | 2 | 1 | 1 | 2 | 3 | 3 |
| Air Throw | ⇧⇧B | 3 | 2 | 3 | 1 | 1 | 2 |
| Toasty! | ⇨⇨⇨BBB | Use if there are more than three ports. | Use if the last digit of the serial number is even. | ||||
| Spear Slice | ⇧⇧⇩⇦AC | Otherwise, use if there are more AA batteries than D batteries. | Otherwise, use if there is a lit BOB or FRK or unlit FRQ or CAR. | ||||
| Stage | A⇨B⇩C⇩ | Otherwise, use. | Otherwise, use. | ||||
| SONYA BLADE | Opponent, Move Order & Fatality Conditions | ||||||
|---|---|---|---|---|---|---|---|
| Move | Controls | Johnny Cage | Kano | Liu Kang | Raiden | Scorpion | Sub-Zero |
| Energy Rings | ⇧⇨A | 3 | 2 | 1 | 1 | 3 | 2 |
| Leg Grab | ⇩⇦C | 2 | 3 | 3 | 2 | 1 | 1 |
| Square Wave Punch | ⇨⇦B | 1 | 1 | 2 | 3 | 2 | 3 |
| Fire Kiss | ⇨⇦⇦⇨CB | Use if the number of indicators is greater than the number of ports. | Use if the number of batteries is greater than the first digit of the serial number. | ||||
| Crush Kiss | ⇩⇧⇨B⇦A | Otherwise, use if the first digit of the serial number is greater than the number of batteries. | Otherwise, use if the number ports is greater than the number of indicators. | ||||
| Stage | ⇧⇧⇩⇦AC | Otherwise, use. | Otherwise, use. | ||||
| SUB-ZERO | Opponent, Move Order & Fatality Conditions | ||||||
|---|---|---|---|---|---|---|---|
| Move | Controls | Johnny Cage | Kano | Liu Kang | Raiden | Scorpion | Sonya Blade |
| Ice Freeze | ⇨⇧B | 1 | 2 | 3 | 1 | 3 | 2 |
| Slide | ⇨⇨A | 3 | 1 | 2 | 2 | 1 | 3 |
| Ground Freeze | ⇨⇩C | 2 | 3 | 1 | 3 | 2 | 1 |
| Spine Rip | ⇦⇧⇨⇩CC | Use if the sum of the serial number digits is divisible by 3. | Use if there are no lit indicators present. | ||||
| Ice Shatter | ⇨⇩⇦⇧AA | Otherwise, use if there are no batteries. | Otherwise, use if there is a Parallel or a Stereo RCA port. | ||||
| Stage | ⇧⇨A⇦⇧B | Otherwise, use. | Otherwise, use. | ||||

Inside some bombs is a mouse that is remote-controlled via a chip in its spinal cord.
|
| ||||||||||||||||||||||||
|
| ||||||||||||||||||||||||
|
|

This module is powered by the restless soul of a murder victim. The only way to disarm it is to solve the case so the victim can pass peacefully to the afterlife.
See Appendix A for indicator identification reference.
See Appendix B for battery identification reference.
See Appendix C for port identification reference.
| Miss Scarlett | Professor Plum | Mrs Peacock | Reverend Green | Colonel Mustard | Mrs White | |
|---|---|---|---|---|---|---|
| Candle- stick | Dagger | Lead Pipe | Revolver | Rope | Spanner | |
| 1 | Dining Room | Library | Lounge | Kitchen | Study | Conserv- atory |
| 2 | Study | Hall | Billiard Room | Lounge | Kitchen | Library |
| 3 | Kitchen | Billiard Room | Ballroom | Library | Conserv- atory | Dining Room |
| 4 | Lounge | Ballroom | Dining Room | Conserv- atory | Hall | Kitchen |
| 5 | Billiard Room | Kitchen | Study | Ballroom | Dining Room | Hall |
| 6 | Conserv- atory | Lounge | Library | Study | Billiard Room | Ballroom |
| 7 | Ballroom | Conserv- atory | Kitchen | Hall | Library | Study |
| 8 | Hall | Study | Conserv- atory | Dining Room | Lounge | Billiard Room |
| 9 | Library | Dining Room | Hall | Billiard Room | Ballroom | Lounge |

Have you ever taken a music theory class where you had to count and clap rhythms? This is just like that, only here your suffering ends when you get it wrong.
See the next page for musical note durations.
Each button press is represented by a musical note and an alphanumeric digit. The musical note is the label of the button that must be pressed, and the digit is the number of beeps that must be heard before the button is released, or P if the button should be pressed and released immediately.
| Rhythm of Light Flashes |
Color of Indicator Light | |||
|---|---|---|---|---|
| Blue | Red | Green | Yellow** | |
 |
♩2/♪P | *** | ♬2/♪P | ♫2/♪P |
 |
♩1/♬P | ♪P/♩P | ♫P/♪1 | ♫1/♬1 |
 |
♫1/♪P | ♪1/♫1 | ♩P/♬P | ♬P/♬1 |
 |
♪P/♫P | ♬1/♩P | ♬1/♬P | ♫1/♪P |
 |
♪1/♫P | ♬P/♫P | ♩1/♪P | ♬P/♫1 |
 |
♩1/♬1 | ♪P/♪1 | ♫P/♪P | ♫P/♩1 |
 |
♩P/♪1* | ♫P/♫1* | ♬P/♬1* | ♪P/♪P* |
*Use the first button press in place of the second if there is more than one battery on the bomb
**Hold both buttons for one additional beep per lit indicator on the bomb
***Press buttons as quickly as possible until module is disarmed
Musical notes have many important properties, but for this module only their duration is important. Every pattern shown above consists of four beats, and they are distributed between the following notes:
 | Half Note: This note lasts for two beats, exactly half of a measure. | ||
 | Dotted Quarter Note:* In-between a quarter note and a half note, the dotted quarter note lasts for one and a half beats. | ||
 | Quarter Note: The most common note, the quarter note lasts for one beat. | ||
 | Eighth Note: The basis of syncopation, the eighth note lasts for half of a beat. | ||
 | Sixteenth Note: The bane of woodwind players everywhere, the sixteenth note lasts for a quarter of a beat. | ||
 | = |  | Beamed Eighth Notes: To enhance clarity, successive eighth notes are often drawn with a single beam connecting them. |
 | = |  | Beamed Sixteenth Notes: Similarly, successive sixteenth notes are often drawn with two beams connecting them. |
 | Eighth Note Triplet:* Each note in this triplet lasts for a third of the beat. | ||
*Dots and triplets can be added to any note durations, but this module only uses dotted quarter notes and eighth note triplets.
If all else fails, then you can trust the spacing of the notes to guide you.

O knight in shining armour, deliver us from the evils of the skull!
| X | X | |
| X | ||
| X | X |
| last serial digit does not lie on the cross-parts of the module | ||||||||||
| number in the middle of the module | 1 | 2 | 3 | 4 | 5 | 6 | 7 | 8 | ||
|---|---|---|---|---|---|---|---|---|---|---|
| on the cross- part |
1 | 1 | 3 | 5 | 4 | 6 | 7 | 2 | 8 | |
| 2 | 2 | 5 | 7 | 3 | 8 | 1 | 4 | 6 | ||
| 3 | 6 | 4 | 8 | 1 | 7 | 3 | 5 | 2 | ||
| 4 | 8 | 1 | 2 | 5 | 3 | 4 | 6 | 7 | ||
| 5 | 3 | 2 | 6 | 8 | 4 | 5 | 7 | 1 | ||
| 6 | 7 | 6 | 1 | 2 | 5 | 8 | 3 | 4 | ||
| 7 | 4 | 7 | 3 | 6 | 1 | 2 | 8 | 5 | ||
| 8 | 5 | 8 | 4 | 7 | 2 | 6 | 1 | 3 | ||
“row”/“column” on this page always refers to the module.
Determining the desired constellation:
Before moving any sliders, use the sum of the rows as R1, R2 and R3 and the sum of the columns as C1, C2 and C3 to look up the target constellation in the table below. The following constellation is also always acceptable.
| 1 | 2 | 3 |
| 4 | 5 | 6 |
| 7 | 8 |
| C1 > C2,C3 | C2 > C1,C3 | C3 > C1,C2 | else | |||||||||||||||||||||||||||||||||||||
|---|---|---|---|---|---|---|---|---|---|---|---|---|---|---|---|---|---|---|---|---|---|---|---|---|---|---|---|---|---|---|---|---|---|---|---|---|---|---|---|---|
| R1 > R2,R3 |
|
|
|
|
||||||||||||||||||||||||||||||||||||
| R2 > R1,R3 |
|
|
|
|
||||||||||||||||||||||||||||||||||||
| R3 > R1,R2 |
|
|
|
|
||||||||||||||||||||||||||||||||||||
| else |
|
|
|
|

The rules are simple: neutralize or be neutralized.
The acid type can be determined using the following chart:
| Solution Color | Acid Type |
|---|---|
| Red | Hydrogen bromide |
| Yellow | Hydrogen fluoride |
| Green | Hydrogen chloride |
| Blue | Hydrogen iodide |
The base that must be used to titrate can be determined via the following ruleset:
The concentration of the acid can be determined via the following process:
The concentration of the base can be determined via the following ruleset:
| NH3 | KOH | LiOH | NaOH | |
|---|---|---|---|---|
| HBr | S | NS | NS | S |
| HF | NS | S | NS | S |
| HCl | NS | NS | S | NS |
| HI | S | S | S | NS |
| Name | Chemical Formula | Cation | Chemical Symbol | Atomic Number |
|---|---|---|---|---|
| Ammonia | NH3 | Hydrogen | H | 1 |
| Lithium hydroxide | LiOH | Lithium | Li | 3 |
| Sodium hydroxide | NaOH | Sodium | Na | 11 |
| Potassium hydroxide | KOH | Potassium | K | 19 |
| Name | Chemical Formula | Anion | Chemical Symbol | Atomic Number |
|---|---|---|---|---|
| Hydrofluoric acid | HF | Fluorine | F | 9 |
| Hydrochloric acid | HCl | Chlorine | Cl | 17 |
| Hydrobromic acid | HBr | Bromine | Br | 35 |
| Hydroiodic acid | HI | Iodine | I | 53 |

Who in the world puts a newspaper puzzle on an explosive device?
| If the last digit of the serial number is... | Numbered Clue | |
| odd | even | |
| Yellow & Orange | Blue & Orange | 1 |
| Green & Purple | Red & Blue | 2 |
| Blue & Orange | Yellow & Orange | 3 |
| Blue & Yellow | Red & Green | 4 |
| Red & Green | Green & Yellow | 5 |
| Red & Orange | Orange & Purple | 1 1 |
| Blue & Green | Green & Orange | 1 2 |
| Blue & Purple | Green & Purple | 1 3 |
| Yellow & Purple | Yellow & Purple | 2 1 |
| Green & Yellow | Blue & Purple | 2 2 |
| Red & Blue | Red & Orange | 3 1 |
| Red & Yellow | Red & Purple | 1 1 1 |
| None of the above | — | |

Try putting in 0000. No? Try 0001. Still not working? We might be here for a while...
See Appendix A for indicator identification reference.
See Appendix B for battery identification reference.
See Appendix C for port identification reference.
Using the wheel chart, starting from the center, pick a path by following the instructions below for each level you are on. (center level is 1, next one out is 2, etc.) Each path you take is the code digit corresponding to its level number unless contradicted by higher levels' instructions. Follow the final instructions after you complete all four levels.
On the first level, the paths are in order from the upper-right corner going clockwise. On the rest of the levels, they are also in clockwise order.
(follow all instructions in this order)
Colorblind helper: Hold the CLR button.

Greek letters are too pretentious, so we use Egyptian hieroglyphs.
This module consists of two rounds.
| Criterion | Two Reeds | Lion | Twisted Flax | Horned Viper | Water | Eye of Horus |
|---|---|---|---|---|---|---|
| #1 | top left | top middle | top right | bottom left | bottom middle | bottom right |
| #2 | first | second | third | fourth | fifth | sixth |
| #3 | PS/2 | Parallel | RJ-45 | Stereo RCA | Serial | DVI-D |
| Language | Non-English letters used by this language | English letters not used by this language |
|---|---|---|
| Albanian |
|
|
| Catalan |
| |
| Croatian |
|
|
| Czech |
| |
| Danish |
| |
| Esperanto |
|
|
| Estonian |
|
|
| Finnish |
|
|
| French |
| |
| German |
| |
| Hungarian |
| |
| Icelandic |
|
|
| Latvian |
|
|
| Lithuanian |
|
|
| Polish |
|
|
| Portuguese |
|
|
| Romanian |
| |
| Spanish |
| |
| Swedish |
| |
| Turkish |
|
|
| Welsh |
|
|
| Acute |
| Double acute |
| Grave |
| Circumflex |
| Umlaut or diaeresis |
| Hacek or caron |
| Cedilla |
| Comma |
| Ring |
| Breve |
| Tilde |
| Macron or line |
| Ogonek |
| Dot above |
| Slash or stroke |
| Ligature |
| Eth |
| Dotless i |
| Eszett or sharp s |
| Thorn |

If the bomb doesn’t kill us a brain haemorrhage will.
In order to defuse this part of the bomb you will need good 3D orientation skills. A virtual cube needs to be rotated into a specific orientation using the four keys along the bottom. Unfortunately there is no display to indicate the current orientation of the virtual cube so you will have to imagine the state of the cube yourself.
The two keys in the bottom left will yaw the cube clockwise or anti-clockwise, respective to looking at the cube from the top.
The two keys in the bottom right will roll the cube clockwise or anti-clockwise, respective to the virtual observer. The virtual observer’s position is indicated on the module as an eye. NOTE: The virtual observer’s position may change.
For example, if the eye is at the bottom then it is facing the ‘FRONT’ face. Pressing ‘Roll clockwise’ will place the ‘LEFT’ face where the ‘TOP’ face is.


Rotate the cube so that the initial left face is in the same position as the initial top face, then press the SET button.
Rotate the cube so that the initial bottom face is in the same position as the initial right face, then press the SET button.
Rotate the cube so that the initial bottom face is in the same position as the initial front face and the initial left face is in the same position as the initial bottom face, then press the SET button.
Rotate the cube so that the initial right face is in the same position as the initial bottom face and the initial back face is in the same position as the initial front face, then press the SET button.
Rotate the cube so that the initial top face is in the same position as the initial bottom face, then press the SET button.
Rotate the cube so that the initial top face is in the same position as the initial left face, then press the SET button.
If you get strike then the virtual cube will be reset to the initial position. Be aware you may need to select a new rule if the observer is now in a different position.

“I really believe that if you practice enough you could paint the ‘Mona Lisa' with a two-inch brush.”
After all that hard work defusing bombs, BOB wanted some time to relax and express his creativity. He didn’t take his color blindness into account however, so he is going to need some help.
First off, determine the type of color blindness that BOB has.
Take the first rule that applies*:
Now swap all colors with their respective colors in the table below. Do this by selecting a color first, then select a field to paint in that color. A wrong color, or painting over a correct color will incur a strike. Also, don’t repaint over a field you have already correctly painted in. This will also incur a strike.
| Protanomaly | Deuteranomaly | Tritanopia |
| Black → Red | Red → Green | Blue ⇄ Gray |
| Brown → Green | Blue → Pink | Purple ⇄ Black |
| Orange → Red | Green ⇄ Yellow | Green → Blue |
| Blue → Red | Pink → Gray | Orange ⇄ Red |
| Green → Orange | Purple ⇄ Brown | |
| Purple ⇄ Pink |
*: BUT, if you have exactly 2 DVI-D, 1 RJ45 and a lit CLR, BOB would like you to express your own creativity, and change every field into another color of choice.
Fortunately this password doesn't seem to meet standard government security requirements: 22 characters, mixed case, numbers in random order without any palindromes above length 3.
| about | after | again | below | could |
| every | first | found | great | house |
| large | learn | never | other | place |
| plant | point | right | small | sound |
| spell | still | study | their | there |
| these | thing | think | three | water |
| where | which | world | would | write |
Unfortunately these passwords may have some special characters in them. That's at least one point towards meeting standard government security requirements.
Use the tables to help find the right password for the right language.
Refer to the original manual of Password for instructions on how to disarm the module.
| agent | barva | bomba | budík | copak |
| domov | dráha | hokej | hvozd | kabel |
| kočka | kolem | kosti | lustr | místo |
| okolo | pokoj | pomoc | pozdě | praha |
| práce | právo | písek | rehek | skála |
| strom | strop | škola | šperk | tráva |
| vazba | volat | volba | zájem | zásah |
| andre | deres | dreng | efter | endnu |
| finde | først | grine | hende | hjælp |
| hvert | ingen | koste | kunne | kunst |
| kæmpe | ligne | lille | lærer | minut |
| nogle | onkel | point | siden | sidst |
| skole | snyde | stave | store | tekst |
| tænke | under | viden | ville | vinde |
| angst | atmen | beten | bombe | danke |
| draht | druck | drück | farbe | fehlt |
| ferse | kabel | knall | knapp | knopf |
| leere | legal | lehre | mathe | matte |
| panik | pieps | rauch | ruhig | saite |
| sehne | seite | sende | strom | super |
| timer | übrig | verse | warte | zange |
| about | after | again | below | could |
| every | first | found | great | house |
| large | learn | never | other | place |
| plant | point | right | small | sound |
| spell | still | study | their | there |
| these | thing | think | three | water |
| where | which | world | would | write |
| afero | aliel | aliom | ambaŭ | antaŭ |
| astro | bombo | daŭre | domoj | dumil |
| iliaj | inter | karoo | lampo | larĝa |
| lavas | legas | lerni | malek | neniu |
| okdek | pagas | paŭzo | pensi | pinto |
| plaĉe | povas | revas | studi | super |
| ŝerco | trans | trefo | turni | unuan |
| abajo | altar | bajar | bomba | botón |
| cable | cerca | corto | delta | donde |
| estar | falta | gomas | grasa | hogar |
| hueso | listo | lugar | magia | miedo |
| mundo | nunca | otros | pasar | pasos |
| perca | plata | punto | queso | ronda |
| salto | suena | tasar | traba | valor |
| aitan | aknal | aksel | diiva | dinod |
| edasi | eesti | ehtne | haile | happe |
| herne | ihkan | jumal | juura | kaart |
| kanad | kevad | magus | morss | nupud |
| piima | ratas | ringi | rumal | särin |
| sügav | sügis | tabav | taibu | taust |
| tugev | vaata | õhtus | õigem | ütlen |
| alava | etelä | hikeä | huone | korva |
| kuksa | kuusi | käyrä | luomi | maata |
| massa | metsä | museo | neljä | nuori |
| odota | onnea | orava | paras | pommi |
| puoli | pätkä | ravut | risti | suoli |
| suora | tammi | tukki | tuppi | tylsä |
| ulkoa | uudet | viisi | viiva | väljä |
| abris | agent | aimer | bidon | bosse |
| canne | coule | digue | engin | fondu |
| gaffe | givre | hibou | idiot | incas |
| jambe | jupes | kayak | lapin | libre |
| micro | nuage | okapi | oxyde | panda |
| plume | purin | robot | ruche | scier |
| tigre | tronc | urine | wagon | zeste |
| altyd | amper | brûke | dêrom | fêste |
| fuort | grien | hjoed | huzen | iepen |
| ierde | iisko | ingel | irony | iuwen |
| jiske | krekt | lêste | piper | priuw |
| proai | pronk | pykje | sipel | snein |
| sneon | stjer | strie | troan | trije |
| tryst | útien | wiist | wrâld | wurch |
| ארמון | אבדון | אבטיח | ארטיק | אטליז |
| בוטיק | ברווז | ביטוח | דימוי | דוגמה |
| זירוז | זרנוק | חללית | יהודי | כוסמת |
| כיוון | מחוגה | מצודה | נחשול | ניצול |
| סיפוח | סיסמה | פרוטה | צלצול | ציפור |
| ריבוע | רעיון | שליטה | שלגון | שאלות |
| שמיכה | שיעול | תאבון | תנשמת | תרדמת |
| bacca | banno | benna | caldo | calma |
| calva | cassa | gallo | gassa | gatto |
| landa | larga | lazzo | malva | manda |
| manna | pacca | panda | panna | parto |
| passa | patto | pazzo | posso | razza |
| razzo | ruota | saldo | salma | salto |
| tardo | targa | tasca | tassa | tosse |
| 공포 | 공자 | 거짓 | 노력 | 누락 |
| 노랑 | 도망 | 다만 | 두릅 | 로봇 |
| 리본 | 라면 | 만두 | 무단 | 머슴 |
| 부산 | 복수 | 박수 | 신사 | 신기 |
| 실패 | 우울 | 우연 | 전기 | 지진 |
| 친구 | 천사 | 컬러 | 코인 | 타박 |
| 투항 | 폭파 | 폭사 | 호박 | 후회 |
| アツクナル | アリエナイ | アンゴウ | カイジョ | カルガル |
| キンチョウ | ギョウシ | ケーブル | ゲンゴ | コタエナシ |
| ストレート | ズノウハ | センモンカ | ゼッタイ | ゼンマイ |
| ソウゼン | ソウダン | ソウマトウ | ゾンビ | テサバキ |
| テロリスト | ディスク | デントウ | ナガオシ | ハイリスク |
| バクハツ | バクヤク | パイロン | パズル | マチガイ |
| マニュアル | メイキュウ | ワカラナイ | ワルシャワ | ワールド |
| ander | boven | draad | eerst | groot |
| ieder | klank | klant | klein | kling |
| klink | klopt | knalt | kruid | kruit |
| links | naast | negen | niets | nogal |
| onder | plant | ploft | speld | spelt |
| stuur | tekst | wacht | water | welke |
| zendt | zenuw | zeven | zweed | zweet |
| alene | andre | angre | angst | blank |
| bombe | celle | enorm | etter | feste |
| først | gjort | hjort | igjen | ingen |
| kabel | klipp | knapp | lampe | liten |
| minne | modul | neste | nerve | ordet |
| press | scene | slett | slipp | snart |
| somle | start | stopp | trykk | vende |
| atlas | balon | bomba | długo | domek |
| drzwi | dziki | ekran | gogle | gumka |
| honor | kabel | karta | komin | kości |
| kotek | kreda | łóżko | łyżwy | mleko |
| morze | nauka | niebo | obraz | ogień |
| osiem | pudło | świat | szafa | szyba |
| taśma | wiatr | włosy | wyraz | zegar |
| achar | aluno | baixo | breve | caixa |
| canto | carta | certo | cinco | coisa |
| disco | falar | horas | letra | livro |
| lugar | menor | menos | mesmo | mundo |
| nobre | nunca | ontem | outro | parou |
| pensa | pobre | ponto | praia | salas |
| sobre | terra | troca | trono | verde |
| аллея | бомба | вверх | взрыв | внизу |
| вьюга | горох | готов | густо | давай |
| давно | далее | книга | конец | лилия |
| линия | можно | назад | нравы | песец |
| песня | порох | порыв | потом | право |
| пусто | румба | скоро | супер | травы |
| тумба | тунец | фугас | шприц | щипцы |
| andas | blank | bomba | börja | efter |
| eller | först | hitta | hålla | höger |
| inget | kabel | klipp | knapp | lampa |
| liten | lösen | minne | modul | måste |
| något | nästa | panik | släpp | snart |
| stava | stopp | svara | tiden | tryck |
| tänka | varje | vilka | visst | vänta |
| กระทะ | เกมกด | งงงวย | งมงาย | ชมเชย |
| ตนเอง | ถาโถม | ทนทาน | ทบทวน | ธรรมะ |
| บนบาน | บรรจบ | ประจบ | ประถม | ปรากฏ |
| ผลงาน | พบเจอ | พบพาน | พรหมา | รบกวน |
| ระบาด | ระบาย | ระราน | ลงนาม | ลนลาน |
| ละลาย | ละเลง | ละเลย | วนรอบ | สายตา |
| แสงไฟ | แหกตา | องอาจ | อากาศ | เออออ |
| 关门放狼狗 | 关鱼杀华凶 | 关看鸡录片 | 关鸡宁还看 | 关鸡看杀鱼 |
| 放心看手鸡 | 狼心贝狗吃 | 贝宁杀乌鸡 | 贝看穿了吗 | 贝宁穿贝心 |
| 宁穿了华鸡 | 宁穿了贝心 | 宁贝鳄片了 | 宁还看凶鸡 | 宁吃乌鸡吗 |
| 杀鱼鳄了吗 | 鸡狗还宁吗 | 鸡杀了凶手 | 华贝还了吗 | 凶手杀狼狗 |
| 凶手贝关了 | 看狼吃鳄鱼 | 看片关手鸡 | 录贝狼片了 | 片片贝狗吃 |
| 片片鱼了鸡 | 今网吃了鸡 | 网还放华鸡 | 鳄鱼吃了吗 | 鳄了吗关网 |
| 还看宁吃鸡 | 心手吃鸡了 | 手鸡看华鸡 | 手鸡录鳄录 | 手鸡贝网录 |
| Lang. | Button |
|---|---|
| CS | Potvrdit |
| DA | Indsend |
| DE | Senden |
| EN | Submit |
| EO | Ek |
| ES | Enviar |
| ET | Sisesta |
| FI | Lähetä |
| FR | Valider |
| FY | Yntsjinje |
| HE | שלח |
| IT | Invio |
| JA | 確認 |
| KO | 확인 |
| NL | Gereed |
| NO | Bekreft |
| PL | Wyślij |
| PT | Enviar |
| RU | Готово |
| SV | Ange |
| TH | ส่ง |
| ZH | 胡说 |

This safe either contains immense riches, or is empty.
Dial |
||||||
Top |
Bottom |
|||||
Left |
Middle |
Right |
Left |
Middle |
Right |
|
Serial |
||||||
First |
Second |
Third |
Fourth |
Fifth |
All |
|
A |
8 |
3 |
4 |
8 |
9 |
0 |
B |
10 |
1 |
3 |
7 |
3 |
8 |
C |
2 |
1 |
1 |
5 |
3 |
6 |
D |
11 |
6 |
11 |
11 |
7 |
7 |
E |
0 |
5 |
5 |
8 |
2 |
1 |
F |
4 |
2 |
7 |
7 |
1 |
5 |
G |
7 |
4 |
4 |
2 |
10 |
5 |
H |
8 |
3 |
6 |
6 |
6 |
5 |
I |
0 |
11 |
0 |
0 |
9 |
10 |
J |
2 |
11 |
8 |
0 |
5 |
6 |
K |
5 |
2 |
5 |
1 |
0 |
4 |
L |
1 |
9 |
8 |
11 |
11 |
11 |
M |
1 |
7 |
9 |
5 |
6 |
2 |
N |
9 |
5 |
1 |
4 |
4 |
9 |
O |
5 |
9 |
8 |
10 |
2 |
8 |
P |
3 |
10 |
9 |
1 |
9 |
7 |
Q |
4 |
10 |
6 |
1 |
4 |
8 |
R |
8 |
0 |
4 |
0 |
6 |
11 |
S |
9 |
4 |
0 |
6 |
3 |
10 |
T |
7 |
6 |
7 |
11 |
5 |
3 |
U |
11 |
9 |
6 |
3 |
11 |
1 |
V |
11 |
11 |
2 |
8 |
1 |
0 |
W |
6 |
0 |
11 |
6 |
11 |
2 |
X |
4 |
2 |
7 |
2 |
8 |
10 |
Y |
10 |
7 |
10 |
10 |
8 |
9 |
Z |
3 |
7 |
1 |
10 |
0 |
4 |
0 |
7 |
0 |
3 |
5 |
8 |
6 |
1 |
9 |
10 |
10 |
9 |
1 |
2 |
2 |
2 |
5 |
11 |
7 |
7 |
3 |
3 |
10 |
8 |
10 |
4 |
10 |
4 |
4 |
6 |
8 |
0 |
3 |
5 |
0 |
5 |
6 |
3 |
3 |
3 |
0 |
11 |
6 |
1 |
1 |
5 |
2 |
7 |
3 |
7 |
0 |
6 |
2 |
4 |
2 |
1 |
8 |
5 |
4 |
9 |
9 |
10 |
7 |
9 |
3 |
8 |
2 |
9 |
4 |
9 |

Complicated Wires just isn’t complicated enough.
| Red Solid |
Orange Dash/3 Dots |
Yellow Dash/Dot |
Green Dashes |
Blue Dots |
|---|---|---|---|---|
| The wire is red, yellow, blue, or white. | The wire shares the same color as its arrow. | The wire’s star is black. | The wire’s position on the bottom is even. | The wire crosses another wire.[1] |
| Letter | Instruction |
|---|---|
| C | Cut the wire. |
| F | Cut the wire (and any other F wires) before all other wires. |
| L | Cut the wire (and any other L wires) after all other wires. |
| W | Cut the wire if more of the LEDs are on than off. |
| T | Cut the wire if the top LED is on. |
| U | Cut the wire if its arrow points up or down. |
| M | Cut the wire if the arrow points down or right. |
| H | Cut the wire if the wire shares a star with another wire. |
| P | Cut the wire if its position at the bottom is equal to the number of ports. |
| B | Cut the wire if its position at the bottom is equal to the number of batteries. |
| I | Cut the wire if its position at the bottom is equal to the number of indicators. |
| Q | Cut the wire if the color of the wire is unique. |
| J | Cut the wire if, at the bottom, it is adjacent to an orange or purple wire. |
| V | Cut the wire if the serial number has a vowel, or if the bomb has a USB port. |
| R | Cut the wire if its arrow direction is unique. |
| D | Do not cut the wire. |
[1] Specifically, two wires are considered “crossing” if their top connectors (near the stars) are in the opposite order from their bottom connectors (near the arrows).
What do you get when you drop a piano down a mine shaft? A flat minor.
See Appendix A for indicator identification reference.
See Appendix B for battery identification reference.
See Appendix C for port identification reference.
See the next page for piano/keyboard reference.
| Required Symbol(s) | Further Requirements | Note Sequence |
| b | Last digit of serial number is even | Bb Bb Bb Bb Gb Ab Bb Ab Bb |
| c or # | 2 or more battery holders | Eb Eb D D Eb Eb D Eb Eb D D Eb |
| n and U | (No other requirements) | E F# F# F# F# E E E |
| C or T | RCA port is present | Bb A Bb F Eb Bb A Bb F Eb |
| B | SND indicator is present and lit | E E E C E G G |
| m or U or c | 3 or more batteries | C# D E F C# D E F Bb A |
| b and # | (No other requirements) | G G C G G C G C |
| C or m | Serial number contains a 3, 7 or 8 | A E F G F E D D F A |
| n or T or B | (No other requirements) | G G G Eb Bb G Eb Bb G |
| (No requirement) | (No other requirements) | B D A G A B D A |
Use the following graphic as a reference to how tones are mapped onto a standard 12-note piano/keyboard.


Will you write your way into her heart?
| Melanie | Jane | Hana | Lacy |
|---|---|---|---|
 |
 |
 |
 |
| Melanie | clarity | flow | fatigue | hollow | Jane |
|---|---|---|---|---|---|
| energy | sunshine | ocean | reflection | identity | black |
| crowd | heart | weather | words | past | solitary |
| relax | dance | weightless | morality | gaze | failure |
| bunny | lovely | romance | future | focus | search |
| Hana | cookies | compassion | creation | patience | Lacy |

We are playing weird 4-card KTANE Mao. Play begins with me and proceeds in a clockwise direction.
To find out what the current rules of the game are, examine the cards already played and determine which two of the following rules are active and which one is inactive:
| First character | Second character | Previously-played suit | |||
|---|---|---|---|---|---|
| ♠ | ♥ | ♣ | ♦ | ||
| Letter | Letter | ♠ or ♥ | ♥ or ♣ | ♣ or ♦ | ♦ or ♠ |
| Letter | Number | ♠ or ♦ | ♥ or ♠ | ♣ or ♥ | ♦ or ♣ |
| Number | Letter | ♥ or ♣ | ♣ or ♦ | ♦ or ♠ | ♠ or ♥ |
| Number | Number | ♦ or ♣ | ♠ or ♦ | ♥ or ♠ | ♣ or ♥ |
Ranks are considered to be numbered from 1 (Ace) to 13 (King).
Only one of the four cards in front of you is valid to play under the two active rules.

Usually in poker, the wrong call means losing a lot of money. Here, it means death.
SEE TABLE PK71 FOR POKER HAND RANKINGS.
The module will display a single face-up card.
You must push two of the buttons and one of the face-down cards in order to disarm it.
Use the given card to determine which of the four flow charts you should use.
Use the flow charts to determine your 5-card poker hand and press the appropriate button.
Your opponent will then respond. Use the two-way table to determine whether the response is the “truth” or a “bluff”.
Your opponent will then make a bet. Use the betting rules to determine which of the four final cards you should press.
| Starter card | |||||
|---|---|---|---|---|---|
| Ace | King | Five | Two | ||
| Truth | Truth | Truth | Bluff | “Terrible play!” | Opponent Response |
| Bluff | Truth | Truth | Bluff | “Awful play!” | |
| Truth | Bluff | Bluff | Bluff | “Really?” | |
| Bluff | Bluff | Truth | Bluff | “Really, really?” | |
| Truth | Bluff | Bluff | Truth | “Sure about that?” | |
| Bluff | Truth | Truth | Truth | “Are you sure?” | |
Poker hands are ranked (strongest to weakest) as follows:
 |
Royal Flush Ten, Jack, Queen, King, Ace of the same suit. |
 |
Straight Flush Five consecutive values of the same suit. (N.B. Aces can be high or low but not both simultaneously). |
 |
Four of a Kind (Quads) Four cards of the same value. |
 |
Full House Three cards of the same value and two cards of another value. |
 |
Flush Five cards of the same suit. (N.B. In the event two flushes are held, the highest card wins). |
 |
Straight Five consecutive values of any suit. (N.B. Aces can be high or low but not both simultaneously). (N.B. In the event two straights are held, the highest card wins). |
 |
Three of a Kind (Trips) Three cards of the same value. |
 |
Two Pair Two cards of the same value and two cards of another value. |
 |
Pair Two cards of the same value. |
 |
No Hand No matching values. (N.B. In the event that two players have no hand, the highest card wins). |

What’s a pentecostal hexadecimal contradiction?
Identify the polyhedron[1] on the module and find its corresponding net[2] below.
The number in the bottom-left of the module shows the current face on the polyhedron. The number in the bottom-right shows the destination face that must be reached to defuse the module.
Navigate to the destination face without crossing any of the thick lines. These are not visible on the module. The letters and the curved lines indicate faces that are connected even though they are not adjacent in the net.

Not that kind of probing...
This module has six wires and two crocodile clips. Each wire carries three alternating currents (AKA 3-phase current), each phase a different frequency. The possible frequencies are 10Hz, 22Hz, 50Hz and 60Hz.
In order to probe the circuit you need to connect the red clip to a wire and the blue clip to a different wire. Common frequencies in both wires will cancel out and the display will show the remaining frequencies, in order from lowest to highest.
If the red and white wire contains a 50Hz current connect the red clip to the wire with the frequencies 10Hz, 22Hz and 60Hz, otherwise if the red and yellow wire does not contain a 10Hz current connect the red clip to the wire with the frequencies 22Hz, 50Hz and 60Hz, otherwise connect the red clip to the wire with the frequencies 10Hz, 22Hz and 50Hz.
If the yellow and red wire contains a 10Hz current connect the blue clip to the wire with the frequencies 10Hz, 50Hz and 60Hz otherwise connect the blue clip to the wire that contains the frequencies 10Hz, 22Hz and 50Hz.
Leave the clips connected for at least six seconds to defuse. Leaving the incorrect wires connected for more than six seconds will cause a strike.
NOTE: Be aware that each time a strike is gained the frequencies in each wire may change.

Is it me or is it getting hot in here?
This module has 2 stages. The temperature stage and the water stage. You will need to keep the value of the temperature stage to work out the value of the water stage.
Submit the temperature stage before the water stage. If you make a mistake, press the reset button.
If the number is not correct for that stage, a strike will be given, and the module must be started over.
HOWEVER, if a lit FRK indicator and a lit BOB indicator are present, submit 13 for the temperature and 37 for the water.
If a number is greater than 99, only use the last two digits of the number.
|
Temperature Starting at 0, if the serial number contains one or more of the letters and numbers: RADI4T07, add 10 for every occurrence of each letter or number. For every pair of AA batteries, add 5 to the number. For every D battery, take 5 away from the number. If you end up with a negative number after you have applied these rules then multiply by -1. Submit the number and keep the answer for the water stage. |
|
Water Take the number you got for the temperature and divide it by 3. If the number is not a whole number, only take the integer part of the number. If there is an RJ-45 port, add 50 to the number. If there are any lit indicators, add 20 to the number. If there are any unlit indicators, follow the table for unlit indicators below. At the end if you receive a negative number multiply by -1. Submit this number. |
|
Unlit indicators table BOB --> +40 NSA --> -10 FRQ --> +2 MSA --> +25 FRK --> -1 |

“It is easier to resist at the beginning than at the end.”
― Leonardo da Vinci, on procrastination
The module contains 2 input pins (A and B), 2 resistors, and 2 output pins (C and D). Follow the rules to make the correct connections. To make a connection, click one pin and then another. Press CLEAR to remove all connections.
Note: all resistance values are checked to be within 5% accuracy.
Note: this means C and D will also be connected with some non-infinite resistance. This value is not checked as part of your solution, and so can be anything.
Consult the following page to learn how to produce the target resistance.
An input and output can be connected via one of five paths.
For the curious... it’s: 1 / (1 / (top resistance) + 1 / (bottom resistance))
Don’t worry, this won’t be on the test!
Each resistor has a sequence of three colored bands, indicating a two-digit number and a multiplier. A fourth band indicates a tolerance value (not used). The fourth band is separated by a gap from the first three. Resistors can be rotated; take care to read the bands in the correct direction.
| Color | First Band | Second Band | Multiplier |
|---|---|---|---|
| Black | 0 | 0 | 1Ω |
| Brown | 1 | 1 | 10Ω |
| Red | 2 | 2 | 100Ω |
| Orange | 3 | 3 | 1,000Ω |
| Yellow | 4 | 4 | 10,000Ω |
| Green | 5 | 5 | 100,000Ω |
| Blue | 6 | 6 | 1,000,000Ω |
| Violet | 7 | 7 | 10,000,000Ω |
| Gray | 8 | 8 | — |
| White | 9 | 9 | — |
| Gold | — | — | 0.1Ω |
| Silver | — | — | 0.01Ω |
For example, Green Violet Yellow indicates 57 × 10,000Ω = 570,000Ω.

Anecdotal evidence suggests that in the game of Rock-Paper-Scissors, players familiar with each other will tie 75 to 80% of the time due to the limited number of outcomes. Rock-Paper-Scissors-Lizard-Spock was created by Internet pioneer Sam Kass as an improvement on the classic game. All hail Sam Kass. Hail.
To disarm this module, determine the correct signs to press.
First, determine the decoy. If the five signs are arranged in a regular pentagon, there is no decoy. Otherwise, the decoy is the one that is in the middle of the arrangement or in the middle in a line of three (horizontal, diagonal or vertical).
Next, go through the rows of the following table and determine the highest-scoring sign in each row. Stop at the first row in which there’s no tie and the highest-scoring sign is not the decoy. Then press the signs on the module that beat this sign. If no row applies, press all signs except the decoy.
Which sign beats which? It’s very simple. Scissors cuts paper. Paper covers rock. Rock crushes lizard. Lizard poisons Spock. Spock smashes scissors. Scissors decapitates lizard. Lizard eats paper. Paper disproves Spock. Spock vaporizes rock. And, as it always has, rock crushes scissors.
| # of occurrences of: | Rock | Paper | Scissors | Lizard | Spock |
|---|---|---|---|---|---|
|
serial number letter
Skip this row if the serial number contains X or Y.
|
R, O | P, A | S, I | L, Z | C, K |
|
port
Skip this row if a PS/2 port is present.
|
RJ-45 | Parallel | Serial | DVI-D | Stereo RCA |
|
lit indicator
Skip this row if a lit TRN indicator is present.
|
FRK, FRQ | BOB, IND | CAR, SIG | CLR, NSA | SND, MSA |
|
unlit indicator
Skip this row if an unlit TRN indicator is present.
|
FRK, FRQ | BOB, IND | CAR, SIG | CLR, NSA | SND, MSA |
| serial number digit | 0, 5 | 3, 6 | 1, 9 | 2, 8 | 4, 7 |

| U | L | F | Moves | |
|---|---|---|---|---|
| 0 | 1 | 2 | L’ | F’ |
| 3 | 4 | 5 | D’ | U’ |
| 6 | 7 | 8 | U | B’ |
| 9 | A | B | F | B |
| C | D | E | L | D |
| F | G | H | R’ | U |
| I | J | K | U’ | F |
| L | M | N | B’ | L’ |
| O | P | Q | B | R |
| R | S | T | D | L |
| U | V | W | R | D’ |
| X | Y | Z | F’ | R’ |
| Color | Number |
|---|---|
| Yellow | 1 |
| Blue | 2 |
| Red | 3 |
| Green | 4 |
| Orange | 5 |
| White | 6 |
Remember this impossible thing? Now it’s on a bomb. Have fun.
The bomb presents an unsolved Rubik’s cube. To disarm the module, solve the Rubik’s cube. The following steps can be used to determine the sequence of moves necessary to solve it. If you get lost, press the Reset button to return the cube to its original state.
Clarifications:
Faces: U = up, D = down, L = left, R = right, F = front, B = back

You know what? Screw this module...

Clear communication is crucial when defusing bombs. One can only assume that this module doesn’t want to be defused.
| SEA SHELLS | SHE SHELLS | SEA SELLS | SHE SELLS | |
|---|---|---|---|---|
| SHE SELLS | BDABDAB | ACEEAC | EACEACE | DAABDAB |
| SHE SHELLS | BEEBBE | CDCCDB | EAEAEA | BEEDA |
| SEA SHELLS | ABABA | EAAEEA | DBEAC | ABDBAA |
| SEA SELLS | ACACEAC | DBAEC | EBDADAB | CECEC |
| ON THE SEA SHORE | A = shoe D = sit |
B = shih tzu E = sushi |
C = she |
|---|---|---|---|
| ON THE SHE SORE | A = can D = 2 |
B = toucan E = cancan |
C = tutu |
| ON THE SHE SURE | A = witch D = twitch |
B = switch E = stitch |
C = itch |
| ON THE SEESAW | A = burglar alarm D = burger |
B = Bulgaria E = llama |
C = armour |

This module demands attention from the sea - unlucky for you the bomb’s bone dry.
See the next page for semaphore reference.
Numbers are signalled by first signalling ‘Numerals’, then the numbers. Similarly, letters are signalled by first signalling ‘Letters’, then the letters.
Use the following graphics as a reference to how to interpret semaphore characters.
 Rest / Space |
 Numerals |
 Error / Attention |
 A or 1 |
 B or 2 |
 C or 3 |
 D or 4 |
 E or 5 |
 F or 6 |
 G or 7 |
 H or 8 |
 I or 9 |
 J or Letters |
 K or 0 |
 L |
 M |
 N |
 O |
 P |
 Q |
 R |
 S |
 T |
 U |
 V |
 W |
 X |
 Y |
 Z |
 Cancel / Annul |
(All images by Denelson83, used under CC-BY-SA-3.0, via Wikimedia Commons)
Semaphore
All images by Denelson83, used under CC-BY-SA-3.0, via Wikimedia Commons

Modules based on card games seem to be a thing now.

The concept is simple: change a shape into another shape according to certain rules. The rules, however, are not so simple.
Starting at the shape displayed on the module, follow the flowchart and submit the first shape which is visited twice.

Sassy Sally said sorry since soggy Steven slurped soup.
Only press the KEEP button when the slots are in a LEGAL state. Only pull the lever when the slots are in an ILLEGAL state. The module will automatically defuse after 4 pulls of the lever.
The slots are in an ILLEGAL state if any of these statements are true:
UNDERLINED words are placeholders, substitute them for the correct word using the matrix below and the keyword found on the module’s display. This keyword changes when the lever is pulled.
| Placeholder | ||||||||
|---|---|---|---|---|---|---|---|---|
| Sassy | Silly | Soggy | Sally | Simon | Sausage | Steven | ||
| Key Word | Sassy | Blue | Red | Green | Cherry | Grape | Bomb | Coin |
| Silly | Blue | Green | Red | Coin | Bomb | Grape | Cherry | |
| Soggy | Green | Blue | Red | Coin | Cherry | Bomb | Grape | |
| Sally | Red | Blue | Green | Grape | Cherry | Bomb | Coin | |
| Simon | Red | Green | Blue | Bomb | Grape | Cherry | Coin | |
| Sausage | Red | Blue | Green | Grape | Bomb | Coin | Cherry | |
| Steven | Green | Red | Blue | Cherry | Bomb | Coin | Grape | |
This is like one of those toys you played with as a kid where you have to match the pattern that appears, except this one is a knockoff that was probably purchased at a dollar store.
If the serial number contains a vowel:
| Red Flash | Blue Flash | Green Flash | Yellow Flash | ||
|---|---|---|---|---|---|
| Button to press: | No Strikes | Blue | Red | Yellow | Green |
| 1 Strike | Yellow | Green | Blue | Red | |
| 2+ Strikes | Green | Red | Yellow | Blue | |
If the serial number does not contain a vowel:
| Red Flash | Blue Flash | Green Flash | Yellow Flash | ||
|---|---|---|---|---|---|
| Button to press: | No Strikes | Blue | Yellow | Green | Red |
| 1 Strike | Red | Blue | Yellow | Green | |
| 2+ Strikes | Yellow | Green | Blue | Red | |

He’s angry! He’s furious! He’s enraged! He’s had it!
|
Stage 1: first flashing color Stage 2: second flashing color Stage 3: third flashing color |
||||||||||||||||||||||||||||||||||||||||||||||||||||||
|---|---|---|---|---|---|---|---|---|---|---|---|---|---|---|---|---|---|---|---|---|---|---|---|---|---|---|---|---|---|---|---|---|---|---|---|---|---|---|---|---|---|---|---|---|---|---|---|---|---|---|---|---|---|---|---|
| red | orange | yellow | green | blue | purple | ||||||||||||||||||||||||||||||||||||||||||||||||||
| If three adjacent colors flashed in clockwise order | FFC | CEH | HAF | ECD | DDE | AHA | |||||||||||||||||||||||||||||||||||||||||||||||||
| Otherwise, if a color flashed, then an adjacent color, then the first again | AHF | DFC | ECH | CDE | FEA | HAD | |||||||||||||||||||||||||||||||||||||||||||||||||
| Otherwise, if at most one color flashed out of red, yellow, and blue | DED | ECF | FHE | HAA | AFH | CDC | |||||||||||||||||||||||||||||||||||||||||||||||||
| Otherwise, if there are two colors opposite each other that didn’t flash | HCE | ADA | CFD | DHH | EAC | FEF | |||||||||||||||||||||||||||||||||||||||||||||||||
| Otherwise, if two adjacent colors flashed in clockwise order | CAH | FHD | DDA | AEC | HCF | EFE | |||||||||||||||||||||||||||||||||||||||||||||||||
| Otherwise | EDA | HAE | AEC | FFF | CHD | DCH | |||||||||||||||||||||||||||||||||||||||||||||||||

I’m not sure this even qualifies as Simon Says...
| Priority | Top-Left Button Colour | |||
| ■ Red | ▲ Yellow | ● Green | ★ Blue | |
| Highest | ■ Red | ★ Blue | ● Green | ▲ Yellow |
| High | ★ Blue | ▲ Yellow | ■ Red | ● Green |
| Low | ● Green | ■ Red | ▲ Yellow | ★ Blue |
| Lowest | ▲ Yellow | ● Green | ★ Blue | ■ Red |
Stage 1
|
Stage 2
|
Stage 3
|
Stage 4
|

I’d say bombs have everything but the kitchen sink, but apparently they have that too.
This module will present you with a sink with two knobs: Hot and cold, use the number of batteries to figure out which row in Table A to follow. This row will give you a series of numbers corresponding to the conditions in the numbered list. For each conditional that’s true, turn the knob in the “If true” column. For each conditional that’s false, turn the knob in the “If false” column.
| # of batteries | Rule Sequence | If True | If False |
|---|---|---|---|
| 0-1 | 2,1,4 | Hot | Cold |
| 2-3 | 3,6,2 | Cold | Hot |
| 4-5 | 5,3,1 | Cold | Hot |
| 6+ | 5,6,4 | Hot | Cold |

This has to be illegal somehow...
See Appendix A for indicator identification reference.
See Appendix B for battery identification reference.
See Appendix C for port identification reference.
See the page after next for a mathematical terms reference.
|
All Slots
Replace any 2 with a 5 and any 7 with a 0. For every lit indicator add 1 to the number and subtract 1 for every unlit indicator. If the number is a multiple of 3, add 4 to it. Otherwise, if the number is greater than 7, multiply it by 2. Otherwise, if the number is less than 3 and it's an even number, divide it by 2. Otherwise, if there is an RCA or a PS/2 port on the bomb, skip the rest of the rules in this section. Otherwise, take the original digit and add the number of batteries on the bomb. |
|
1st Slot
If the number is even and greater than 5, divide it by two. Otherwise, if the number is prime, add the rightmost number in the serial number. Otherwise, if there is a parallel port on the bomb, multiply it by -1. Otherwise, if the original digit to the right is odd, leave this number unchanged. Otherwise, subtract 2 from it. |
|
2nd Slot
If there is an unlit BOB indicator, leave this number unchanged. Otherwise, if the number is 0, add the original digit from the 1st display. Otherwise, if the number is in the Fibonacci sequence, add the next number from the Fibonacci sequence based on the first occurrence of the number. Otherwise, if the number is greater than or equal to 7, add 4. Otherwise, multiply it by 3. |
|
3rd Slot
If there is a serial port on the bomb, add the largest number from the serial number. Otherwise, if the original digit is the same as any of the other original digits, leave this number unchanged. Otherwise, if the number is greater than or equal to 5, add up all the individual digits in the binary form of the original digit for the new number. Otherwise, add 1 to the number. |
| 0 | 1 | 2 | 3 | 4 | 5 | 6 | 7 | 8 | 9 |
| 10 | 11 | 12 | 13 | 14 | 15 | 16 | 17 | 18 | 19 |
| 20 | 21 | 22 | 23 | 24 | 25 | 26 | 27 | 28 | 29 |
| Decimal | Binary Form |
| 0 | 0000 |
| 1 | 0001 |
| 2 | 0010 |
| 3 | 0011 |
| 4 | 0100 |
| 5 | 0101 |
| 6 | 0110 |
| 7 | 0111 |
| 8 | 1000 |
| 9 | 1001 |
| 10 | 1010 |
See Appendix Math for more detailed information.

Use the power of the Dovahkiin to disarm the module.
SEE SECTION SK75 FOR A LARGER MAP OF SKYRIM.
| If battery count < 3... | Otherwise, if battery count < 6... | Otherwise... |
|---|---|---|
| Nord | Imperial | Dunmer |
| Khajiit | Orc | Orc |
| Breton | Redguard | Nord |
| Argonian | Altmer | Altmer |
| Dunmer | Dunmer | Khajiit |
| Altmer | Argonian | Breton |
| Redguard | Breton | Redguard |
| Orc | Khajiit | Imperial |
| Imperial | Nord | Argonian |
| If a Breton is present but not selected... | Otherwise, if an Orc is present but not selected... | Otherwise, if a Redguard is selected... | Otherwise... |
|---|---|---|---|
| Axe of Whiterun | Blade of Woe | Chillrend | Mace of Molag Bal |
| Dawnbreaker | Volendrung | Bow of the Hunt | Firiniel's End |
| Windshear | Mace of Molag Bal | Dawnbreaker | Volendrung |
| Blade of Woe | Axe of Whiterun | Volendrung | Windshear |
| Firiniel's End | Bow of the Hunt | Windshear | Axe of Whiterun |
| Bow of the Hunt | Chillrend | Firiniel's End | Blade of Woe |
| Volendrung | Dawnbreaker | Axe of Whiterun | Dawnbreaker |
| Chillrend | Firiniel's End | Mace of Molag Bal | Bow of the Hunt |
| Mace of Molag Bal | Windshear | Blade of Woe | Chillrend |
| If any bow is selected... | Otherwise, if a Daedric weapon is selected... | Otherwise, if a non-Daedric sword is selected... | Otherwise, if the Axe of Whiterun is selected... | Otherwise... |
|---|---|---|---|---|
| Dragon Priest | Frost Troll | Draugr Overlord | Cave Bear | Blood Dragon |
| Alduin | Mudcrab | Cave Bear | Frost Troll | Mudcrab |
| Mudcrab | Frostbite Spider | Blood Dragon | Frostbite Spider | Frostbite Spider |
| Draugr Overlord | Draugr Overlord | Mudcrab | Blood Dragon | Alduin |
| Draugr | Draugr | Draugr | Draugr | Frost Troll |
| Blood Dragon | Dragon Priest | Dragon Priest | Draugr Overlord | Draugr Overlord |
| Frostbite Spider | Cave Bear | Alduin | Mudcrab | Dragon Priest |
| Frost Troll | Blood Dragon | Frostbite Spider | Alduin | Cave Bear |
| Cave Bear | Alduin | Frost Troll | Dragon Priest | Draugr |
| Nords are from Windhelm. | UNLESS an Argonian is present, then... | Nords are from Whiterun. |
| Khajiits are from Rorikstead. | UNLESS a Frost Troll is present, then... | Khajiits are from Ivarstead. |
| Bretons are from Riverwood. | UNLESS the Blade of Woe is selected, then... | Bretons are from Dawnstar. |
| Argonians are from Dawnstar. | UNLESS a Draugr Overlord is selected, then... | Argonians are from Markarth. |
| Dunmer are from Rorikstead. | UNLESS a Mudcrab is present, then... | Dunmer are from Solitude. |
| Altmer are from Solitude. | UNLESS Windshear is selected, then... | Altmer are from Riverwood. |
| Redguards are from Markarth. | UNLESS a Daedric weapon was not present, then... | Redguards are from Windhelm. |
| Orcs are from Ivarstead. | UNLESS a Cave Bear is selected, then... | Orcs are from Winterhold. |
| Imperials are from Winterhold. | UNLESS Volendrung is present, then... | Imperials are from Rorikstead. |
.png)
| If the first character of the serial number is a letter and the enemy is... | Otherwise, if the first character of the serial number is an odd digit and the enemy is... | Otherwise, if the first character of the serial number is an even digit and the enemy is... | Starting Shout |
|---|---|---|---|
| Draugr Overlord | Draugr | Alduin | Unrelenting Force |
| Frost Troll | Dragon Priest | Mudcrab | Disarm |
| Blood Dragon | Mudcrab | Cave Bear | Ice Form |
| Frostbite Spider | Frost Troll | Draugr Overlord | Whirlwind Sprint |
| Dragon Priest | Alduin | Blood Dragon | Dragonrend |
| Mudcrab | Draugr Overlord | Draugr | Dismay |
| Cave Bear | Blood Dragon | Frostbite Spider | Fire Breath |
| Draugr | Cave Bear | Dragon Priest | Kyne's Peace |
| Alduin | Frostbite Spider | Frost Troll | Slow Time |

| Name | Common Tongue Translation | Name | Common Tongue Translation |
|---|---|---|---|
| Disarm | zun - haal - viik | Kyne's Peace | kaan - drem - ov |
| Dismay | faas - ru - maar | Slow Time | tiid - klo - ul |
| Dragonrend | joor - zah - frul | Unrelenting Force | fus - ro - dah |
| Fire Breath | yol - toor - shul | Whirlwind Sprint | wuld - nah - kest |
| Ice Form | liz - slen - nus |
| Races | ||||
|---|---|---|---|---|
Altmer
|
Argonian
|
Breton
|
Dunmer
|
Imperial
|
Khajiit
|
Nord
|
Orc
|
Redguard
|
|
| Weapons | ||||
|---|---|---|---|---|
Axe of Whiterun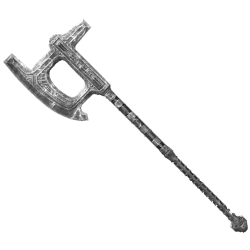 Enchanted axe |
Blade of Woe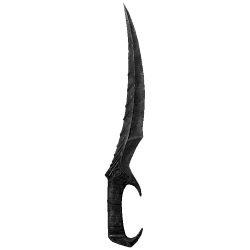 Dark Brotherhood dagger |
Bow of the Hunt Hunting bow |
Chillrend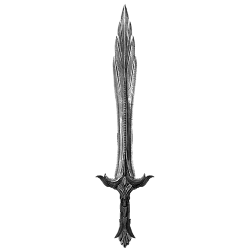 Glass sword |
Dawnbreaker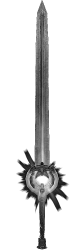 Daedric sword |
Firiniel's End Elven bow |
Mace of Molag Bal Daedric mace |
Volendrung Daedric warhammer |
Windshear Enchanted sword |
|
| Enemies | ||||
|---|---|---|---|---|
Alduin
|
Blood Dragon
|
Cave Bear
|
Dragon Priest
|
Draugr
|
Draugr Overlord
|
Frost Troll
|
Frostbite Spider
|
Mudcrab
|
|
| Home Cities | ||||
|---|---|---|---|---|
Dawnstar
|
Ivarstead
|
Markarth
|
Riverwood
|
Rorikstead
|
Solitude
|
Whiterun
|
Windhelm
|
Winterhold
|
|

Sonic the Hedgehog was a popular 16 bit video game from 1991. What it’s doing here on a bomb over 25 years later is anybody’s guess...
See Table SN72 for a phonetic guide to each sound.
See Table SN73 for image references.
The module consists of a television screen with an on (top) and off (bottom) button, four "TV monitor" buttons and a Start button.
To disarm the module, you will need to progress through three levels of play, identifying the correct TV monitor to press in response to the given picture.
Each TV monitor will play a sound. You may listen to the sounds as many times as you like prior to starting the game.
IT IS CRITICAL THAT YOU IDENTIFY THE SOUNDS BEFORE PRESSING THE START BUTTON: ONCE THE GAME HAS BEEN STARTED, YOU WILL NO LONGER BE ABLE TO PLAY THEM.
Pressing the incorrect TV monitor will result in the module being reset and new sounds being generated.
Once you are sure of the sounds, press the Start button to begin and refer to the tables below. It is advised that the television screen is switched on.
To use the tables, identify which picture has been displayed and work from left to right. If the condition at the top of the table is met, press the relevant TV monitor.
| A | B | C | D | |
|---|---|---|---|---|
| Ballhog | In | RBt | EL | Rg |
| Burrobot | RBt | In | EL | Rg |
| Buzz Bomber | EL | Rg | RBt | In |
| Crab Meat | In | EL | Rg | RBt |
| Moto Bug | Rg | RBt | In | EL |
| A | B | C | D | E | F | G | H | |
|---|---|---|---|---|---|---|---|---|
| Annoyed Sonic | Rg | RBt | EL | RBt | In | EL | Rg | In |
| Dead Sonic | In | EL | RBt | Rg | Rg | RBt | EL | In |
| Drowned Sonic | In | Rg | In | EL | RBt | Rg | RBt | EL |
| Falling Sonic | RBt | EL | Rg | In | EL | Rg | In | RBt |
| Standing Sonic | EL | Rg | RBt | RBt | EL | In | In | Rg |
| A | B | C | D | E | F | G | H | I | J | K | L | |
|---|---|---|---|---|---|---|---|---|---|---|---|---|
| Blue Lamppost | EL | Rg | RBt | RBt | In | Rg | In | EL | EL | RBt | In | Rg |
| Red Lamppost | RBt | EL | In | RBt | Rg | In | EL | In | RBt | EL | In | RBt |
| Red Spring | Rg | RBt | EL | In | RBt | EL | RBt | Rg | EL | In | RBt | In |
| Switch | In | EL | Rg | EL | RBt | In | Rg | RBt | In | Rg | EL | Rg |
| Yellow Spring | RBt | In | RBt | Rg | EL | RBt | Rg | EL | Rg | In | Rg | EL |
What follows is a phonetic guide to the sounds you may encounter.
| Sound Name | Description | Length |
|---|---|---|
|
Boss "Level Theme" | Two alternating octave notes accompanied by a low drum concluding with a scary motif. | 3.5s |
| Breathe | Two short high-pitched squawking sounds. | 0.6s |
| Bumper | A single metallic ringing sound; like a dull bell. | 0.7s |
| Continue | A happy twinkly sound that arpeggiates upwards in pitch before decreasing in volume. | 4.5s |
| Drown | Like the last of the water racing into a noisy drain. | 1.9s |
| Emerald | About halfway between a TARDIS materialising and a cat running across the keys of a Hammond organ. | 1.9s |
| Extra Life | A euphoric brass fanfare concluding with timpani. | 5.0s |
|
Final Zone "Level Theme" | Super high brass followed by scary drums. | 2.3s |
| Invincibility | Five snares followed by a bright fanfare. | 3.0s |
| Jump | A short, upward-sliding note. | 0.5s |
| Lamppost | Two distinct tones; like a futuristic doorbell. | 0.7s |
|
Marble Zone
"Level Theme" | Three hard-hitting notes before an octave drop. | 2.4s |
| Skid | Two of the same tone; like a computer error sound. | 0.5s |
| Spikes | A tinny, high-pitched sound that slides even higher. | 0.7s |
| Spin | Like a dentist’s drill attacking a filling. | 2.2s |
| Spring | It sounds like a spring. | 0.8s |
What follows is a visual guide to the images you may encounter.
| Image Name | Type/Description | Image |
|---|---|---|
| Annoyed Sonic | A "Sonic". This appears on Level 2. | |
| Ballhog | A "Badnik". This appears on Level 1. | |
| Blue Lamppost | An "Object". This appears on Level 3. | |
| Burrobot | A "Badnik". This appears on Level 1. | |
| Buzz Bomber | A "Badnik". This appears on Level 1. | |
| Crab Meat | A "Badnik". This appears on Level 1. | |
| Dead Sonic | A "Sonic". This appears on Level 2. | |
| Drowned Sonic | A "Sonic". This appears on Level 2. | |
| Extra Life TV Monitor | One of four TV monitors. The code is "EL". | |
| Falling Sonic | A "Sonic". This appears on Level 2. | |
| Invincibility TV Monitor | One of four TV monitors. The code is "In". | |
| Moto Bug | A "Badnik". This appears on Level 1. | |
| Red Lamppost | An "Object". This appears on Level 3. | |
| Red Spring | An "Object". This appears on Level 3. | |
| Rings TV Monitor | One of four TV monitors. The code is "Rg". | |
| Running Boots TV Monitor | One of four TV monitors. The code is "RBt". | |
| Standing Sonic | A "Sonic". This appears on Level 2. | |
| Switch | An "Object". This appears on Level 3. | |
| Yellow Spring | An "Object". This appears on Level 3. |
Something to remember your explosion by.
Souvenir asks questions about the state of other modules that you solved prior. Answer all the questions correctly.
If a module reset itself upon a strike, the question about it is assumed to refer only to successful runs or stages.
continued on next page...
continued on next page...
continued on next page...
continued on next page...
continued on next page...
continued on next page...
continued on next page...
continued on next page...
continued on next page...
continued on next page...
continued on next page...
continued on next page...
continued on next page...
continued on next page...
continued on next page...
continued on next page...
continued on next page...
continued on next page...
continued on next page...
continued on next page...
continued on next page...
continued on next page...
continued on next page...
continued on next page...
continued on next page...
continued on next page...
continued on next page...
continued on next page...
continued on next page...
continued on next page...
continued on next page...

You are in a maze of twisty passages, all alike. Exits are to the north, south, east, and west.
Row:
Column:
Direction:

This appears to be a strange interface for an old text adventure game. All of the inventory management puzzles you have come to know and love, but none of the story.
| Statistic | Description |
|---|---|
| 5 STR | Strength (STR) of player, used in combat |
| 5 DEX | Dexterity (DEX) of player, used in combat |
| 5 INT | Intelligence (INT) of player, used in combat |
| 5’ 5” | Height of player, in feet and inches |
| 15°C | Temperature, in degrees Celsius |
| 9.8 m/s² | Force of gravity, in meters per second squared |
| 101 kPa | Atmospheric pressure, in kilopascals |
| Item | Use if... |
|---|---|
| Balloon | Gravity is less than 9.3 m/s² or pressure is greater than 110 kPa, and not fighting an Eagle. |
| Battery | There is at most 1 battery on the bomb, and fighting an enemy other than a Golem or a Wizard. |
| Bellows | If fighting a Dragon or an Eagle, use if pressure is greater than 105 kPa. If fighting a different enemy, use if pressure is less than 95 kPa. |
| Cheat code | Cheaters never prosper! Don’t use these. |
| Crystal ball | INT is greater than the last digit of the serial number, and not fighting a Wizard. |
| Feather | DEX is greater than either STR or INT. |
| Hard drive | There are two or more of the same port on the bomb. |
| Lamp | Temperature is less than 12°C, and not fighting a Lizard. |
| Moonstone | There are at least two unlit indicators on the bomb. |
| Potion | Always use, but note that STR, DEX, and INT may change. |
| Small dog | Fighting an enemy other than a Demon, a Dragon, or a Troll. |
| Stepladder | The player is shorter than 4’, and fighting an enemy other than a Goblin or a Lizard. |
| Sunstone | There are at least two lit indicators on the bomb. |
| Symbol | Fighting a Demon or a Golem, or if the temperature is greater than 31°C. |
| Ticket | The player is 4’ 6” or taller, and gravity is at least 9.2 m/s², and at most 10.4 m/s². |
| Trophy | STR is greater than the first numeric digit of the serial number, or if fighting a Troll. |
| Enemy | STR | DEX | INT |
|---|---|---|---|
| Demon | 50 | 50 | 50 |
| Dragon | 10 | 11 | 13 |
| Eagle | 4 | 7 | 3 |
| Goblin | 3 | 6 | 5 |
| Golem | 9 | 4 | 7 |
| Troll | 8 | 5 | 4 |
| Lizard | 4 | 6 | 3 |
| Wizard | 4 | 3 | 8 |
| Weapon | Uses... | Bonus |
|---|---|---|
| Broadsword | STR | +0 |
| Caber | STR | +2 |
| Nasty Knife | DEX | +0 |
| Longbow | DEX | +2 |
| Magic orb | INT | +0 |
| Grimoire | INT | +2 |

Sometimes, the stars have it out for you. Is this bomb a good or a poor omen?

| 
| 
| 
| 
| 
| 
| 
| 
| 
| |
|---|---|---|---|---|---|---|---|---|---|---|
 | 0 | 0 | 1 | -1 | 0 | 1 | -2 | 2 | 0 | -1 |
 | -2 | 0 | -1 | 0 | 2 | 0 | -2 | 2 | 0 | 1 |
 | -1 | -1 | 0 | -1 | 1 | 2 | 0 | 2 | 1 | -2 |
 | -1 | 2 | -1 | 0 | -2 | -1 | 0 | 2 | -2 | 2 |

| 
| 
| 
| 
| 
| 
| 
| 
| 
| 
| 
| |
|---|---|---|---|---|---|---|---|---|---|---|---|---|
| | 1 | 0 | -1 | 0 | 0 | 2 | 2 | 0 | 1 | 0 | 1 | 0 |
| 2 | 2 | -1 | 2 | -1 | -1 | -2 | 1 | 2 | 0 | 0 | 2 |
| -2 | -1 | 0 | 0 | 1 | 0 | 1 | 2 | -1 | -2 | 1 | 1 |
| | 1 | 1 | -2 | -2 | 2 | 0 | -1 | 1 | 0 | 0 | -1 | -1 |
|
|
|
|
|
|
|
|
|
|
|
|
| |
|---|---|---|---|---|---|---|---|---|---|---|---|---|
| | -1 | -1 | 2 | 0 | -1 | 0 | -1 | 1 | 0 | 0 | -2 | -2 |
| | -2 | 0 | 1 | 0 | 2 | 0 | -1 | 1 | 2 | 0 | 1 | 0 |
| | -2 | -2 | -1 | -1 | 1 | -1 | 0 | -2 | 0 | 0 | -1 | 1 |
| | -2 | 2 | -2 | 0 | 0 | 1 | -1 | 0 | 2 | -2 | -1 | 1 |
| | -2 | 0 | -1 | -2 | -2 | -2 | -1 | 1 | 1 | 1 | 0 | -1 |
| | -1 | -2 | 1 | -1 | 0 | 0 | 0 | 1 | 0 | -1 | 2 | 0 |
| | -1 | -1 | 0 | 0 | 1 | 1 | 0 | 0 | 0 | 0 | -1 | -1 |
| | -1 | 2 | 0 | 0 | 1 | -2 | 1 | 0 | 2 | -1 | 1 | 0 |
| | 1 | 0 | 2 | 1 | -1 | 1 | 1 | 1 | 0 | -2 | 2 | 0 |
| | -1 | 0 | 0 | -1 | -2 | 1 | 2 | 1 | 1 | 0 | 0 | -1 |
| Symbol | Element | Symbol | Planet | Symbol | Planet |
|---|---|---|---|---|---|
| | Fire | | Sun | | Jupiter |
| Water | | Moon | | Saturn |
| Earth | | Mercury | | Uranus |
| | Air | | Venus | | Neptune |
| | Mars | | Pluto |
| Symbol | Zodiac | Symbol | Zodiac | Symbol | Zodiac |
|---|---|---|---|---|---|
| | Aries | | Leo | | Sagittarius |
| Taurus | | Virgo | | Capricorn |
| Gemini | | Libra | | Aquarius |
| Cancer | | Scorpio | | Pisces |

Everything is different from the perspective of another.
Regard the difference between alphabetic positions to be positive.
Take the least significant digit of the number, and look up in the table:
| 0 | 3 | Red |
| 4 | 9 | Yellow |
| 1 | 7 | Green |
| 5 | 8 | Blue |
| 2 | 6 | Purple |
R – Red, Y – Yellow, G – Green, B – Blue, P – Purple
Determine which column to use based on battery count.
Perform permutations from top to bottom:
| 1 – 2 Batteries | |
|---|---|
| Prime | Alternate |
| R Y Y | B P Y |
| Y P G | P B R |
| R G P | B G R |
| Y B G | B Y Y |
| P P R | R Y P |
| B G B | P Y G |
| Y G B | G P Y |
| P G G | G Y R |
| 3 – 4 Batteries | |
|---|---|
| Prime | Alternate |
| B P B | Y B G |
| Y Y P | B R P |
| G R B | Y P B |
| R P Y | G B G |
| Y G G | P B R |
| G P B | Y G Y |
| P R P | B B G |
| R Y R | R P B |
| 0, 5+ Batteries | |
|---|---|
| Prime | Alternate |
| P Y B | R G B |
| Y R P | R Y R |
| G Y R | G B P |
| B Y G | P G R |
| R P Y | G Y B |
| P P G | P B R |
| R Y Y | B B R |
| Y G P | P Y Y |

A yes or no choice isn’t too bad. Unfortunately you have to make five of them and any of them could be your last.
Switches need to be flipped to match the lit indicators either above or below them.
Avoid the following switch states:

Have you ever stared at the logo on the screensaver and hoped that it would bounce exactly into a corner?

Those symbols are probably just a reference to where the mothership is docked, right?

Websites allow symbols in passwords now, but this is ridiculous!
|
|
|
|
|
|
|
|
|
|
|
|
|
|
|
|
|
|
|
|
|
|
|
|
|
|
|
|
|
|
|
|
|
|
|
|
|
|
|
|
|
|
|
|
|
|
|
|
|

It’s trivial. Just 6 letters out there! Wait, what did you say? Each letter has 5 rules to check? Never mind then.
See Appendix A for indicator identification reference.
See Appendix C for port identification reference.
| D | C | F | A |
| B | E | F | F |
| B | B | B | C |
| C | B | E | F |
| E | B | F | E |
| D | C | A | A |
| B | A | B | B |
| C | D | F | D |
| D | F | C | E |
| D | A | B | F |
| D | F | B | E |
| C | E | B | A |
| C | B | D | E |
| A | F | D | C |
| B | E | B | D |
| A | D | C | B |
| A | C | B | C |
| A | E | F | A |
| E | C | F | A |
| C | F | B | D |
| F | F | B | C |
| B | E | A | B |
| E | D | F | A |
| B | C | E | C |

How many bomb defusal experts does it take to screw in a light bulb?
This module has two buttons labeled I and O and a light bulb, which is either see-through (translucent) or opaque, and is one of six colors: blue, green, purple, red, white or yellow.
If you incur a strike because you pushed a wrong button, ignore it and continue. If you incur a strike because you unscrewed or screwed in the bulb at an incorrect time, you must undo that before continuing.
Begin at Step 1 below.
While the bulb is screwed in, a long press on either button will reset the module back to Step 1. Attempting this while the bulb is out will incur a strike.
| Step 1 |
|
|---|---|
| Step 2 |
|
| Step 3 |
|
| Step 4 |
|
| Step 5 |
|
| Step 6 |
|
| Step 7 |
|
|---|---|
| Step 8 |
|
| Step 9 |
|
| Step 10 |
|
| Step 11 |
|
| Step 12 |
|
| Step 13 |
|
| Step 14 |
|
| Step 15 |
|
Tick-tock... as if you needed more reminding that time is running out.
NOTE: Remember to switch between AM and PM if necessary.

Oh, the layout of the buttons on this thing takes me back to my childhood! Except I didn’t expect to see that on a time bomb, even. Play time is over, I suppose.
See the next page for more information on the mathematical concepts.
| Global Overrides |
|
|---|---|
| Apply all matches after determining the two commands. |
| First Subcommand | |
|---|---|
| x is prime | ▲▲▼▼ |
| x = 12n | ▲A◀◀ |
| a+b = 10 AND the last digit of serial number is odd | AB◀▶ |
| x = 6n + 3 OR x = 10n + 5 | ▼◀A▶ |
| x = 7n AND y ≠ 7n | ◀◀▲B |
| x = c × d | A▲◀◀ |
| x is a perfect square | ▶▶A▼ |
| x = 3n – 1 OR bomb has unlit ind. labeled SND | ▶AB▲ |
| 60 ≤ x < 90 AND bomb has no batteries | BB▶◀ |
| x = 6n | ABA▶ |
| x = 4n | ▼▼◀▲ |
| else | A◀B▶ |
| Second Subcommand | |
|---|---|
| y is prime | ◀▶◀▶ |
| y = 8n | ▼▶B▲ |
| c - d = 4 AND bomb has a Stereo RCA | ▶A▼▼ |
| y = 4n + 2 OR bomb has lit ind. labeled FRQ | B▲▶A |
| y = 7n AND x ≠ 7n | ◀◀▼A |
| y is a perfect square | ▲▼B▶ |
| y = a × b | A▲◀▼ |
| y = 4n – 1 OR bomb has a PS/2 port | ▲BBB |
| c > d AND bomb has 2 or more batteries | AA▲▼ |
| y = 5n | BAB◀ |
| y = 3n | ▶▲▲◀ |
| else | B▲A▼ |
This page contains a brief overview of some mathematical concepts used in the Gamepad module.
A prime number is a counting number (positive whole number) that can only be divided by 1 and itself. In other words, there is no way to share a prime number of donuts equally among any number of friends (unless you have as many friends as donuts!).
Prime numbers below 100 are: 2, 3, 5, 7, 11, 13, 17, 19, 23, 29, 31, 37, 41, 43, 47, 53, 59, 61, 67, 71, 73, 79, 83, 89, 97.
A perfect square is any whole number multiplied by itself.
Perfect squares below 100 are: 1, 4, 9, 16, 25, 36, 49, 64, 81.
A highly composite number (HCN) has more divisors than any smaller positive integer. For example, 6 can be divided by 1, 2, 3, and 6, which is more than the last HCN, 4, which has 1, 2, and 4. 8 can be divided by 1, 2, 4, and 8, but a smaller number (6) has an equal number of divisors, so it is not a HCN.
Highly composite numbers below 100 are: 1, 2, 4, 6, 12, 24, 36, 48, 60.
Every 108 minutes seconds, the button must be pushed...
SEE THE NEXT PAGE FOR THE ORIENTATION MANUAL OF STATION 3.
| Name | First Twelve Integers |
|---|---|
| Radzinsky’s Binomial Spiral | 7, 15, 27, 39, 59, 75, 87, 107, 123, 143, 159, 179... |
| Bakunin’s Constants | 2, 3, 6, 7, 12, 13, 18, 22, 27, 30, 31, 35... |
| DeGroot’s Sequence | 0, 1, 5, 13, 20, 23, 29, 31, 32, 46, 52, 75... |
| Minkowski’s Cyclic Quadratics | 4, 9, 11, 15, 17, 22, 30, 35, 41, 49, 56, 63... |

Welcome, I’m Dr. Marvin Candle, and this is the orientation manual for Station 3 of the DHARMA Initiative. In a moment you’ll be given a simple set of instructions for how you will fulfill the responsibilities associated with the station. But first, a little history.
The DHARMA Initiative was created in 1970, and it is the brainchild of Gerald and Karen DeGroot - two doctoral candidates at the University of Michigan. Following in the footsteps of visionaries such as B.F. Skinner, they imagined a large scale communal research compound where scientists and free thinkers from around the globe could pursue research in meteorology, psychology, parapsychology, zoology, electromagnetism; a Utopian social experiment, supported by Danish industrialist and munitions magnate Alvar Hanso, whose financial backing made their dream of a multi-purpose social science research facility a reality.
You and your partner are currently located in Station 3, or the Swan, and will be for the next 540 days. Station 3 was originally constructed as a laboratory where scientists could work to understand the unique electromagnetic fluctuations emanating from this part of the Island.
Not long after the experiments began, however, there was an incident. And since that time the following protocol has been observed: every 108 minutes the button must be pushed. From the moment the alarm sounds you will have four minutes to enter the code into the microcomputer processor. When the alarm sounds, either you or your partner must input the code. It is highly recommended that you and your partner take alternating shifts. In this manner you will both stay fresh and alert. It is of the utmost importance that when the alarm sounds the code be entered correctly, and in a timely fashion.
Do not attempt to use the computer for anything else other than the entering of the code. This is its only function. The isolation associated with Station 3 may tempt you to try and utilise the computer for communication with the outside world. This is strictly forbidden. Attempting to use the computer in this manner will compromise the integrity of the project or worse, could lead to another incident. I repeat, do not use the computer for anything other than entering the code.
Congratulations, until your replacements arrive, the future of the project is in your hands. On behalf of the DeGroots, Alvar Hanso and all of us at the DHARMA Initiative, thank you. Namaste. And good luck.
| Rule | Applies To | Enter |
|---|---|---|
| The number of resets does not appear on any sequence | 8, 10, 14, 16, 19, 21, 24, 25, 26, 28, 34, 36, 37, 38, 40... | DHARMA |
| The number of resets multiplied by eight is within two of any number in Radzinsky's Binomial Spiral | 1, 2, 5, 11, 18, 20... | HATCH |
| The third number of each sequence, when added to the number of resets, yields a composite number | 3, 9, 15, 19, 21, 22, 27, 28, 29, 33, 39... | SWN |
| The number of resets appears on more than one sequence | 7, 13, 15, 22, 27, 30, 31, 35... | DARMA |
| Exception | Applies To | Enter |
| No rules apply | 0, 4, 6, 12, 17, 23, 32... | SWAN |
| More than one rule applies | 15, 19, 21, 22, 27, 28... | HTCH |
| The number of resets is 25 or greater | 25, 26, 27, 28, 29, 30, 31, 32, 33, 34, 35, 36, 37, 38, 39, 40... | 77 |

This module is identical to Who’s On First, except with four characters on each button instead of confusing words and phrases. This should be easy... right?
Based on the display, read the label of a particular button and proceed to step 2:
|
|
|
|
|
|
||||||||||||||||||||||||||||||||||||||||||||||||
|
|
|
|
|
|
||||||||||||||||||||||||||||||||||||||||||||||||
|
|
|
|
|
|
||||||||||||||||||||||||||||||||||||||||||||||||
|
|
|
|
|
|
||||||||||||||||||||||||||||||||||||||||||||||||
|
|
|
|
||||||||||||||||||||||||||||||||||||||||||||||||||
Using the label from step 1, push the first button that appears in its corresponding list:
| "XI8Z": | NHXS, I8O9, XOHZ, 6O8I, 6NZH, 66I8, H6SI, Z8IX, XI8Z, SXHN, H68S, 8OXN, IH6X, NXO8 |
|---|---|
| "H68S": | 6NZH, I8O9, NHXS, 6O8I, SXHN, H6SI, IH6X, 8OXN, NXO8, XI8Z, Z8IX, XOHZ, 66I8, H68S |
| "SXHN": | Z8IX, 8OXN, NXO8, H68S, XOHZ, XI8Z, H6SI, NHXS, IH6X, 6NZH, 66I8, I8O9, SXHN, 6O8I |
| "Z8IX": | NXO8, H6SI, I8O9, 6O8I, Z8IX, 66I8, XI8Z, IH6X, SXHN, XOHZ, 6NZH, 8OXN, NHXS, H68S |
| "IH6X": | 8OXN, H6SI, I8O9, 6O8I, NHXS, Z8IX, SXHN, 66I8, 6NZH, XOHZ, NXO8, H68S, IH6X, XI8Z |
| "NHXS": | I8O9, H6SI, 8OXN, 6O8I, H68S, XOHZ, 66I8, XI8Z, IH6X, NHXS, 6NZH, Z8IX, SXHN, NXO8 |
| "XOHZ": | 8OXN, XOHZ, 6NZH, IH6X, XI8Z, Z8IX, 6O8I, SXHN, I8O9, H68S, NXO8, NHXS, 66I8, H6SI |
| "8OXN": | XI8Z, IH6X, 6NZH, XOHZ, I8O9, NHXS, H6SI, SXHN, 66I8, Z8IX, 8OXN, 6O8I, NXO8, H68S |
| "6NZH": | H6SI, 6NZH, H68S, SXHN, 6O8I, NHXS, Z8IX, XOHZ, 8OXN, NXO8, 66I8, XI8Z, I8O9, IH6X |
| "H6SI": | NHXS, IH6X, XI8Z, 66I8, SXHN, NXO8, XOHZ, H6SI, 6O8I, 6NZH, 8OXN, Z8IX, I8O9, H68S |
| "6O8I": | Z8IX, XI8Z, I8O9, XOHZ, IH6X, 66I8, SXHN, NXO8, 6NZH, 6O8I, H6SI, H68S, 8OXN, NHXS |
| "I8O9": | 6O8I, SXHN, H68S, NHXS, 8OXN, IH6X, NXO8, I8O9, 6NZH, XI8Z, Z8IX, 66I8, XOHZ, H6SI |
| "NXO8": | 8OXN, SXHN, Z8IX, I8O9, NHXS, 6NZH, H68S, 66I8, XOHZ, NXO8, IH6X, XI8Z, H6SI, 6O8I |
| "66I8": | H6SI, 6O8I, NHXS, XI8Z, 66I8, I8O9, IH6X, 8OXN, Z8IX, 6NZH, H68S, XOHZ, SXHN, NXO8 |
| "9NZS": | 8NSZ, 8I99, ZHOX, HZN9, IS9H, SNZX, SZN6, XZNS, SI9X, 9NZS, ZSN8, X6IS, X9HI, S89H |
| "8I99": | ZHOX, IS9H, X6IS, SNZX, SI9X, X9HI, ZSN8, XZNS, 9NZS, S89H, HZN9, 8NSZ, SZN6, 8I99 |
| "ZHOX": | ZSN8, 8I99, SNZX, ZHOX, IS9H, SZN6, 8NSZ, S89H, HZN9, 9NZS, SI9X, XZNS, X6IS, X9HI |
| "HZN9": | 9NZS, HZN9, SZN6, IS9H, ZSN8, 8I99, S89H, ZHOX, SI9X, SNZX, 8NSZ, X9HI, X6IS, XZNS |
| "SZN6": | X9HI, S89H, SZN6, SNZX, SI9X, 8NSZ, ZHOX, XZNS, HZN9, X6IS, IS9H, ZSN8, 8I99, 9NZS |
| "S89H": | SNZX, 8NSZ, IS9H, SI9X, HZN9, SZN6, ZSN8, X9HI, S89H, 9NZS, X6IS, XZNS, 8I99, ZHOX |
| "SNZX": | SNZX, ZHOX, 8I99, 9NZS, X9HI, XZNS, ZSN8, IS9H, 8NSZ, X6IS, HZN9, SZN6, S89H, SI9X |
| "ZSN8": | SZN6, S89H, 8I99, HZN9, IS9H, ZSN8, X9HI, 9NZS, SNZX, X6IS, ZHOX, 8NSZ, XZNS, SI9X |
| "SI9X": | 9NZS, XZNS, HZN9, ZHOX, S89H, X9HI, ZSN8, X6IS, 8I99, SNZX, SZN6, IS9H, SI9X, 8NSZ |
| "X9HI": | 8NSZ, SNZX, IS9H, SI9X, ZHOX, SZN6, HZN9, XZNS, X6IS, 9NZS, S89H, 8I99, ZSN8, X9HI |
| "IS9H": | SI9X, SNZX, ZSN8, ZHOX, XZNS, 8NSZ, IS9H, X6IS, X9HI, 8I99, SZN6, HZN9, S89H, 9NZS |
| "XZNS": | 8I99, S89H, X9HI, ZSN8, 9NZS, SZN6, 8NSZ, SI9X, HZN9, IS9H, XZNS, SNZX, ZHOX, X6IS |
| "8NSZ": | 8I99, X9HI, X6IS, HZN9, 9NZS, XZNS, SNZX, SZN6, 8NSZ, S89H, SI9X, IS9H, ZHOX, ZSN8 |
| "X6IS": | HZN9, IS9H, S89H, SZN6, XZNS, X9HI, ZSN8, SI9X, SNZX, 9NZS, X6IS, 8NSZ, 8I99, ZHOX |

All those years of getting ties in Tic Tac Toe might finally pay off.
To defuse this module, all nine buttons must be filled with “X”s and “O”s.
The display labeled “Up Next:” shows either an “X” or an “O”. The keypad displays some numbers between 1 and 9 and some already placed “X”s and “O”s. After placing a piece, the displays go blank.
The numbers in the chart on the following page indicate the location on the keypad where each piece should be placed.
Use the rules below to determine the starting row:
In the chart, determine the appropriate placement column based on the relative number of “X”s and “O”s already on the board. Begin at the starting row and move down your selected column until you reach a number that corresponds to an unfilled spot on the keypad. If you pass row 9, continue at row 1.
If placing the piece in this location would result in a tic-tac-toe, you MUST press “PASS” and continue in the same row; otherwise, place the piece by pressing the location on the keypad and then move to the next row in the chart.
Two consecutive passes will result in a piece being placed (and displayed) in one of the available spaces. This may result in a tic-tac-toe but will not incur a strike. In such a case, move to the next row in the chart.
Upon a strike, the row resets to the initial starting row and the keypad displays the placed pieces and remaining numbers. All previous placements remain until the module is defused.
Table 1
| More “X”s | “X”s = “O”s | More “O”s | ||||
| Placing An: | Placing An: | Placing An: | ||||
| ROW | “X” | “O” | “X” | “O” | “X” | “O” |
|---|---|---|---|---|---|---|
| 1 | 9 | 3 | 3 | 9 | 8 | 1 |
| 2 | 5 | 6 | 6 | 7 | 1 | 2 |
| 3 | 7 | 8 | 2 | 1 | 5 | 8 |
| 4 | 4 | 5 | 7 | 8 | 9 | 6 |
| 5 | 1 | 4 | 1 | 6 | 7 | 3 |
| 6 | 8 | 7 | 5 | 2 | 4 | 4 |
| 7 | 6 | 1 | 8 | 4 | 3 | 9 |
| 8 | 2 | 2 | 9 | 5 | 2 | 5 |
| 9 | 3 | 9 | 4 | 3 | 6 | 7 |

Nobody likes to convert timezones.
| Country | City | Timezone |
|---|---|---|
| Argentina | Buenos Aires | UTC-3 |
| Australia | Brisbane | UTC+10 |
| Australia | Sydney | UTC+11 |
| Brazil | Manaus | UTC-4 |
| Brazil | Sao Paulo | UTC-2 |
| Burundi | Bujumbura | UTC+2 |
| Cabo Verde | Praia | UTC-1 |
| Canada | Whitehorse | UTC-8 |
| China | Beijing | UTC+8 |
| Ecuador | Quito | UTC-5 |
| French Polynesia | Papeete | UTC-10 |
| Georgia | Tbilisi | UTC+4 |
| Japan | Tokyo | UTC+9 |
| Germany | Berlin | UTC+1 |
| Kiribati | Tarawa | UTC+12 |
| Nicaragua | Managua | UTC-6 |
| Niue | Alofi | UTC-11 |
| Pakistan | Lahore | UTC+5 |
| Russia | Moscow | UTC+3 |
| Russia | Omsk | UTC+6 |
| Scotland | Edinburgh | UTC |
| Thailand | Bangkok | UTC+7 |
| USA | Denver | UTC-7 |
| USA | Unalaska | UTC-9 |
How can something so simple be so infuriating?
Turn the key when the bomb’s timer matches the time on the display, no sooner, no later.
Order is everything.
This module has two keys and a display. The display indicates this module’s priority.
Turn the left key after you have done all of the following:
But before you have done any of the following:
Turn the right key after you have done all of the following:
But before you have done any of the following:

This poorly programmed lookup device is as maddening with its slow responses as it is unforgiving with ill-timed inputs. Patience required.
Query a series of two-letter codes to track down the correct answer before submitting it. This primitive lookup machine is intolerant to incomplete and excessive inputs, as well as any input while it is busy.
If the serial number contains a letter, use the leftmost letter's numeric position in the alphabet as your base value (e.g. A=1, B=2). For no letters, use 0.
Add the last digit of the serial number multiplied by the number of batteries present.
If there is a Stereo RCA port present, double the current value.*
This value** is now the current code.
* Note: Skip this step if there is also an RJ45 port present.
** Note: Use the last two digits if the value is greater than 99. Prepend with a zero if less than 10.
Using the current code, look up the character pair. Enter that pair into the device and press "Query".
| -0 | -1 | -2 | -3 | -4 | -5 | -6 | -7 | -8 | -9 | |
|---|---|---|---|---|---|---|---|---|---|---|
| 0- | kb | dk | gv | tk | pv | kp | bv | vt | pz | dt |
| 1- | ee | zk | ke | ck | zp | pp | tp | tg | pd | pt |
| 2- | tz | eb | ec | cc | cz | zv | cv | gc | bt | gt |
| 3- | bz | pk | kz | kg | vd | ce | vb | kd | gg | dg |
| 4- | pb | vv | ge | kv | dz | pe | db | cd | td | cb |
| 5- | gb | tv | kk | bg | bp | vp | ep | tt | ed | zg |
| 6- | de | dd | ev | te | zd | bb | pc | bd | kc | zb |
| 7- | eg | bc | tc | ze | zc | gp | et | vc | tb | vz |
| 8- | ez | ek | dv | cg | ve | dp | bk | pg | gk | gz |
| 9- | kt | ct | zz | vg | gd | cp | be | zt | vk | dc |
The response code from the device from the query in Step 2 is now your current code. Perform Step 2 an additional 2 times, using the new code each time.
After receiving the response code from the final query, look up the corresponding character pair, enter the pair into the device and press "Submit".
These wires aren't like the others. Some have stripes! That makes them completely different. The good news is that we've found a concise set of instructions on what to do about it! Maybe too concise...
 |
Wire has red coloring |
 |
Wire has blue coloring |
 |
Has ★ symbol |
 |
LED is on |
| Letter | Instruction |
|---|---|
| C | Cut the wire |
| D | Do not cut the wire |
| S | Cut the wire if the last digit of the serial number is even |
| P | Cut the wire if the bomb has a parallel port |
| B | Cut the wire if the bomb has two or more batteries |
See Appendix B for battery identification reference.
See Appendix C for port identification reference.

Don't look at this manual too long, or you will actually go blind!
| Blue | Red | Green | White |


Fun fact — The amount of food wasted in Singapore is equivalent to every household throwing two bowls of rice away every day, per annum.
This module features eight buttons, four of which are Roman numerals labeled “I", "V", "X", and "L” which have the values of one, five, ten, and fifty respectively, two with the letters “W (waste) and R (recycle)”, and the last two colored red and green respectively. The red button resets the current stage, and the green button submits the answer. Lastly, there is a display which shows, in the order of submission: Paper, Plastic and Metal. Note: Since the module registers single presses, the correct value for 4 would be IIII and not IV. Similarly, IX would be VIIII. Etc.
To solve the module, the defuser needs to waste and recycle the correct amount of paper, plastic, and metal.
Starting from zero for all values, use the following tables to determine the amount of paper, plastic, and metal present. Follow all rules until the end of each table, performing an operation for each material type where necessary.
| Paper | ||
|---|---|---|
| Condition | Operation | Unless: |
| Is there an IND indicator? | Add 19. | There are at least five batteries. |
| Is there an SND indicator? | Add 15. | — |
| Is there a parallel port? | Subtract 44. | — |
| Is there a Morse Code related module on the bomb?* | Subtract 26. | Half of the bomb time has not passed.*** |
| Are there zero batteries on the bomb? | Add 154. | There are at least three indicators on the bomb. |
| Does the serial number contain any letters from "SAVE MY WORLD"? | Add 200. | There are more than two consonants in the serial number. |
| Plastic | ||
|---|---|---|
| Condition | Operation | Unless: |
| Is there a TRN indicator? | Add 91. | Exactly one strike has already been issued.*** |
| Is there an FRK indicator? | Add 69. | Exactly two strikes have already been issued.*** |
| Is there an empty port plate? | Subtract 17. | There are an odd number of modules on the bomb. (including needy modules) |
| Is there an FRQ indicator? | Add 153. | There are more D batteries than AA batteries. |
| Metal | ||
|---|---|---|
| Condition | Operation | Unless: |
| Is there a BOB indicator? | Add 199. | — |
| Is there an MSA indicator? | Add 92. | — |
| Is there a CAR indicator? | Subtract 200. | There is an RJ-45 port. |
| Are there any duplicate ports? | Add 153. | There is a DVI-D port present. |
| Is there a SIG indicator? | Add 99. | The bomb is in the last fifth of time left on the bomb.*** |
| Is there a Forget Me Not module on the bomb? | Subtract 84. | There is also a lit BOB indicator and at least 6 ports — add 99 instead. |
If at any time the bar on the right becomes empty after completing a stage, IMMEDIATELY press the green button again. Otherwise, a strike will be issued and the module will reset. This cannot occur during stage 4. From all the calculated values, if any of them are negative, make them positive and follow all of the rules below:
If any value ends up with a decimal, round it to the nearest integer. Subtract your answer for that stage from the amount remaining to calculate the leftovers.
Further notes: Upon submitting an incorrect amount of recycled and/or wasted material, a strike is issued and the module resets. To submit an answer, the defuser must input the amount of recycled or wasted paper and then press the R button to designate it as recycling, or press the W button to designate it as waste. The defuser must then press the green button to confirm their inputted amount of wasted and recycled material. A total of three green button presses are expected. A fourth green button press is expected when there are leftovers.
Upon pressing the red button to reset, the defuser’s input of the material type for that stage will be reset. There will not be a display to show the amount the defuser has entered, so he or she must be wary.
*Morse code modules refer to any module that contain “Morse” in their names and Simon Sends.
**Any materials left after being modified by a rule become leftovers unless another rule refers to them again.
***The bomb time and strikes are taken from the time of the first press of the submit button and is recalculated with every strike on the module.

Welcome to web design class. The first rule of web design is: You do not talk about Comic Sans MS. The second rule is: You DO NOT talk about Comic Sans MS. The third rule is: The word “color” is NEVER spelled with a U.
Find the website this code was quoted from. Use the Selector part of the code (the part before {) to narrow it down to one site, then note down its Threshold value.
Edison Daily (news site)Elements: body, a, h3, blockquote IDs: #header, #comments Classes: .post, .title, .author Threshold: #00FF00 |
Buddymaker (social media)Elements: div, span, img, a IDs: #msg, #cover, #content, #sidebar Classes: .post, .title, .share Threshold: #8040C0 |
PNGdrop (image hosting)Elements: div, img IDs: #main, #comments, #fullview Classes: .username, .share, .large Threshold: #BADA55 |
BobIRS (chatroom)Elements: ul, ol, img, b, i IDs: #sidebar Classes: .avatar, .username Threshold: #03E61E |
Vidhost (video hosting)Elements: div, iframe, b, i IDs: #main, #rating, #comments Classes: .username, .share, .channel Threshold: #60061E |
Go Team Falcon online (online game)Elements: body, iframe IDs: #rating, #comments Classes: .rating, .fullscreen Threshold: #501337 |
Stufflocker (cloud storage)Elements: div, h3, img, iframe IDs: #sidebar, #download Classes: .menu, .author Threshold: #B020E5 |
Steel Nexus (forum)Elements: body, div, img, blockquote IDs: #header, #content, #sidebar Classes: .avatar, .reply Threshold: #BEA61E |
Find the first color name in the CSS file, then use the following table to determine a hexadecimal value of that color. This value is the Color Target that you will need later. If no color name is displayed, use #7F7F7F.
| Color | Hex value | Color | Hex value | Color | Hex value |
|---|---|---|---|---|---|
| Blue | #0000FF | Yellow | #FFFF00 | Red | #FF0000 |
| Green | #00FF00 | White | #FFFFFF | Orange | #FFA500 |
| Purple | #800080 | Magenta | #FF00FF | Gray | #808080 |
Note: The hexadecimal value of a color is denoted in #RRGGBB format.
Calculate the site score as follows:
{curly braces}. Counting semi-colons is a good idea because it is a line terminator.margin/padding.border/border-radius unless it's 0px or 50%.z-index if there is no position anywhere on the module.font-family unless it's "Comic Sans MS", which gives a -5 score.box-shadow/text-shadow unless it's none.| Accept (✓) | Consider (Δ) | Reject (✗) |
|---|---|---|
| 2, 3, 5, 7 | 6, 8 | 1, 4, 9 |
This contraption is like something out of a sketch comedy routine, which might be funny if it wasn't connected to a bomb. I’ll keep this brief, as words only complicate matters.
Based on the display, read the label of a particular button and proceed to step 2:
|
|
|
|
|
|
||||||||||||||||||||||||||||||||||||||||||||||||
|
|
|
|
|
|
||||||||||||||||||||||||||||||||||||||||||||||||
|
|
|
|
|
|
||||||||||||||||||||||||||||||||||||||||||||||||
|
|
|
|
|
|
||||||||||||||||||||||||||||||||||||||||||||||||
|
|
|
|
||||||||||||||||||||||||||||||||||||||||||||||||||
Using the label from step 1, push the first button that appears in its corresponding list:
READY: |
YES, OKAY, WHAT, MIDDLE, LEFT, PRESS, RIGHT, BLANK, READY, NO, FIRST, UHHH, NOTHING, WAIT |
|---|---|
FIRST: |
LEFT, OKAY, YES, MIDDLE, NO, RIGHT, NOTHING, UHHH, WAIT, READY, BLANK, WHAT, PRESS, FIRST |
NO: |
BLANK, UHHH, WAIT, FIRST, WHAT, READY, RIGHT, YES, NOTHING, LEFT, PRESS, OKAY, NO, MIDDLE |
BLANK: |
WAIT, RIGHT, OKAY, MIDDLE, BLANK, PRESS, READY, NOTHING, NO, WHAT, LEFT, UHHH, YES, FIRST |
NOTHING: |
UHHH, RIGHT, OKAY, MIDDLE, YES, BLANK, NO, PRESS, LEFT, WHAT, WAIT, FIRST, NOTHING, READY |
YES: |
OKAY, RIGHT, UHHH, MIDDLE, FIRST, WHAT, PRESS, READY, NOTHING, YES, LEFT, BLANK, NO, WAIT |
WHAT: |
UHHH, WHAT, LEFT, NOTHING, READY, BLANK, MIDDLE, NO, OKAY, FIRST, WAIT, YES, PRESS, RIGHT |
UHHH: |
READY, NOTHING, LEFT, WHAT, OKAY, YES, RIGHT, NO, PRESS, BLANK, UHHH, MIDDLE, WAIT, FIRST |
LEFT: |
RIGHT, LEFT, FIRST, NO, MIDDLE, YES, BLANK, WHAT, UHHH, WAIT, PRESS, READY, OKAY, NOTHING |
RIGHT: |
YES, NOTHING, READY, PRESS, NO, WAIT, WHAT, RIGHT, MIDDLE, LEFT, UHHH, BLANK, OKAY, FIRST |
MIDDLE: |
BLANK, READY, OKAY, WHAT, NOTHING, PRESS, NO, WAIT, LEFT, MIDDLE, RIGHT, FIRST, UHHH, YES |
OKAY: |
MIDDLE, NO, FIRST, YES, UHHH, NOTHING, WAIT, OKAY, LEFT, READY, BLANK, PRESS, WHAT, RIGHT |
WAIT: |
UHHH, NO, BLANK, OKAY, YES, LEFT, FIRST, PRESS, WHAT, WAIT, NOTHING, READY, RIGHT, MIDDLE |
PRESS: |
RIGHT, MIDDLE, YES, READY, PRESS, OKAY, NOTHING, UHHH, BLANK, LEFT, FIRST, WHAT, NO, WAIT |
YOU: |
SURE, YOU ARE, YOUR, YOU'RE, NEXT, UH HUH, UR, HOLD, WHAT?, YOU, UH UH, LIKE, DONE, U |
YOU ARE: |
YOUR, NEXT, LIKE, UH HUH, WHAT?, DONE, UH UH, HOLD, YOU, U, YOU'RE, SURE, UR, YOU ARE |
YOUR: |
UH UH, YOU ARE, UH HUH, YOUR, NEXT, UR, SURE, U, YOU'RE, YOU, WHAT?, HOLD, LIKE, DONE |
YOU'RE: |
YOU, YOU'RE, UR, NEXT, UH UH, YOU ARE, U, YOUR, WHAT?, UH HUH, SURE, DONE, LIKE, HOLD |
UR: |
DONE, U, UR, UH HUH, WHAT?, SURE, YOUR, HOLD, YOU'RE, LIKE, NEXT, UH UH, YOU ARE, YOU |
U: |
UH HUH, SURE, NEXT, WHAT?, YOU'RE, UR, UH UH, DONE, U, YOU, LIKE, HOLD, YOU ARE, YOUR |
UH HUH: |
UH HUH, YOUR, YOU ARE, YOU, DONE, HOLD, UH UH, NEXT, SURE, LIKE, YOU'RE, UR, U, WHAT? |
UH UH: |
UR, U, YOU ARE, YOU'RE, NEXT, UH UH, DONE, YOU, UH HUH, LIKE, YOUR, SURE, HOLD, WHAT? |
WHAT?: |
YOU, HOLD, YOU'RE, YOUR, U, DONE, UH UH, LIKE, YOU ARE, UH HUH, UR, NEXT, WHAT?, SURE |
DONE: |
SURE, UH HUH, NEXT, WHAT?, YOUR, UR, YOU'RE, HOLD, LIKE, YOU, U, YOU ARE, UH UH, DONE |
NEXT: |
WHAT?, UH HUH, UH UH, YOUR, HOLD, SURE, NEXT, LIKE, DONE, YOU ARE, UR, YOU'RE, U, YOU |
HOLD: |
YOU ARE, U, DONE, UH UH, YOU, UR, SURE, WHAT?, YOU'RE, NEXT, HOLD, UH HUH, YOUR, LIKE |
SURE: |
YOU ARE, DONE, LIKE, YOU'RE, YOU, HOLD, UH HUH, UR, SURE, U, WHAT?, NEXT, YOUR, UH UH |
LIKE: |
YOU'RE, NEXT, U, UR, HOLD, DONE, UH UH, WHAT?, UH HUH, YOU, LIKE, SURE, YOU ARE, YOUR |
I’ll continue keeping this brief, as words only complicate matters. Especially when those words are complicated themselves by being in a language you don't understand.
Use the tables to help perform the two steps.
Refer to the original manual of Who's on First for instructions on how to disarm the module.
Top header = Czech, bottom header = Danish.
|
|
|
|
|
| ||||||||||||||||||||||||||||||||||||||||||||||||||||||||||||
|
|
|
|
|
| ||||||||||||||||||||||||||||||||||||||||||||||||||||||||||||
|
|
|
|
|
| ||||||||||||||||||||||||||||||||||||||||||||||||||||||||||||
|
|
|
|
|
| ||||||||||||||||||||||||||||||||||||||||||||||||||||||||||||
|
|
|
| ||||||||||||||||||||||||||||||||||||||||||||||||||||||||||||||
Top header = German, middle header = English, bottom header = Esperanto.
|
|
|
|
|
| ||||||||||||||||||||||||||||||||||||||||||||||||||||||||||||||||||||||||
|
|
|
|
|
| ||||||||||||||||||||||||||||||||||||||||||||||||||||||||||||||||||||||||
|
|
|
|
|
| ||||||||||||||||||||||||||||||||||||||||||||||||||||||||||||||||||||||||
|
|
|
|
|
| ||||||||||||||||||||||||||||||||||||||||||||||||||||||||||||||||||||||||
|
|
|
| ||||||||||||||||||||||||||||||||||||||||||||||||||||||||||||||||||||||||||
Top header = Spanish, middle header = Estonian, bottom header = Finnish.
|
|
|
|
|
| ||||||||||||||||||||||||||||||||||||||||||||||||||||||||||||||||||||||||
|
|
|
|
|
| ||||||||||||||||||||||||||||||||||||||||||||||||||||||||||||||||||||||||
|
|
|
|
|
| ||||||||||||||||||||||||||||||||||||||||||||||||||||||||||||||||||||||||
|
|
|
|
|
| ||||||||||||||||||||||||||||||||||||||||||||||||||||||||||||||||||||||||
|
|
|
| ||||||||||||||||||||||||||||||||||||||||||||||||||||||||||||||||||||||||||
Top header = French, middle header = West Frisian, bottom header = Hebrew.
|
|
|
|
|
| ||||||||||||||||||||||||||||||||||||||||||||||||||||||||||||||||||||||||
|
|
|
|
| |||||||||||||||||||||||||||||||||||||||||||||||||||||||||||||||||||||||||
|
|
|
|
|
| ||||||||||||||||||||||||||||||||||||||||||||||||||||||||||||||||||||||||
|
|
|
|
|
| ||||||||||||||||||||||||||||||||||||||||||||||||||||||||||||||||||||||||
|
|
|
| ||||||||||||||||||||||||||||||||||||||||||||||||||||||||||||||||||||||||||
Top header = Italian, middle header = Japanese, bottom header = Korean.
|
|
|
|
|
| ||||||||||||||||||||||||||||||||||||||||||||||||||||||||||||||||||||||||
|
|
|
|
|
| ||||||||||||||||||||||||||||||||||||||||||||||||||||||||||||||||||||||||
|
|
|
|
|
| ||||||||||||||||||||||||||||||||||||||||||||||||||||||||||||||||||||||||
|
|
|
|
|
| ||||||||||||||||||||||||||||||||||||||||||||||||||||||||||||||||||||||||
|
|
|
| ||||||||||||||||||||||||||||||||||||||||||||||||||||||||||||||||||||||||||
Top header = Dutch, middle header = Norwegian, bottom header = Polish.
|
|
|
|
|
| ||||||||||||||||||||||||||||||||||||||||||||||||||||||||||||||||||||||||
|
|
|
|
|
| ||||||||||||||||||||||||||||||||||||||||||||||||||||||||||||||||||||||||
|
|
|
|
|
| ||||||||||||||||||||||||||||||||||||||||||||||||||||||||||||||||||||||||
|
|
|
|
|
| ||||||||||||||||||||||||||||||||||||||||||||||||||||||||||||||||||||||||
|
|
|
| ||||||||||||||||||||||||||||||||||||||||||||||||||||||||||||||||||||||||||
Top header = Portuguese, middle header = Russian, bottom header = Swedish.
|
|
|
|
|
| ||||||||||||||||||||||||||||||||||||||||||||||||||||||||||||||||||||||||
|
|
|
|
| |||||||||||||||||||||||||||||||||||||||||||||||||||||||||||||||||||||||||
|
|
|
|
|
| ||||||||||||||||||||||||||||||||||||||||||||||||||||||||||||||||||||||||
|
|
|
|
|
| ||||||||||||||||||||||||||||||||||||||||||||||||||||||||||||||||||||||||
|
|
|
| ||||||||||||||||||||||||||||||||||||||||||||||||||||||||||||||||||||||||||
Top header = Thai, bottom header = Chinese.
|
|
|
|
|
| ||||||||||||||||||||||||||||||||||||||||||||||||||||||||||||
|
|
|
|
|
| ||||||||||||||||||||||||||||||||||||||||||||||||||||||||||||
|
|
|
|
|
| ||||||||||||||||||||||||||||||||||||||||||||||||||||||||||||
|
|
|
|
|
| ||||||||||||||||||||||||||||||||||||||||||||||||||||||||||||
|
|
|
| ||||||||||||||||||||||||||||||||||||||||||||||||||||||||||||||
| "MŮŽU": | CO, OK, TEDA, DOLE, VPRAVO, ZMÁČKNI, NAHOŘE, NIC, MŮŽU, PRÁZDNÉ, NE, VLEVO, ANO, POČKEJ |
|---|---|
| "NE": | VPRAVO, OK, CO, DOLE, PRÁZDNÉ, NAHOŘE, ANO, VLEVO, POČKEJ, MŮŽU, NIC, TEDA, ZMÁČKNI, NE |
| "PRÁZDNÉ": | NIC, VLEVO, POČKEJ, NE, TEDA, MŮŽU, NAHOŘE, CO, ANO, VPRAVO, ZMÁČKNI, OK, PRÁZDNÉ, DOLE |
| "NIC": | POČKEJ, NAHOŘE, OK, DOLE, NIC, ZMÁČKNI, MŮŽU, ANO, PRÁZDNÉ, TEDA, VPRAVO, VLEVO, CO, NE |
| "ANO": | VLEVO, NAHOŘE, OK, DOLE, CO, NIC, PRÁZDNÉ, ZMÁČKNI, VPRAVO, TEDA, POČKEJ, NE, ANO, MŮŽU |
| "CO": | OK, NAHOŘE, VLEVO, DOLE, NE, TEDA, ZMÁČKNI, MŮŽU, ANO, CO, VPRAVO, NIC, PRÁZDNÉ, POČKEJ |
| "TEDA": | VLEVO, TEDA, VPRAVO, ANO, MŮŽU, NIC, DOLE, PRÁZDNÉ, OK, NE, POČKEJ, CO, ZMÁČKNI, NAHOŘE |
| "VLEVO": | MŮŽU, ANO, VPRAVO, TEDA, OK, CO, NAHOŘE, PRÁZDNÉ, ZMÁČKNI, NIC, VLEVO, DOLE, POČKEJ, NE |
| "VPRAVO": | NAHOŘE, VPRAVO, NE, PRÁZDNÉ, DOLE, CO, NIC, TEDA, VLEVO, POČKEJ, ZMÁČKNI, MŮŽU, OK, ANO |
| "NAHOŘE": | CO, ANO, MŮŽU, ZMÁČKNI, PRÁZDNÉ, POČKEJ, TEDA, NAHOŘE, DOLE, VPRAVO, VLEVO, NIC, OK, NE |
| "DOLE": | NIC, MŮŽU, OK, TEDA, ANO, ZMÁČKNI, PRÁZDNÉ, POČKEJ, VPRAVO, DOLE, NAHOŘE, NE, VLEVO, CO |
| "OK": | DOLE, PRÁZDNÉ, NE, CO, VLEVO, ANO, POČKEJ, OK, VPRAVO, MŮŽU, NIC, ZMÁČKNI, TEDA, NAHOŘE |
| "POČKEJ": | VLEVO, PRÁZDNÉ, NIC, OK, CO, VPRAVO, NE, ZMÁČKNI, TEDA, POČKEJ, ANO, MŮŽU, NAHOŘE, DOLE |
| "ZMÁČKNI": | NAHOŘE, DOLE, CO, MŮŽU, ZMÁČKNI, OK, ANO, VLEVO, NIC, VPRAVO, NE, TEDA, PRÁZDNÉ, POČKEJ |
| "BYLI": | JASNĚ, BYLY, BÍLÍ, BÍLÝ, DÁL, NO?, O NĚM, DRŽ, CO?, BYLI, NO, JAKO, HOTOVO, ONĚM |
| "BYLY": | BÍLÍ, DÁL, JAKO, NO?, CO?, HOTOVO, NO, DRŽ, BYLI, ONĚM, BÍLÝ, JASNĚ, O NĚM, BYLY |
| "BÍLÍ": | NO, BYLY, NO?, BÍLÍ, DÁL, O NĚM, JASNĚ, ONĚM, BÍLÝ, BYLI, CO?, DRŽ, JAKO, HOTOVO |
| "BÍLÝ": | BYLI, BÍLÝ, O NĚM, DÁL, NO, BYLY, ONĚM, BÍLÍ, CO?, NO?, JASNĚ, HOTOVO, JAKO, DRŽ |
| "O NĚM": | HOTOVO, ONĚM, O NĚM, NO?, CO?, JASNĚ, BÍLÍ, DRŽ, BÍLÝ, JAKO, DÁL, NO, BYLY, BYLI |
| "ONĚM": | NO?, JASNĚ, DÁL, CO?, BÍLÝ, O NĚM, NO, HOTOVO, ONĚM, BYLI, JAKO, DRŽ, BYLY, BÍLÍ |
| "NO?": | NO?, BÍLÍ, BYLY, BYLI, HOTOVO, DRŽ, NO, DÁL, JASNĚ, JAKO, BÍLÝ, O NĚM, ONĚM, CO? |
| "NO": | O NĚM, ONĚM, BYLY, BÍLÝ, DÁL, NO, HOTOVO, BYLI, NO?, JAKO, BÍLÍ, JASNĚ, DRŽ, CO? |
| "CO?": | BYLI, DRŽ, BÍLÝ, BÍLÍ, ONĚM, HOTOVO, NO, JAKO, BYLY, NO?, O NĚM, DÁL, CO?, JASNĚ |
| "HOTOVO": | JASNĚ, NO?, DÁL, CO?, BÍLÍ, O NĚM, BÍLÝ, DRŽ, JAKO, BYLI, ONĚM, BYLY, NO, HOTOVO |
| "DÁL": | CO?, NO?, NO, BÍLÍ, DRŽ, JASNĚ, DÁL, JAKO, HOTOVO, BYLY, O NĚM, BÍLÝ, ONĚM, BYLI |
| "DRŽ": | BYLY, ONĚM, HOTOVO, NO, BYLI, O NĚM, JASNĚ, CO?, BÍLÝ, DÁL, DRŽ, NO?, BÍLÍ, JAKO |
| "JASNĚ": | BYLY, HOTOVO, JAKO, BÍLÝ, BYLI, DRŽ, NO?, O NĚM, JASNĚ, ONĚM, CO?, DÁL, BÍLÍ, NO |
| "JAKO": | BÍLÝ, DÁL, ONĚM, O NĚM, DRŽ, HOTOVO, NO, CO?, NO?, BYLI, JAKO, JASNĚ, BYLY, BÍLÍ |
| "VENSTRE": | HVAD, NEJ, HVAD?, JA, VENT, C, OKAY, TRYK, VENSTRE, MIDTEN, HØJRE, NÆSTE, FÆRDIG, ØJEBLIK |
|---|---|
| "HØJRE": | VENT, NEJ, HVAD, JA, MIDTEN, OKAY, FÆRDIG, NÆSTE, ØJEBLIK, VENSTRE, TRYK, HVAD?, C, HØJRE |
| "MIDTEN": | TRYK, NÆSTE, ØJEBLIK, HØJRE, HVAD?, VENSTRE, OKAY, HVAD, FÆRDIG, VENT, C, NEJ, MIDTEN, JA |
| "TRYK": | ØJEBLIK, OKAY, NEJ, JA, TRYK, C, VENSTRE, FÆRDIG, MIDTEN, HVAD?, VENT, NÆSTE, HVAD, HØJRE |
| "FÆRDIG": | NÆSTE, OKAY, NEJ, JA, HVAD, TRYK, MIDTEN, C, VENT, HVAD?, ØJEBLIK, HØJRE, FÆRDIG, VENSTRE |
| "HVAD": | NEJ, OKAY, NÆSTE, JA, HØJRE, HVAD?, C, VENSTRE, FÆRDIG, HVAD, VENT, TRYK, MIDTEN, ØJEBLIK |
| "HVAD?": | NÆSTE, HVAD?, VENT, FÆRDIG, VENSTRE, TRYK, JA, MIDTEN, NEJ, HØJRE, ØJEBLIK, HVAD, C, OKAY |
| "NÆSTE": | VENSTRE, FÆRDIG, VENT, HVAD?, NEJ, HVAD, OKAY, MIDTEN, C, TRYK, NÆSTE, JA, ØJEBLIK, HØJRE |
| "VENT": | OKAY, VENT, HØJRE, MIDTEN, JA, HVAD, TRYK, HVAD?, NÆSTE, ØJEBLIK, C, VENSTRE, NEJ, FÆRDIG |
| "OKAY": | HVAD, FÆRDIG, VENSTRE, C, MIDTEN, ØJEBLIK, HVAD?, OKAY, JA, VENT, NÆSTE, TRYK, NEJ, HØJRE |
| "JA": | TRYK, VENSTRE, NEJ, HVAD?, FÆRDIG, C, MIDTEN, ØJEBLIK, VENT, JA, OKAY, HØJRE, NÆSTE, HVAD |
| "NEJ": | JA, MIDTEN, HØJRE, HVAD, NÆSTE, FÆRDIG, ØJEBLIK, NEJ, VENT, VENSTRE, TRYK, C, HVAD?, OKAY |
| "ØJEBLIK": | NÆSTE, MIDTEN, TRYK, NEJ, HVAD, VENT, HØJRE, C, HVAD?, ØJEBLIK, FÆRDIG, VENSTRE, OKAY, JA |
| "C": | OKAY, JA, HVAD, VENSTRE, C, NEJ, FÆRDIG, NÆSTE, TRYK, VENT, HØJRE, HVAD?, MIDTEN, ØJEBLIK |
| "SE": | NÅRH, TRYG, VÆR, VÆRD, NÅR, ØH, VEJR, NÅH, IGEN, SE, ØHHH, NÅ, GENTAG, HVER |
| "TRYG": | VÆR, NÅR, NÅ, ØH, IGEN, GENTAG, ØHHH, NÅH, SE, HVER, VÆRD, NÅRH, VEJR, TRYG |
| "VÆR": | ØHHH, TRYG, ØH, VÆR, NÅR, VEJR, NÅRH, HVER, VÆRD, SE, IGEN, NÅH, NÅ, GENTAG |
| "VÆRD": | SE, VÆRD, VEJR, NÅR, ØHHH, TRYG, HVER, VÆR, IGEN, ØH, NÅRH, GENTAG, NÅ, NÅH |
| "VEJR": | GENTAG, HVER, VEJR, ØH, IGEN, NÅRH, VÆR, NÅH, VÆRD, NÅ, NÅR, ØHHH, TRYG, SE |
| "HVER": | ØH, NÅRH, NÅR, IGEN, VÆRD, VEJR, ØHHH, GENTAG, HVER, SE, NÅ, NÅH, TRYG, VÆR |
| "ØH": | ØH, VÆR, TRYG, SE, GENTAG, NÅH, ØHHH, NÅR, NÅRH, NÅ, VÆRD, VEJR, HVER, IGEN |
| "ØHHH": | VEJR, HVER, TRYG, VÆRD, NÅR, ØHHH, GENTAG, SE, ØH, NÅ, VÆR, NÅRH, NÅH, IGEN |
| "IGEN": | SE, NÅH, VÆRD, VÆR, HVER, GENTAG, ØHHH, NÅ, TRYG, ØH, VEJR, NÅR, IGEN, NÅRH |
| "GENTAG": | NÅRH, ØH, NÅR, IGEN, VÆR, VEJR, VÆRD, NÅH, NÅ, SE, HVER, TRYG, ØHHH, GENTAG |
| "NÅR": | IGEN, ØH, ØHHH, VÆR, NÅH, NÅRH, NÅR, NÅ, GENTAG, TRYG, VEJR, VÆRD, HVER, SE |
| "NÅH": | TRYG, HVER, GENTAG, ØHHH, SE, VEJR, NÅRH, IGEN, VÆRD, NÅR, NÅH, ØH, VÆR, NÅ |
| "NÅRH": | TRYG, GENTAG, NÅ, VÆRD, SE, NÅH, ØH, VEJR, NÅRH, HVER, IGEN, NÅR, VÆR, ØHHH |
| "NÅ": | VÆRD, NÅR, HVER, VEJR, NÅH, GENTAG, ØHHH, IGEN, ØH, SE, NÅ, NÅRH, TRYG, VÆR |
| "OKAY": | NEIN, NICHTS, , COUP, OBEN, NOCHMAL, Q, KUH, OKAY, FERTIG, JA, DA STEHT, DRÜCK, LEER |
|---|---|
| "JA": | OBEN, NICHTS, NEIN, COUP, FERTIG, Q, DRÜCK, DA STEHT, LEER, OKAY, KUH, , NOCHMAL, JA |
| "FERTIG": | KUH, DA STEHT, LEER, JA, , OKAY, Q, NEIN, DRÜCK, OBEN, NOCHMAL, NICHTS, FERTIG, COUP |
| "KUH": | LEER, Q, NICHTS, COUP, KUH, NOCHMAL, OKAY, DRÜCK, FERTIG, , OBEN, DA STEHT, NEIN, JA |
| "DRÜCK": | DA STEHT, Q, NICHTS, COUP, NEIN, KUH, FERTIG, NOCHMAL, OBEN, , LEER, JA, DRÜCK, OKAY |
| "NEIN": | NICHTS, Q, DA STEHT, COUP, JA, , NOCHMAL, OKAY, DRÜCK, NEIN, OBEN, KUH, FERTIG, LEER |
| " ": | DA STEHT, , OBEN, DRÜCK, OKAY, KUH, COUP, FERTIG, NICHTS, JA, LEER, NEIN, NOCHMAL, Q |
| "DA STEHT": | OKAY, DRÜCK, OBEN, , NICHTS, NEIN, Q, FERTIG, NOCHMAL, KUH, DA STEHT, COUP, LEER, JA |
| "OBEN": | Q, OBEN, JA, FERTIG, COUP, NEIN, KUH, , DA STEHT, LEER, NOCHMAL, OKAY, NICHTS, DRÜCK |
| "Q": | NEIN, DRÜCK, OKAY, NOCHMAL, FERTIG, LEER, , Q, COUP, OBEN, DA STEHT, KUH, NICHTS, JA |
| "COUP": | KUH, OKAY, NICHTS, , DRÜCK, NOCHMAL, FERTIG, LEER, OBEN, COUP, Q, JA, DA STEHT, NEIN |
| "NICHTS": | COUP, FERTIG, JA, NEIN, DA STEHT, DRÜCK, LEER, NICHTS, OBEN, OKAY, KUH, NOCHMAL, , Q |
| "LEER": | DA STEHT, FERTIG, KUH, NICHTS, NEIN, OBEN, JA, NOCHMAL, , LEER, DRÜCK, OKAY, Q, COUP |
| "NOCHMAL": | Q, COUP, NEIN, OKAY, NOCHMAL, NICHTS, DRÜCK, DA STEHT, KUH, OBEN, JA, , FERTIG, LEER |
| "SOHN": | SO'N, ZÄH, ZEHN, CN, MOMENT, SO EIN, CEE, 10, OH GOTT, SOHN, C, ZEHEN, WARTE, ZEH |
| "ZÄH": | ZEHN, MOMENT, ZEHEN, SO EIN, OH GOTT, WARTE, C, 10, SOHN, ZEH, CN, SO'N, CEE, ZÄH |
| "ZEHN": | C, ZÄH, SO EIN, ZEHN, MOMENT, CEE, SO'N, ZEH, CN, SOHN, OH GOTT, 10, ZEHEN, WARTE |
| "CN": | SOHN, CN, CEE, MOMENT, C, ZÄH, ZEH, ZEHN, OH GOTT, SO EIN, SO'N, WARTE, ZEHEN, 10 |
| "CEE": | WARTE, ZEH, CEE, SO EIN, OH GOTT, SO'N, ZEHN, 10, CN, ZEHEN, MOMENT, C, ZÄH, SOHN |
| "ZEH": | SO EIN, SO'N, MOMENT, OH GOTT, CN, CEE, C, WARTE, ZEH, SOHN, ZEHEN, 10, ZÄH, ZEHN |
| "SO EIN": | SO EIN, ZEHN, ZÄH, SOHN, WARTE, 10, C, MOMENT, SO'N, ZEHEN, CN, CEE, ZEH, OH GOTT |
| "C": | CEE, ZEH, ZÄH, CN, MOMENT, C, WARTE, SOHN, SO EIN, ZEHEN, ZEHN, SO'N, 10, OH GOTT |
| "OH GOTT": | SOHN, 10, CN, ZEHN, ZEH, WARTE, C, ZEHEN, ZÄH, SO EIN, CEE, MOMENT, OH GOTT, SO'N |
| "WARTE": | SO'N, SO EIN, MOMENT, OH GOTT, ZEHN, CEE, CN, 10, ZEHEN, SOHN, ZEH, ZÄH, C, WARTE |
| "MOMENT": | OH GOTT, SO EIN, C, ZEHN, 10, SO'N, MOMENT, ZEHEN, WARTE, ZÄH, CEE, CN, ZEH, SOHN |
| "10": | ZÄH, ZEH, WARTE, C, SOHN, CEE, SO'N, OH GOTT, CN, MOMENT, 10, SO EIN, ZEHN, ZEHEN |
| "SO'N": | ZÄH, WARTE, ZEHEN, CN, SOHN, 10, SO EIN, CEE, SO'N, ZEH, OH GOTT, MOMENT, ZEHN, C |
| "ZEHEN": | CN, MOMENT, ZEH, CEE, 10, WARTE, C, OH GOTT, SO EIN, SOHN, ZEHEN, SO'N, ZÄH, ZEHN |
| "READY": | YES, OKAY, WHAT, MIDDLE, LEFT, PRESS, RIGHT, BLANK, READY, NO, FIRST, UHHH, NOTHING, WAIT |
|---|---|
| "FIRST": | LEFT, OKAY, YES, MIDDLE, NO, RIGHT, NOTHING, UHHH, WAIT, READY, BLANK, WHAT, PRESS, FIRST |
| "NO": | BLANK, UHHH, WAIT, FIRST, WHAT, READY, RIGHT, YES, NOTHING, LEFT, PRESS, OKAY, NO, MIDDLE |
| "BLANK": | WAIT, RIGHT, OKAY, MIDDLE, BLANK, PRESS, READY, NOTHING, NO, WHAT, LEFT, UHHH, YES, FIRST |
| "NOTHING": | UHHH, RIGHT, OKAY, MIDDLE, YES, BLANK, NO, PRESS, LEFT, WHAT, WAIT, FIRST, NOTHING, READY |
| "YES": | OKAY, RIGHT, UHHH, MIDDLE, FIRST, WHAT, PRESS, READY, NOTHING, YES, LEFT, BLANK, NO, WAIT |
| "WHAT": | UHHH, WHAT, LEFT, NOTHING, READY, BLANK, MIDDLE, NO, OKAY, FIRST, WAIT, YES, PRESS, RIGHT |
| "UHHH": | READY, NOTHING, LEFT, WHAT, OKAY, YES, RIGHT, NO, PRESS, BLANK, UHHH, MIDDLE, WAIT, FIRST |
| "LEFT": | RIGHT, LEFT, FIRST, NO, MIDDLE, YES, BLANK, WHAT, UHHH, WAIT, PRESS, READY, OKAY, NOTHING |
| "RIGHT": | YES, NOTHING, READY, PRESS, NO, WAIT, WHAT, RIGHT, MIDDLE, LEFT, UHHH, BLANK, OKAY, FIRST |
| "MIDDLE": | BLANK, READY, OKAY, WHAT, NOTHING, PRESS, NO, WAIT, LEFT, MIDDLE, RIGHT, FIRST, UHHH, YES |
| "OKAY": | MIDDLE, NO, FIRST, YES, UHHH, NOTHING, WAIT, OKAY, LEFT, READY, BLANK, PRESS, WHAT, RIGHT |
| "WAIT": | UHHH, NO, BLANK, OKAY, YES, LEFT, FIRST, PRESS, WHAT, WAIT, NOTHING, READY, RIGHT, MIDDLE |
| "PRESS": | RIGHT, MIDDLE, YES, READY, PRESS, OKAY, NOTHING, UHHH, BLANK, LEFT, FIRST, WHAT, NO, WAIT |
| "YOU": | SURE, YOU ARE, YOUR, YOU'RE, NEXT, UH HUH, UR, HOLD, WHAT?, YOU, UH UH, LIKE, DONE, U |
| "YOU ARE": | YOUR, NEXT, LIKE, UH HUH, WHAT?, DONE, UH UH, HOLD, YOU, U, YOU'RE, SURE, UR, YOU ARE |
| "YOUR": | UH UH, YOU ARE, UH HUH, YOUR, NEXT, UR, SURE, U, YOU'RE, YOU, WHAT?, HOLD, LIKE, DONE |
| "YOU'RE": | YOU, YOU'RE, UR, NEXT, UH UH, YOU ARE, U, YOUR, WHAT?, UH HUH, SURE, DONE, LIKE, HOLD |
| "UR": | DONE, U, UR, UH HUH, WHAT?, SURE, YOUR, HOLD, YOU'RE, LIKE, NEXT, UH UH, YOU ARE, YOU |
| "U": | UH HUH, SURE, NEXT, WHAT?, YOU'RE, UR, UH UH, DONE, U, YOU, LIKE, HOLD, YOU ARE, YOUR |
| "UH HUH": | UH HUH, YOUR, YOU ARE, YOU, DONE, HOLD, UH UH, NEXT, SURE, LIKE, YOU'RE, UR, U, WHAT? |
| "UH UH": | UR, U, YOU ARE, YOU'RE, NEXT, UH UH, DONE, YOU, UH HUH, LIKE, YOUR, SURE, HOLD, WHAT? |
| "WHAT?": | YOU, HOLD, YOU'RE, YOUR, U, DONE, UH UH, LIKE, YOU ARE, UH HUH, UR, NEXT, WHAT?, SURE |
| "DONE": | SURE, UH HUH, NEXT, WHAT?, YOUR, UR, YOU'RE, HOLD, LIKE, YOU, U, YOU ARE, UH UH, DONE |
| "NEXT": | WHAT?, UH HUH, UH UH, YOUR, HOLD, SURE, NEXT, LIKE, DONE, YOU ARE, UR, YOU'RE, U, YOU |
| "HOLD": | YOU ARE, U, DONE, UH UH, YOU, UR, SURE, WHAT?, YOU'RE, NEXT, HOLD, UH HUH, YOUR, LIKE |
| "SURE": | YOU ARE, DONE, LIKE, YOU'RE, YOU, HOLD, UH HUH, UR, SURE, U, WHAT?, NEXT, YOUR, UH UH |
| "LIKE": | YOU'RE, NEXT, U, UR, HOLD, DONE, UH UH, WHAT?, UH HUH, YOU, LIKE, SURE, YOU ARE, YOUR |
| "PRETA": | JES, ATENDU, KIO, EN ORDO, DEKSTRA, NENIU, MEZA, NENIO, PRETA, NE, UNUA, EEE, NENION, PUŜU |
|---|---|
| "UNUA": | DEKSTRA, ATENDU, JES, EN ORDO, NE, MEZA, NENION, EEE, PUŜU, PRETA, NENIO, KIO, NENIU, UNUA |
| "NE": | NENIO, EEE, PUŜU, UNUA, KIO, PRETA, MEZA, JES, NENION, DEKSTRA, NENIU, ATENDU, NE, EN ORDO |
| "NENIO": | PUŜU, MEZA, ATENDU, EN ORDO, NENIO, NENIU, PRETA, NENION, NE, KIO, DEKSTRA, EEE, JES, UNUA |
| "NENION": | EEE, MEZA, ATENDU, EN ORDO, JES, NENIO, NE, NENIU, DEKSTRA, KIO, PUŜU, UNUA, NENION, PRETA |
| "JES": | ATENDU, MEZA, EEE, EN ORDO, UNUA, KIO, NENIU, PRETA, NENION, JES, DEKSTRA, NENIO, NE, PUŜU |
| "KIO": | EEE, KIO, DEKSTRA, NENION, PRETA, NENIO, EN ORDO, NE, ATENDU, UNUA, PUŜU, JES, NENIU, MEZA |
| "EEE": | PRETA, NENION, DEKSTRA, KIO, ATENDU, JES, MEZA, NE, NENIU, NENIO, EEE, EN ORDO, PUŜU, UNUA |
| "DEKSTRA": | MEZA, DEKSTRA, UNUA, NE, EN ORDO, JES, NENIO, KIO, EEE, PUŜU, NENIU, PRETA, ATENDU, NENION |
| "MEZA": | JES, NENION, PRETA, NENIU, NE, PUŜU, KIO, MEZA, EN ORDO, DEKSTRA, EEE, NENIO, ATENDU, UNUA |
| "EN ORDO": | NENIO, PRETA, ATENDU, KIO, NENION, NENIU, NE, PUŜU, DEKSTRA, EN ORDO, MEZA, UNUA, EEE, JES |
| "ATENDU": | EN ORDO, NE, UNUA, JES, EEE, NENION, PUŜU, ATENDU, DEKSTRA, PRETA, NENIO, NENIU, KIO, MEZA |
| "PUŜU": | EEE, NE, NENIO, ATENDU, JES, DEKSTRA, UNUA, NENIU, KIO, PUŜU, NENION, PRETA, MEZA, EN ORDO |
| "NENIU": | MEZA, EN ORDO, JES, PRETA, NENIU, ATENDU, NENION, EEE, NENIO, DEKSTRA, UNUA, KIO, NE, PUŜU |
| "NENIAN": | SEKVA, NENIAM, ĜUSTE, D, KIO?, DO DO, DD, FINITA, DUFOJE, NENIAN, DU, ATENTU, PRAVE, DO |
| "NENIAM": | ĜUSTE, KIO?, ATENTU, DO DO, DUFOJE, PRAVE, DU, FINITA, NENIAN, DO, D, SEKVA, DD, NENIAM |
| "ĜUSTE": | DU, NENIAM, DO DO, ĜUSTE, KIO?, DD, SEKVA, DO, D, NENIAN, DUFOJE, FINITA, ATENTU, PRAVE |
| "D": | NENIAN, D, DD, KIO?, DU, NENIAM, DO, ĜUSTE, DUFOJE, DO DO, SEKVA, PRAVE, ATENTU, FINITA |
| "DD": | PRAVE, DO, DD, DO DO, DUFOJE, SEKVA, ĜUSTE, FINITA, D, ATENTU, KIO?, DU, NENIAM, NENIAN |
| "DO": | DO DO, SEKVA, KIO?, DUFOJE, D, DD, DU, PRAVE, DO, NENIAN, ATENTU, FINITA, NENIAM, ĜUSTE |
| "DO DO": | DO DO, ĜUSTE, NENIAM, NENIAN, PRAVE, FINITA, DU, KIO?, SEKVA, ATENTU, D, DD, DO, DUFOJE |
| "DU": | DD, DO, NENIAM, D, KIO?, DU, PRAVE, NENIAN, DO DO, ATENTU, ĜUSTE, SEKVA, FINITA, DUFOJE |
| "DUFOJE": | NENIAN, FINITA, D, ĜUSTE, DO, PRAVE, DU, ATENTU, NENIAM, DO DO, DD, KIO?, DUFOJE, SEKVA |
| "PRAVE": | SEKVA, DO DO, KIO?, DUFOJE, ĜUSTE, DD, D, FINITA, ATENTU, NENIAN, DO, NENIAM, DU, PRAVE |
| "KIO?": | DUFOJE, DO DO, DU, ĜUSTE, FINITA, SEKVA, KIO?, ATENTU, PRAVE, NENIAM, DD, D, DO, NENIAN |
| "FINITA": | NENIAM, DO, PRAVE, DU, NENIAN, DD, SEKVA, DUFOJE, D, KIO?, FINITA, DO DO, ĜUSTE, ATENTU |
| "SEKVA": | NENIAM, PRAVE, ATENTU, D, NENIAN, FINITA, DO DO, DD, SEKVA, DO, DUFOJE, KIO?, ĜUSTE, DU |
| "ATENTU": | D, KIO?, DO, DD, FINITA, PRAVE, DU, DUFOJE, DO DO, NENIAN, ATENTU, SEKVA, NENIAM, ĜUSTE |
| "ESPERA": | LISTO, VA, ¿ÉSTA?, VALE, NO ESTÁ, ¿ÉSA?, OKAY, OTRO, ESPERA, NO, ¿QUÉ?, ESTA, ¿CÓMO?, NO ÉS |
|---|---|
| "¿QUÉ?": | NO ESTÁ, VA, LISTO, VALE, NO, OKAY, ¿CÓMO?, ESTA, NO ÉS, ESPERA, OTRO, ¿ÉSTA?, ¿ÉSA?, ¿QUÉ? |
| "NO": | OTRO, ESTA, NO ÉS, ¿QUÉ?, ¿ÉSTA?, ESPERA, OKAY, LISTO, ¿CÓMO?, NO ESTÁ, ¿ÉSA?, VA, NO, VALE |
| "OTRO": | NO ÉS, OKAY, VA, VALE, OTRO, ¿ÉSA?, ESPERA, ¿CÓMO?, NO, ¿ÉSTA?, NO ESTÁ, ESTA, LISTO, ¿QUÉ? |
| "¿CÓMO?": | ESTA, OKAY, VA, VALE, LISTO, OTRO, NO, ¿ÉSA?, NO ESTÁ, ¿ÉSTA?, NO ÉS, ¿QUÉ?, ¿CÓMO?, ESPERA |
| "LISTO": | VA, OKAY, ESTA, VALE, ¿QUÉ?, ¿ÉSTA?, ¿ÉSA?, ESPERA, ¿CÓMO?, LISTO, NO ESTÁ, OTRO, NO, NO ÉS |
| "¿ÉSTA?": | ESTA, ¿ÉSTA?, NO ESTÁ, ¿CÓMO?, ESPERA, OTRO, VALE, NO, VA, ¿QUÉ?, NO ÉS, LISTO, ¿ÉSA?, OKAY |
| "ESTA": | ESPERA, ¿CÓMO?, NO ESTÁ, ¿ÉSTA?, VA, LISTO, OKAY, NO, ¿ÉSA?, OTRO, ESTA, VALE, NO ÉS, ¿QUÉ? |
| "NO ESTÁ": | OKAY, NO ESTÁ, ¿QUÉ?, NO, VALE, LISTO, OTRO, ¿ÉSTA?, ESTA, NO ÉS, ¿ÉSA?, ESPERA, VA, ¿CÓMO? |
| "OKAY": | LISTO, ¿CÓMO?, ESPERA, ¿ÉSA?, NO, NO ÉS, ¿ÉSTA?, OKAY, VALE, NO ESTÁ, ESTA, OTRO, VA, ¿QUÉ? |
| "VALE": | OTRO, ESPERA, VA, ¿ÉSTA?, ¿CÓMO?, ¿ÉSA?, NO, NO ÉS, NO ESTÁ, VALE, OKAY, ¿QUÉ?, ESTA, LISTO |
| "VA": | VALE, NO, ¿QUÉ?, LISTO, ESTA, ¿CÓMO?, NO ÉS, VA, NO ESTÁ, ESPERA, OTRO, ¿ÉSA?, ¿ÉSTA?, OKAY |
| "NO ÉS": | ESTA, NO, OTRO, VA, LISTO, NO ESTÁ, ¿QUÉ?, ¿ÉSA?, ¿ÉSTA?, NO ÉS, ¿CÓMO?, ESPERA, OKAY, VALE |
| "¿ÉSA?": | OKAY, VALE, LISTO, ESPERA, ¿ÉSA?, VA, ¿CÓMO?, ESTA, OTRO, NO ESTÁ, ¿QUÉ?, ¿ÉSTA?, NO, NO ÉS |
| "OK": | DALE, ¿DÓNDE?, BUENO, ÉSTA, BIEN, RÁPIDO, ESTÁ, YA ESTÁ, SI, OK, ¿CUÁL?, ¿SEGURO?, OTRA, NO SÉ |
| "¿DÓNDE?": | BUENO, BIEN, ¿SEGURO?, RÁPIDO, SI, OTRA, ¿CUÁL?, YA ESTÁ, OK, NO SÉ, ÉSTA, DALE, ESTÁ, ¿DÓNDE? |
| "BUENO": | ¿CUÁL?, ¿DÓNDE?, RÁPIDO, BUENO, BIEN, ESTÁ, DALE, NO SÉ, ÉSTA, OK, SI, YA ESTÁ, ¿SEGURO?, OTRA |
| "ÉSTA": | OK, ÉSTA, ESTÁ, BIEN, ¿CUÁL?, ¿DÓNDE?, NO SÉ, BUENO, SI, RÁPIDO, DALE, OTRA, ¿SEGURO?, YA ESTÁ |
| "ESTÁ": | OTRA, NO SÉ, ESTÁ, RÁPIDO, SI, DALE, BUENO, YA ESTÁ, ÉSTA, ¿SEGURO?, BIEN, ¿CUÁL?, ¿DÓNDE?, OK |
| "NO SÉ": | RÁPIDO, DALE, BIEN, SI, ÉSTA, ESTÁ, ¿CUÁL?, OTRA, NO SÉ, OK, ¿SEGURO?, YA ESTÁ, ¿DÓNDE?, BUENO |
| "RÁPIDO": | RÁPIDO, BUENO, ¿DÓNDE?, OK, OTRA, YA ESTÁ, ¿CUÁL?, BIEN, DALE, ¿SEGURO?, ÉSTA, ESTÁ, NO SÉ, SI |
| "¿CUÁL?": | ESTÁ, NO SÉ, ¿DÓNDE?, ÉSTA, BIEN, ¿CUÁL?, OTRA, OK, RÁPIDO, ¿SEGURO?, BUENO, DALE, YA ESTÁ, SI |
| "SI": | OK, YA ESTÁ, ÉSTA, BUENO, NO SÉ, OTRA, ¿CUÁL?, ¿SEGURO?, ¿DÓNDE?, RÁPIDO, ESTÁ, BIEN, SI, DALE |
| "OTRA": | DALE, RÁPIDO, BIEN, SI, BUENO, ESTÁ, ÉSTA, YA ESTÁ, ¿SEGURO?, OK, NO SÉ, ¿DÓNDE?, ¿CUÁL?, OTRA |
| "BIEN": | SI, RÁPIDO, ¿CUÁL?, BUENO, YA ESTÁ, DALE, BIEN, ¿SEGURO?, OTRA, ¿DÓNDE?, ESTÁ, ÉSTA, NO SÉ, OK |
| "YA ESTÁ": | ¿DÓNDE?, NO SÉ, OTRA, ¿CUÁL?, OK, ESTÁ, DALE, SI, ÉSTA, BIEN, YA ESTÁ, RÁPIDO, BUENO, ¿SEGURO? |
| "DALE": | ¿DÓNDE?, OTRA, ¿SEGURO?, ÉSTA, OK, YA ESTÁ, RÁPIDO, ESTÁ, DALE, NO SÉ, SI, BIEN, BUENO, ¿CUÁL? |
| "¿SEGURO?": | ÉSTA, BIEN, NO SÉ, ESTÁ, YA ESTÁ, OTRA, ¿CUÁL?, SI, RÁPIDO, OK, ¿SEGURO?, DALE, ¿DÓNDE?, BUENO |
| "VALMIS": | JAH, OKEI, MIDA, KESKEL, VASAK, VAJUTA, PAREM, TÜHI, VALMIS, EI, ESIMENE, AHHH, MIDAGI, OOTA |
|---|---|
| "ESIMENE": | VASAK, OKEI, JAH, KESKEL, EI, PAREM, MIDAGI, AHHH, OOTA, VALMIS, TÜHI, MIDA, VAJUTA, ESIMENE |
| "EI": | TÜHI, AHHH, OOTA, ESIMENE, MIDA, VALMIS, PAREM, JAH, MIDAGI, VASAK, VAJUTA, OKEI, EI, KESKEL |
| "TÜHI": | OOTA, PAREM, OKEI, KESKEL, TÜHI, VAJUTA, VALMIS, MIDAGI, EI, MIDA, VASAK, AHHH, JAH, ESIMENE |
| "MIDAGI": | AHHH, PAREM, OKEI, KESKEL, JAH, TÜHI, EI, VAJUTA, VASAK, MIDA, OOTA, ESIMENE, MIDAGI, VALMIS |
| "JAH": | OKEI, PAREM, AHHH, KESKEL, ESIMENE, MIDA, VAJUTA, VALMIS, MIDAGI, JAH, VASAK, TÜHI, EI, OOTA |
| "MIDA": | AHHH, MIDA, VASAK, MIDAGI, VALMIS, TÜHI, KESKEL, EI, OKEI, ESIMENE, OOTA, JAH, VAJUTA, PAREM |
| "AHHH": | VALMIS, MIDAGI, VASAK, MIDA, OKEI, JAH, PAREM, EI, VAJUTA, TÜHI, AHHH, KESKEL, OOTA, ESIMENE |
| "VASAK": | PAREM, VASAK, ESIMENE, EI, KESKEL, JAH, TÜHI, MIDA, AHHH, OOTA, VAJUTA, VALMIS, OKEI, MIDAGI |
| "PAREM": | JAH, MIDAGI, VALMIS, VAJUTA, EI, OOTA, MIDA, PAREM, KESKEL, VASAK, AHHH, TÜHI, OKEI, ESIMENE |
| "KESKEL": | TÜHI, VALMIS, OKEI, MIDA, MIDAGI, VAJUTA, EI, OOTA, VASAK, KESKEL, PAREM, ESIMENE, AHHH, JAH |
| "OKEI": | KESKEL, EI, ESIMENE, JAH, AHHH, MIDAGI, OOTA, OKEI, VASAK, VALMIS, TÜHI, VAJUTA, MIDA, PAREM |
| "OOTA": | AHHH, EI, TÜHI, OKEI, JAH, VASAK, ESIMENE, VAJUTA, MIDA, OOTA, MIDAGI, VALMIS, PAREM, KESKEL |
| "VAJUTA": | PAREM, KESKEL, JAH, VALMIS, VAJUTA, OKEI, MIDAGI, AHHH, TÜHI, VASAK, ESIMENE, MIDA, EI, OOTA |
| "SA": | OK, SINA, SINU, SU, EDASI, AH HAH, SUU, OOT, MIDA?, SA, AH AH, NAGU, OLEMAS, U |
| "SINA": | SINU, EDASI, NAGU, AH HAH, MIDA?, OLEMAS, AH AH, OOT, SA, U, SU, OK, SUU, SINA |
| "SINU": | AH AH, SINA, AH HAH, SINU, EDASI, SUU, OK, U, SU, SA, MIDA?, OOT, NAGU, OLEMAS |
| "SU": | SA, SU, SUU, EDASI, AH AH, SINA, U, SINU, MIDA?, AH HAH, OK, OLEMAS, NAGU, OOT |
| "SUU": | OLEMAS, U, SUU, AH HAH, MIDA?, OK, SINU, OOT, SU, NAGU, EDASI, AH AH, SINA, SA |
| "U": | AH HAH, OK, EDASI, MIDA?, SU, SUU, AH AH, OLEMAS, U, SA, NAGU, OOT, SINA, SINU |
| "AH HAH": | AH HAH, SINU, SINA, SA, OLEMAS, OOT, AH AH, EDASI, OK, NAGU, SU, SUU, U, MIDA? |
| "AH AH": | SUU, U, SINA, SU, EDASI, AH AH, OLEMAS, SA, AH HAH, NAGU, SINU, OK, OOT, MIDA? |
| "MIDA?": | SA, OOT, SU, SINU, U, OLEMAS, AH AH, NAGU, SINA, AH HAH, SUU, EDASI, MIDA?, OK |
| "OLEMAS": | OK, AH HAH, EDASI, MIDA?, SINU, SUU, SU, OOT, NAGU, SA, U, SINA, AH AH, OLEMAS |
| "EDASI": | MIDA?, AH HAH, AH AH, SINU, OOT, OK, EDASI, NAGU, OLEMAS, SINA, SUU, SU, U, SA |
| "OOT": | SINA, U, OLEMAS, AH AH, SA, SUU, OK, MIDA?, SU, EDASI, OOT, AH HAH, SINU, NAGU |
| "OK": | SINA, OLEMAS, NAGU, SU, SA, OOT, AH HAH, SUU, OK, U, MIDA?, EDASI, SINU, AH AH |
| "NAGU": | SU, EDASI, U, SUU, OOT, OLEMAS, AH AH, MIDA?, AH HAH, SA, NAGU, OK, SINA, SINU |
| "T": | VALMIS, Ö, OIKEIN, ÖÖH, ODOTA, MITÄ?, HETKI, SITTEN, T, TEHTY, TEE, VÄÄRIN, PAINA, MITÄ |
|---|---|
| "TEE": | ODOTA, Ö, VALMIS, ÖÖH, TEHTY, HETKI, PAINA, VÄÄRIN, MITÄ, T, SITTEN, OIKEIN, MITÄ?, TEE |
| "TEHTY": | SITTEN, VÄÄRIN, MITÄ, TEE, OIKEIN, T, HETKI, VALMIS, PAINA, ODOTA, MITÄ?, Ö, TEHTY, ÖÖH |
| "SITTEN": | MITÄ, HETKI, Ö, ÖÖH, SITTEN, MITÄ?, T, PAINA, TEHTY, OIKEIN, ODOTA, VÄÄRIN, VALMIS, TEE |
| "PAINA": | VÄÄRIN, HETKI, Ö, ÖÖH, VALMIS, SITTEN, TEHTY, MITÄ?, ODOTA, OIKEIN, MITÄ, TEE, PAINA, T |
| "VALMIS": | Ö, HETKI, VÄÄRIN, ÖÖH, TEE, OIKEIN, MITÄ?, T, PAINA, VALMIS, ODOTA, SITTEN, TEHTY, MITÄ |
| "OIKEIN": | VÄÄRIN, OIKEIN, ODOTA, PAINA, T, SITTEN, ÖÖH, TEHTY, Ö, TEE, MITÄ, VALMIS, MITÄ?, HETKI |
| "VÄÄRIN": | T, PAINA, ODOTA, OIKEIN, Ö, VALMIS, HETKI, TEHTY, MITÄ?, SITTEN, VÄÄRIN, ÖÖH, MITÄ, TEE |
| "ODOTA": | HETKI, ODOTA, TEE, TEHTY, ÖÖH, VALMIS, SITTEN, OIKEIN, VÄÄRIN, MITÄ, MITÄ?, T, Ö, PAINA |
| "HETKI": | VALMIS, PAINA, T, MITÄ?, TEHTY, MITÄ, OIKEIN, HETKI, ÖÖH, ODOTA, VÄÄRIN, SITTEN, Ö, TEE |
| "ÖÖH": | SITTEN, T, Ö, OIKEIN, PAINA, MITÄ?, TEHTY, MITÄ, ODOTA, ÖÖH, HETKI, TEE, VÄÄRIN, VALMIS |
| "Ö": | ÖÖH, TEHTY, TEE, VALMIS, VÄÄRIN, PAINA, MITÄ, Ö, ODOTA, T, SITTEN, MITÄ?, OIKEIN, HETKI |
| "MITÄ": | VÄÄRIN, TEHTY, SITTEN, Ö, VALMIS, ODOTA, TEE, MITÄ?, OIKEIN, MITÄ, PAINA, T, HETKI, ÖÖH |
| "MITÄ?": | HETKI, ÖÖH, VALMIS, T, MITÄ?, Ö, PAINA, VÄÄRIN, SITTEN, ODOTA, TEE, OIKEIN, TEHTY, MITÄ |
| "MIKÄ": | RUOAN, MIKÄ?, JUU, JEP, PIANO, LÖYTYY, KYLLÄ, PIENO, EI OLE, MIKÄ, EI, RUUAN, EI OO, ON |
| "MIKÄ?": | JUU, PIANO, RUUAN, LÖYTYY, EI OLE, EI OO, EI, PIENO, MIKÄ, ON, JEP, RUOAN, KYLLÄ, MIKÄ? |
| "JUU": | EI, MIKÄ?, LÖYTYY, JUU, PIANO, KYLLÄ, RUOAN, ON, JEP, MIKÄ, EI OLE, PIENO, RUUAN, EI OO |
| "JEP": | MIKÄ, JEP, KYLLÄ, PIANO, EI, MIKÄ?, ON, JUU, EI OLE, LÖYTYY, RUOAN, EI OO, RUUAN, PIENO |
| "KYLLÄ": | EI OO, ON, KYLLÄ, LÖYTYY, EI OLE, RUOAN, JUU, PIENO, JEP, RUUAN, PIANO, EI, MIKÄ?, MIKÄ |
| "ON": | LÖYTYY, RUOAN, PIANO, EI OLE, JEP, KYLLÄ, EI, EI OO, ON, MIKÄ, RUUAN, PIENO, MIKÄ?, JUU |
| "LÖYTYY": | LÖYTYY, JUU, MIKÄ?, MIKÄ, EI OO, PIENO, EI, PIANO, RUOAN, RUUAN, JEP, KYLLÄ, ON, EI OLE |
| "EI": | KYLLÄ, ON, MIKÄ?, JEP, PIANO, EI, EI OO, MIKÄ, LÖYTYY, RUUAN, JUU, RUOAN, PIENO, EI OLE |
| "EI OLE": | MIKÄ, PIENO, JEP, JUU, ON, EI OO, EI, RUUAN, MIKÄ?, LÖYTYY, KYLLÄ, PIANO, EI OLE, RUOAN |
| "EI OO": | RUOAN, LÖYTYY, PIANO, EI OLE, JUU, KYLLÄ, JEP, PIENO, RUUAN, MIKÄ, ON, MIKÄ?, EI, EI OO |
| "PIANO": | EI OLE, LÖYTYY, EI, JUU, PIENO, RUOAN, PIANO, RUUAN, EI OO, MIKÄ?, KYLLÄ, JEP, ON, MIKÄ |
| "PIENO": | MIKÄ?, ON, EI OO, EI, MIKÄ, KYLLÄ, RUOAN, EI OLE, JEP, PIANO, PIENO, LÖYTYY, JUU, RUUAN |
| "RUOAN": | MIKÄ?, EI OO, RUUAN, JEP, MIKÄ, PIENO, LÖYTYY, KYLLÄ, RUOAN, ON, EI OLE, PIANO, JUU, EI |
| "RUUAN": | JEP, PIANO, ON, KYLLÄ, PIENO, EI OO, EI, EI OLE, LÖYTYY, MIKÄ, RUUAN, RUOAN, MIKÄ?, JUU |
| "PRÊT": | OUI, OKAY, QUOI, MILIEU, GAUCHE, APPUIE, DROITE, VIDE, PRÊT, NON, PREMIER, EUHHH, RIEN, ATTEND |
|---|---|
| "PREMIER": | GAUCHE, OKAY, OUI, MILIEU, NON, DROITE, RIEN, EUHHH, ATTEND, PRÊT, VIDE, QUOI, APPUIE, PREMIER |
| "NON": | VIDE, EUHHH, ATTEND, PREMIER, QUOI, PRÊT, DROITE, OUI, RIEN, GAUCHE, APPUIE, OKAY, NON, MILIEU |
| "VIDE": | ATTEND, DROITE, OKAY, MILIEU, VIDE, APPUIE, PRÊT, RIEN, NON, QUOI, GAUCHE, EUHHH, OUI, PREMIER |
| "RIEN": | EUHHH, DROITE, OKAY, MILIEU, OUI, VIDE, NON, APPUIE, GAUCHE, QUOI, ATTEND, PREMIER, RIEN, PRÊT |
| "OUI": | OKAY, DROITE, EUHHH, MILIEU, PREMIER, QUOI, APPUIE, PRÊT, RIEN, OUI, GAUCHE, VIDE, NON, ATTEND |
| "QUOI": | EUHHH, QUOI, GAUCHE, RIEN, PRÊT, VIDE, MILIEU, NON, OKAY, PREMIER, ATTEND, OUI, APPUIE, DROITE |
| "EUHHH": | PRÊT, RIEN, GAUCHE, QUOI, OKAY, OUI, DROITE, NON, APPUIE, VIDE, EUHHH, MILIEU, ATTEND, PREMIER |
| "GAUCHE": | DROITE, GAUCHE, PREMIER, NON, MILIEU, OUI, VIDE, QUOI, EUHHH, ATTEND, APPUIE, PRÊT, OKAY, RIEN |
| "DROITE": | OUI, RIEN, PRÊT, APPUIE, NON, ATTEND, QUOI, DROITE, MILIEU, GAUCHE, EUHHH, VIDE, OKAY, PREMIER |
| "MILIEU": | VIDE, PRÊT, OKAY, QUOI, RIEN, APPUIE, NON, ATTEND, GAUCHE, MILIEU, DROITE, PREMIER, EUHHH, OUI |
| "OKAY": | MILIEU, NON, PREMIER, OUI, EUHHH, RIEN, ATTEND, OKAY, GAUCHE, PRÊT, VIDE, APPUIE, QUOI, DROITE |
| "ATTEND": | EUHHH, NON, VIDE, OKAY, OUI, GAUCHE, PREMIER, APPUIE, QUOI, ATTEND, RIEN, PRÊT, DROITE, MILIEU |
| "APPUIE": | DROITE, MILIEU, OUI, PRÊT, APPUIE, OKAY, RIEN, EUHHH, VIDE, GAUCHE, PREMIER, QUOI, NON, ATTEND |
| "TOI": | SÛR, TON, TAON, THON, SUIVANT, EUH, T'ONT, CONTINUE, QUOI?, TOI, E, COMME, FAIT, TOIT |
| "TON": | TAON, SUIVANT, COMME, EUH, QUOI?, FAIT, E, CONTINUE, TOI, TOIT, THON, SÛR, T'ONT, TON |
| "TAON": | E, TON, EUH, TAON, SUIVANT, T'ONT, SÛR, TOIT, THON, TOI, QUOI?, CONTINUE, COMME, FAIT |
| "THON": | TOI, THON, T'ONT, SUIVANT, E, TON, TOIT, TAON, QUOI?, EUH, SÛR, FAIT, COMME, CONTINUE |
| "T'ONT": | FAIT, TOIT, T'ONT, EUH, QUOI?, SÛR, TAON, CONTINUE, THON, COMME, SUIVANT, E, TON, TOI |
| "TOIT": | EUH, SÛR, SUIVANT, QUOI?, THON, T'ONT, E, FAIT, TOIT, TOI, COMME, CONTINUE, TON, TAON |
| "EUH": | EUH, TAON, TON, TOI, FAIT, CONTINUE, E, SUIVANT, SÛR, COMME, THON, T'ONT, TOIT, QUOI? |
| "E": | T'ONT, TOIT, TON, THON, SUIVANT, E, FAIT, TOI, EUH, COMME, TAON, SÛR, CONTINUE, QUOI? |
| "QUOI?": | TOI, CONTINUE, THON, TAON, TOIT, FAIT, E, COMME, TON, EUH, T'ONT, SUIVANT, QUOI?, SÛR |
| "FAIT": | SÛR, EUH, SUIVANT, QUOI?, TAON, T'ONT, THON, CONTINUE, COMME, TOI, TOIT, TON, E, FAIT |
| "SUIVANT": | QUOI?, EUH, E, TAON, CONTINUE, SÛR, SUIVANT, COMME, FAIT, TON, T'ONT, THON, TOIT, TOI |
| "CONTINUE": | TON, TOIT, FAIT, E, TOI, T'ONT, SÛR, QUOI?, THON, SUIVANT, CONTINUE, EUH, TAON, COMME |
| "SÛR": | TON, FAIT, COMME, THON, TOI, CONTINUE, EUH, T'ONT, SÛR, TOIT, QUOI?, SUIVANT, TAON, E |
| "COMME": | THON, SUIVANT, TOIT, T'ONT, CONTINUE, FAIT, E, QUOI?, EUH, TOI, COMME, SÛR, TON, TAON |
| "KLEAR": | JA, OKEE, WAT, MIDDEN, LINKS, DRUKKE, RJOCHTS, LEECH, KLEAR, NEE, EARSTE, UMM, NEAT, WACHT |
|---|---|
| "EARSTE": | LINKS, OKEE, JA, MIDDEN, NEE, RJOCHTS, NEAT, UMM, WACHT, KLEAR, LEECH, WAT, DRUKKE, EARSTE |
| "NEE": | LEECH, UMM, WACHT, EARSTE, WAT, KLEAR, RJOCHTS, JA, NEAT, LINKS, DRUKKE, OKEE, NEE, MIDDEN |
| "LEECH": | WACHT, RJOCHTS, OKEE, MIDDEN, LEECH, DRUKKE, KLEAR, NEAT, NEE, WAT, LINKS, UMM, JA, EARSTE |
| "NEAT": | UMM, RJOCHTS, OKEE, MIDDEN, JA, LEECH, NEE, DRUKKE, LINKS, WAT, WACHT, EARSTE, NEAT, KLEAR |
| "JA": | OKEE, RJOCHTS, UMM, MIDDEN, EARSTE, WAT, DRUKKE, KLEAR, NEAT, JA, LINKS, LEECH, NEE, WACHT |
| "WAT": | UMM, WAT, LINKS, NEAT, KLEAR, LEECH, MIDDEN, NEE, OKEE, EARSTE, WACHT, JA, DRUKKE, RJOCHTS |
| "UMM": | KLEAR, NEAT, LINKS, WAT, OKEE, JA, RJOCHTS, NEE, DRUKKE, LEECH, UMM, MIDDEN, WACHT, EARSTE |
| "LINKS": | RJOCHTS, LINKS, EARSTE, NEE, MIDDEN, JA, LEECH, WAT, UMM, WACHT, DRUKKE, KLEAR, OKEE, NEAT |
| "RJOCHTS": | JA, NEAT, KLEAR, DRUKKE, NEE, WACHT, WAT, RJOCHTS, MIDDEN, LINKS, UMM, LEECH, OKEE, EARSTE |
| "MIDDEN": | LEECH, KLEAR, OKEE, WAT, NEAT, DRUKKE, NEE, WACHT, LINKS, MIDDEN, RJOCHTS, EARSTE, UMM, JA |
| "OKEE": | MIDDEN, NEE, EARSTE, JA, UMM, NEAT, WACHT, OKEE, LINKS, KLEAR, LEECH, DRUKKE, WAT, RJOCHTS |
| "WACHT": | UMM, NEE, LEECH, OKEE, JA, LINKS, EARSTE, DRUKKE, WAT, WACHT, NEAT, KLEAR, RJOCHTS, MIDDEN |
| "DRUKKE": | RJOCHTS, MIDDEN, JA, KLEAR, DRUKKE, OKEE, NEAT, UMM, LEECH, LINKS, EARSTE, WAT, NEE, WACHT |
| "SYN": | GOED, SIN, SINE, SINNE, FOLGJENDE, EN, SJEN, NOGRIS, WAT?, SYN, N, AS, SA, TSJIN |
| "SIN": | SINE, FOLGJENDE, AS, EN, WAT?, SA, N, NOGRIS, SYN, TSJIN, SINNE, GOED, SJEN, SIN |
| "SINE": | N, SIN, EN, SINE, FOLGJENDE, SJEN, GOED, TSJIN, SINNE, SYN, WAT?, NOGRIS, AS, SA |
| "SINNE": | SYN, SINNE, SJEN, FOLGJENDE, N, SIN, TSJIN, SINE, WAT?, EN, GOED, SA, AS, NOGRIS |
| "SJEN": | SA, TSJIN, SJEN, EN, WAT?, GOED, SINE, NOGRIS, SINNE, AS, FOLGJENDE, N, SIN, SYN |
| "TSJIN": | EN, GOED, FOLGJENDE, WAT?, SINNE, SJEN, N, SA, TSJIN, SYN, AS, NOGRIS, SIN, SINE |
| "EN": | EN, SINE, SIN, SYN, SA, NOGRIS, N, FOLGJENDE, GOED, AS, SINNE, SJEN, TSJIN, WAT? |
| "N": | SJEN, TSJIN, SIN, SINNE, FOLGJENDE, N, SA, SYN, EN, AS, SINE, GOED, NOGRIS, WAT? |
| "WAT?": | SYN, NOGRIS, SINNE, SINE, TSJIN, SA, N, AS, SIN, EN, SJEN, FOLGJENDE, WAT?, GOED |
| "SA": | GOED, EN, FOLGJENDE, WAT?, SINE, SJEN, SINNE, NOGRIS, AS, SYN, TSJIN, SIN, N, SA |
| "FOLGJENDE": | WAT?, EN, N, SINE, NOGRIS, GOED, FOLGJENDE, AS, SA, SIN, SJEN, SINNE, TSJIN, SYN |
| "NOGRIS": | SIN, TSJIN, SA, N, SYN, SJEN, GOED, WAT?, SINNE, FOLGJENDE, NOGRIS, EN, SINE, AS |
| "GOED": | SIN, SA, AS, SINNE, SYN, NOGRIS, EN, SJEN, GOED, TSJIN, WAT?, FOLGJENDE, SINE, N |
| "AS": | SINNE, FOLGJENDE, TSJIN, SJEN, NOGRIS, SA, N, WAT?, EN, SYN, AS, GOED, SIN, SINE |
| "א": | עין, הוא, אם, E, אף אחד, הם, היא, הלאה, א, סיימתי, ע, עם, אלף, אי |
|---|---|
| "ע": | אף אחד, הוא, עין, E, סיימתי, היא, אלף, עם, אי, א, הלאה, אם, הם, ע |
| "סיימתי": | הלאה, עם, אי, ע, אם, א, היא, עין, אלף, אף אחד, הם, הוא, סיימתי, E |
| "הלאה": | אי, היא, הוא, E, הלאה, הם, א, אלף, סיימתי, אם, אף אחד, עם, עין, ע |
| "אלף": | עם, היא, הוא, E, עין, הלאה, סיימתי, הם, אף אחד, אם, אי, ע, אלף, א |
| "עין": | הוא, היא, עם, E, ע, אם, הם, א, אלף, עין, אף אחד, הלאה, סיימתי, אי |
| "אם": | עם, אם, אף אחד, אלף, א, הלאה, E, סיימתי, הוא, ע, אי, עין, הם, היא |
| "עם": | א, אלף, אף אחד, אם, הוא, עין, היא, סיימתי, הם, הלאה, עם, E, אי, ע |
| "אף אחד": | היא, אף אחד, ע, סיימתי, E, עין, הלאה, אם, עם, אי, הם, א, הוא, אלף |
| "היא": | עין, אלף, א, הם, סיימתי, אי, אם, היא, E, אף אחד, עם, הלאה, הוא, ע |
| "E": | הלאה, א, הוא, אם, אלף, הם, סיימתי, אי, אף אחד, E, היא, ע, עם, עין |
| "הוא": | E, סיימתי, ע, עין, עם, אלף, אי, הוא, אף אחד, א, הלאה, הם, אם, היא |
| "אי": | עם, סיימתי, הלאה, הוא, עין, אף אחד, ע, הם, אם, אי, אלף, א, היא, E |
| "הם": | היא, E, עין, א, הם, הוא, אלף, עם, הלאה, אף אחד, ע, אם, סיימתי, אי |
| "M": | בטח, אמממ, אהא, כן, שוב, האות א, לא, כאילו, את, M, האות ע, רגע, עט, נו |
| "אמממ": | אהא, שוב, רגע, האות א, את, עט, האות ע, כאילו, M, נו, כן, בטח, לא, אמממ |
| "אהא": | האות ע, אמממ, האות א, אהא, שוב, לא, בטח, נו, כן, M, את, כאילו, רגע, עט |
| "כן": | M, כן, לא, שוב, האות ע, אמממ, נו, אהא, את, האות א, בטח, עט, רגע, כאילו |
| "לא": | עט, נו, לא, האות א, את, בטח, אהא, כאילו, כן, רגע, שוב, האות ע, אמממ, M |
| "נו": | האות א, בטח, שוב, את, כן, לא, האות ע, עט, נו, M, רגע, כאילו, אמממ, אהא |
| "האות א": | האות א, אהא, אמממ, M, עט, כאילו, האות ע, שוב, בטח, רגע, כן, לא, נו, את |
| "האות ע": | לא, נו, אמממ, כן, שוב, האות ע, עט, M, האות א, רגע, אהא, בטח, כאילו, את |
| "את": | M, כאילו, כן, אהא, נו, עט, האות ע, רגע, אמממ, האות א, לא, שוב, את, בטח |
| "עט": | בטח, האות א, שוב, את, אהא, לא, כן, כאילו, רגע, M, נו, אמממ, האות ע, עט |
| "שוב": | את, האות א, האות ע, אהא, כאילו, בטח, שוב, רגע, עט, אמממ, לא, כן, נו, M |
| "כאילו": | אמממ, נו, עט, האות ע, M, לא, בטח, את, כן, שוב, כאילו, האות א, אהא, רגע |
| "בטח": | אמממ, עט, רגע, כן, M, כאילו, האות א, לא, בטח, נו, את, שוב, אהא, האות ע |
| "רגע": | כן, שוב, נו, לא, כאילו, עט, האות ע, את, האות א, M, רגע, בטח, אמממ, אהא |
| "PRONTO": | SI, OK, COSA, CENTRO, SINISTRA, PREMI, DESTRA, VUOTO, PRONTO, NO, PRIMO, EHM, NIENTE, ASPETTA |
|---|---|
| "PRIMO": | SINISTRA, OK, SI, CENTRO, NO, DESTRA, NIENTE, EHM, ASPETTA, PRONTO, VUOTO, COSA, PREMI, PRIMO |
| "NO": | VUOTO, EHM, ASPETTA, PRIMO, COSA, PRONTO, DESTRA, SI, NIENTE, SINISTRA, PREMI, OK, NO, CENTRO |
| "VUOTO": | ASPETTA, DESTRA, OK, CENTRO, VUOTO, PREMI, PRONTO, NIENTE, NO, COSA, SINISTRA, EHM, SI, PRIMO |
| "NIENTE": | EHM, DESTRA, OK, CENTRO, SI, VUOTO, NO, PREMI, SINISTRA, COSA, ASPETTA, PRIMO, NIENTE, PRONTO |
| "SI": | OK, DESTRA, EHM, CENTRO, PRIMO, COSA, PREMI, PRONTO, NIENTE, SI, SINISTRA, VUOTO, NO, ASPETTA |
| "COSA": | EHM, COSA, SINISTRA, NIENTE, PRONTO, VUOTO, CENTRO, NO, OK, PRIMO, ASPETTA, SI, PREMI, DESTRA |
| "EHM": | PRONTO, NIENTE, SINISTRA, COSA, OK, SI, DESTRA, NO, PREMI, VUOTO, EHM, CENTRO, ASPETTA, PRIMO |
| "SINISTRA": | DESTRA, SINISTRA, PRIMO, NO, CENTRO, SI, VUOTO, COSA, EHM, ASPETTA, PREMI, PRONTO, OK, NIENTE |
| "DESTRA": | SI, NIENTE, PRONTO, PREMI, NO, ASPETTA, COSA, DESTRA, CENTRO, SINISTRA, EHM, VUOTO, OK, PRIMO |
| "CENTRO": | VUOTO, PRONTO, OK, COSA, NIENTE, PREMI, NO, ASPETTA, SINISTRA, CENTRO, DESTRA, PRIMO, EHM, SI |
| "OK": | CENTRO, NO, PRIMO, SI, EHM, NIENTE, ASPETTA, OK, SINISTRA, PRONTO, VUOTO, PREMI, COSA, DESTRA |
| "ASPETTA": | EHM, NO, VUOTO, OK, SI, SINISTRA, PRIMO, PREMI, COSA, ASPETTA, NIENTE, PRONTO, DESTRA, CENTRO |
| "PREMI": | DESTRA, CENTRO, SI, PRONTO, PREMI, OK, NIENTE, EHM, VUOTO, SINISTRA, PRIMO, COSA, NO, ASPETTA |
| "RIPETI": | DAINO, SCUSA, IN ALTO, IN BASSO, PROSSIMO, UH HUH, CAPELLO, VA BENE, COSA?, RIPETI, UH UH, DAI NO, FATTO, CAPPELLO |
| "SCUSA": | IN ALTO, PROSSIMO, DAI NO, UH HUH, COSA?, FATTO, UH UH, VA BENE, RIPETI, CAPPELLO, IN BASSO, DAINO, CAPELLO, SCUSA |
| "IN ALTO": | UH UH, SCUSA, UH HUH, IN ALTO, PROSSIMO, CAPELLO, DAINO, CAPPELLO, IN BASSO, RIPETI, COSA?, VA BENE, DAI NO, FATTO |
| "IN BASSO": | RIPETI, IN BASSO, CAPELLO, PROSSIMO, UH UH, SCUSA, CAPPELLO, IN ALTO, COSA?, UH HUH, DAINO, FATTO, DAI NO, VA BENE |
| "CAPELLO": | FATTO, CAPPELLO, CAPELLO, UH HUH, COSA?, DAINO, IN ALTO, VA BENE, IN BASSO, DAI NO, PROSSIMO, UH UH, SCUSA, RIPETI |
| "CAPPELLO": | UH HUH, DAINO, PROSSIMO, COSA?, IN BASSO, CAPELLO, UH UH, FATTO, CAPPELLO, RIPETI, DAI NO, VA BENE, SCUSA, IN ALTO |
| "UH HUH": | UH HUH, IN ALTO, SCUSA, RIPETI, FATTO, VA BENE, UH UH, PROSSIMO, DAINO, DAI NO, IN BASSO, CAPELLO, CAPPELLO, COSA? |
| "UH UH": | CAPELLO, CAPPELLO, SCUSA, IN BASSO, PROSSIMO, UH UH, FATTO, RIPETI, UH HUH, DAI NO, IN ALTO, DAINO, VA BENE, COSA? |
| "COSA?": | RIPETI, VA BENE, IN BASSO, IN ALTO, CAPPELLO, FATTO, UH UH, DAI NO, SCUSA, UH HUH, CAPELLO, PROSSIMO, COSA?, DAINO |
| "FATTO": | DAINO, UH HUH, PROSSIMO, COSA?, IN ALTO, CAPELLO, IN BASSO, VA BENE, DAI NO, RIPETI, CAPPELLO, SCUSA, UH UH, FATTO |
| "PROSSIMO": | COSA?, UH HUH, UH UH, IN ALTO, VA BENE, DAINO, PROSSIMO, DAI NO, FATTO, SCUSA, CAPELLO, IN BASSO, CAPPELLO, RIPETI |
| "VA BENE": | SCUSA, CAPPELLO, FATTO, UH UH, RIPETI, CAPELLO, DAINO, COSA?, IN BASSO, PROSSIMO, VA BENE, UH HUH, IN ALTO, DAI NO |
| "DAINO": | SCUSA, FATTO, DAI NO, IN BASSO, RIPETI, VA BENE, UH HUH, CAPELLO, DAINO, CAPPELLO, COSA?, PROSSIMO, IN ALTO, UH UH |
| "DAI NO": | IN BASSO, PROSSIMO, CAPPELLO, CAPELLO, VA BENE, FATTO, UH UH, COSA?, UH HUH, RIPETI, DAI NO, DAINO, SCUSA, IN ALTO |
Continues on next page
| 空白 | 上、オッケー、真ん中、違う、右、わかった、いや、待って、空白、うん、終わり、下、左、押す |
|---|---|
| 終わり | 右、オッケー、上、違う、うん、いや、左、下、押す、空白、待って、真ん中、わかった、終わり |
| うん | 待って、下、押す、終わり、真ん中、空白、いや、上、左、右、わかった、オッケー、うん、違う |
| 待って | 押す、いや、オッケー、違う、待って、わかった、空白、左、うん、真ん中、右、下、上、終わり |
| 左 | 下、いや、オッケー、違う、上、待って、うん、わかった、右、真ん中、押す、終わり、左、空白 |
| 上 | オッケー、いや、下、違う、終わり、真ん中、わかった、空白、左、上、右、待って、うん、押す |
| 真ん中 | 下、真ん中、右、左、空白、待って、違う、うん、オッケー、終わり、押す、上、わかった、いや |
| 下 | 空白、左、右、真ん中、オッケー、上、いや、うん、わかった、待って、下、違う、押す、終わり |
| 右 | いや、右、終わり、うん、違う、上、待って、真ん中、下、押す、わかった、空白、オッケー、左 |
| いや | 上、左、空白、わかった、うん、押す、真ん中、いや、違う、右、下、待って、オッケー、終わり |
| 違う | 待って、空白、オッケー、真ん中、左、わかった、うん、押す、右、違う、いや、終わり、下、上 |
| オッケー | 違う、うん、終わり、上、下、左、押す、オッケー、右、空白、待って、わかった、真ん中、いや |
| 押す | 下、うん、待って、オッケー、上、右、終わり、わかった、真ん中、押す、左、空白、いや、違う |
| わかった | いや、違う、上、空白、わかった、オッケー、左、下、待って、右、終わり、真ん中、うん、押す |
| 絵 | 壱、あぁ、あ~、あーあ、1、何?、え、位置、解雇、絵、そう、一、蚕、何 |
| あぁ | あ~、1、一、何?、解雇、蚕、そう、位置、絵、何、あーあ、壱、え、あぁ |
| あ~ | そう、あぁ、何?、あ~、1、え、壱、何、あーあ、絵、解雇、位置、一、蚕 |
| あーあ | 絵、あーあ、え、1、そう、あぁ、何、あ~、解雇、何?、壱、蚕、一、位置 |
| え | 蚕、何、え、何?、解雇、壱、あ~、位置、あーあ、一、1、そう、あぁ、絵 |
| 何 | 何?、壱、1、解雇、あーあ、え、そう、蚕、何、絵、一、位置、あぁ、あ~ |
| 何? | 何?、あ~、あぁ、絵、蚕、位置、そう、1、壱、一、あーあ、え、何、解雇 |
| そう | え、何、あぁ、あーあ、1、そう、蚕、絵、何?、一、あ~、壱、位置、解雇 |
| 解雇 | 絵、位置、あーあ、あ~、何、蚕、そう、一、あぁ、何?、え、1、解雇、壱 |
| 蚕 | 壱、何?、1、解雇、あ~、え、あーあ、位置、一、絵、何、あぁ、そう、蚕 |
| 1 | 解雇、何?、そう、あ~、位置、壱、1、一、蚕、あぁ、え、あーあ、何、絵 |
| 位置 | あぁ、何、蚕、そう、絵、え、壱、解雇、あーあ、1、位置、何?、あ~、一 |
| 壱 | あぁ、蚕、一、あーあ、絵、位置、何?、え、壱、何、解雇、1、あ~、そう |
| 一 | あーあ、1、何、え、位置、蚕、そう、解雇、何?、絵、一、壱、あぁ、あ~ |
| 어 | 내 거, 다음, 네 거, 일단, 내 개, 그거, 잠시만, 어의, 어, 어이, 어어, 네 개, 오이, 그거 눌러! |
|---|---|
| 어어 | 내 개, 다음, 내 거, 일단, 어이, 잠시만, 오이, 네 개, 그거 눌러!, 어, 어의, 네 거, 그거, 어어 |
| 어이 | 어의, 네 개, 그거 눌러!, 어어, 네 거, 어, 잠시만, 내 거, 오이, 내 개, 그거, 다음, 어이, 일단 |
| 어의 | 그거 눌러!, 잠시만, 다음, 일단, 어의, 그거, 어, 오이, 어이, 네 거, 내 개, 네 개, 내 거, 어어 |
| 오이 | 네 개, 잠시만, 다음, 일단, 내 거, 어의, 어이, 그거, 내 개, 네 거, 그거 눌러!, 어어, 오이, 어 |
| 내 거 | 다음, 잠시만, 네 개, 일단, 어어, 네 거, 그거, 어, 오이, 내 거, 내 개, 어의, 어이, 그거 눌러! |
| 네 거 | 네 개, 네 거, 내 개, 오이, 어, 어의, 일단, 어이, 다음, 어어, 그거 눌러!, 내 거, 그거, 잠시만 |
| 네 개 | 어, 오이, 내 개, 네 거, 다음, 내 거, 잠시만, 어이, 그거, 어의, 네 개, 일단, 그거 눌러!, 어어 |
| 내 개 | 잠시만, 내 개, 어어, 어이, 일단, 내 거, 어의, 네 거, 네 개, 그거 눌러!, 그거, 어, 다음, 오이 |
| 잠시만 | 내 거, 오이, 어, 그거, 어이, 그거 눌러!, 네 거, 잠시만, 일단, 내 개, 네 개, 어의, 다음, 어어 |
| 일단 | 어의, 어, 다음, 네 거, 오이, 그거, 어이, 그거 눌러!, 내 개, 일단, 잠시만, 어어, 네 개, 내 거 |
| 다음 | 일단, 어이, 어어, 내 거, 네 개, 오이, 그거 눌러!, 다음, 내 개, 어, 어의, 그거, 네 거, 잠시만 |
| 그거 눌러! | 네 개, 어이, 어의, 다음, 내 거, 내 개, 어어, 그거, 네 거, 그거 눌러!, 오이, 어, 잠시만, 일단 |
| 그거 | 잠시만, 일단, 내 거, 어, 그거, 다음, 오이, 네 개, 어의, 내 개, 어어, 네 거, 어이, 그거 눌러! |
| 아니 그거 | 뭐, 그 옆에, 그거 말고, 아니, 뭐라고, 그러니까, 안이, 뭐?, 안써있어, 아니 그거, 비어있어, 왼쪽 위에, 뭐라고?, 아니라고 |
| 그 옆에 | 그거 말고, 뭐라고, 왼쪽 위에, 그러니까, 안써있어, 뭐라고?, 비어있어, 뭐?, 아니 그거, 아니라고, 아니, 뭐, 안이, 그 옆에 |
| 그거 말고 | 비어있어, 그 옆에, 그러니까, 그거 말고, 뭐라고, 안이, 뭐, 아니라고, 아니, 아니 그거, 안써있어, 뭐?, 왼쪽 위에, 뭐라고? |
| 아니 | 아니 그거, 아니, 안이, 뭐라고, 비어있어, 그 옆에, 아니라고, 그거 말고, 안써있어, 그러니까, 뭐, 뭐라고?, 왼쪽 위에, 뭐? |
| 안이 | 뭐라고?, 아니라고, 안이, 그러니까, 안써있어, 뭐, 그거 말고, 뭐?, 아니, 왼쪽 위에, 뭐라고, 비어있어, 그 옆에, 아니 그거 |
| 아니라고 | 그러니까, 뭐, 뭐라고, 안써있어, 아니, 안이, 비어있어, 뭐라고?, 아니라고, 아니 그거, 왼쪽 위에, 뭐?, 그 옆에, 그거 말고 |
| 그러니까 | 그러니까, 그거 말고, 그 옆에, 아니 그거, 뭐라고?, 뭐?, 비어있어, 뭐라고, 뭐, 왼쪽 위에, 아니, 안이, 아니라고, 안써있어 |
| 비어있어 | 안이, 아니라고, 그 옆에, 아니, 뭐라고, 비어있어, 뭐라고?, 아니 그거, 그러니까, 왼쪽 위에, 그거 말고, 뭐, 뭐?, 안써있어 |
| 안써있어 | 아니 그거, 뭐?, 아니, 그거 말고, 아니라고, 뭐라고?, 비어있어, 왼쪽 위에, 그 옆에, 그러니까, 안이, 뭐라고, 안써있어, 뭐 |
| 뭐라고? | 뭐, 그러니까, 뭐라고, 안써있어, 그거 말고, 안이, 아니, 뭐?, 왼쪽 위에, 아니 그거, 아니라고, 그 옆에, 비어있어, 뭐라고? |
| 뭐라고 | 안써있어, 그러니까, 비어있어, 그거 말고, 뭐?, 뭐, 뭐라고, 왼쪽 위에, 뭐라고?, 그 옆에, 안이, 아니, 아니라고, 아니 그거 |
| 뭐? | 그 옆에, 아니라고, 뭐라고?, 비어있어, 아니 그거, 안이, 뭐, 안써있어, 아니, 뭐라고, 뭐?, 그러니까, 그거 말고, 왼쪽 위에 |
| 뭐 | 그 옆에, 뭐라고?, 왼쪽 위에, 아니, 아니 그거, 뭐?, 그러니까, 안이, 뭐, 아니라고, 안써있어, 뭐라고, 그거 말고, 비어있어 |
| 왼쪽 위에 | 아니, 뭐라고, 아니라고, 안이, 뭐?, 뭐라고?, 비어있어, 안써있어, 그러니까, 아니 그거, 왼쪽 위에, 뭐, 그 옆에, 그거 말고 |
| "BOVEN": | HAUWT, IK ZEG, HOU, HOUWT, HOUSE, KLAAR, HOUT, EERSTE, BOVEN, ECHT, DRUK, HOUD, HAUSSE, JA |
|---|---|
| "DRUK": | HOUSE, IK ZEG, HAUWT, HOUWT, ECHT, HOUT, HAUSSE, HOUD, JA, BOVEN, EERSTE, HOU, KLAAR, DRUK |
| "ECHT": | EERSTE, HOUD, JA, DRUK, HOU, BOVEN, HOUT, HAUWT, HAUSSE, HOUSE, KLAAR, IK ZEG, ECHT, HOUWT |
| "EERSTE": | JA, HOUT, IK ZEG, HOUWT, EERSTE, KLAAR, BOVEN, HAUSSE, ECHT, HOU, HOUSE, HOUD, HAUWT, DRUK |
| "HAUSSE": | HOUD, HOUT, IK ZEG, HOUWT, HAUWT, EERSTE, ECHT, KLAAR, HOUSE, HOU, JA, DRUK, HAUSSE, BOVEN |
| "HAUWT": | IK ZEG, HOUT, HOUD, HOUWT, DRUK, HOU, KLAAR, BOVEN, HAUSSE, HAUWT, HOUSE, EERSTE, ECHT, JA |
| "HOU": | HOUD, HOU, HOUSE, HAUSSE, BOVEN, EERSTE, HOUWT, ECHT, IK ZEG, DRUK, JA, HAUWT, KLAAR, HOUT |
| "HOUD": | BOVEN, HAUSSE, HOUSE, HOU, IK ZEG, HAUWT, HOUT, ECHT, KLAAR, EERSTE, HOUD, HOUWT, JA, DRUK |
| "HOUSE": | HOUT, HOUSE, DRUK, ECHT, HOUWT, HAUWT, EERSTE, HOU, HOUD, JA, KLAAR, BOVEN, IK ZEG, HAUSSE |
| "HOUT": | HAUWT, HAUSSE, BOVEN, KLAAR, ECHT, JA, HOU, HOUT, HOUWT, HOUSE, HOUD, EERSTE, IK ZEG, DRUK |
| "HOUWT": | EERSTE, BOVEN, IK ZEG, HOU, HAUSSE, KLAAR, ECHT, JA, HOUSE, HOUWT, HOUT, DRUK, HOUD, HAUWT |
| "IK ZEG": | HOUWT, ECHT, DRUK, HAUWT, HOUD, HAUSSE, JA, IK ZEG, HOUSE, BOVEN, EERSTE, KLAAR, HOU, HOUT |
| "JA": | HOUD, ECHT, EERSTE, IK ZEG, HAUWT, HOUSE, DRUK, KLAAR, HOU, JA, HAUSSE, BOVEN, HOUT, HOUWT |
| "KLAAR": | HOUT, HOUWT, HAUWT, BOVEN, KLAAR, IK ZEG, HAUSSE, HOUD, EERSTE, HOUSE, DRUK, HOU, ECHT, JA |
| "LEEG": | WAT, LINKS, MIDDEN, NAAST, EH, NU, NEE, WACHT, ONDER, LEEG, OK, WAT?, RECHTS, NIETS |
| "LINKS": | MIDDEN, EH, WAT?, NU, ONDER, RECHTS, OK, WACHT, LEEG, NIETS, NAAST, WAT, NEE, LINKS |
| "MIDDEN": | OK, LINKS, NU, MIDDEN, EH, NEE, WAT, NIETS, NAAST, LEEG, ONDER, WACHT, WAT?, RECHTS |
| "NAAST": | LEEG, NAAST, NEE, EH, OK, LINKS, NIETS, MIDDEN, ONDER, NU, WAT, RECHTS, WAT?, WACHT |
| "NEE": | RECHTS, NIETS, NEE, NU, ONDER, WAT, MIDDEN, WACHT, NAAST, WAT?, EH, OK, LINKS, LEEG |
| "NIETS": | NU, WAT, EH, ONDER, NAAST, NEE, OK, RECHTS, NIETS, LEEG, WAT?, WACHT, LINKS, MIDDEN |
| "NU": | NU, MIDDEN, LINKS, LEEG, RECHTS, WACHT, OK, EH, WAT, WAT?, NAAST, NEE, NIETS, ONDER |
| "OK": | NEE, NIETS, LINKS, NAAST, EH, OK, RECHTS, LEEG, NU, WAT?, MIDDEN, WAT, WACHT, ONDER |
| "ONDER": | LEEG, WACHT, NAAST, MIDDEN, NIETS, RECHTS, OK, WAT?, LINKS, NU, NEE, EH, ONDER, WAT |
| "RECHTS": | WAT, NU, EH, ONDER, MIDDEN, NEE, NAAST, WACHT, WAT?, LEEG, NIETS, LINKS, OK, RECHTS |
| "EH": | ONDER, NU, OK, MIDDEN, WACHT, WAT, EH, WAT?, RECHTS, LINKS, NEE, NAAST, NIETS, LEEG |
| "WACHT": | LINKS, NIETS, RECHTS, OK, LEEG, NEE, WAT, ONDER, NAAST, EH, WACHT, NU, MIDDEN, WAT? |
| "WAT": | LINKS, RECHTS, WAT?, NAAST, LEEG, WACHT, NU, NEE, WAT, NIETS, ONDER, EH, MIDDEN, OK |
| "WAT?": | NAAST, EH, NIETS, NEE, WACHT, RECHTS, OK, ONDER, NU, LEEG, WAT?, WAT, LINKS, MIDDEN |
| "VENSTRE": | LR, C, NEI!, IGJEN, HVA?, CE , OKAY , HVA, VENSTRE, MIDT I, HØYRE, SOM, ELLER, SE |
|---|---|
| "HØYRE": | HVA?, C, LR, IGJEN, MIDT I, OKAY , ELLER, SOM, SE, VENSTRE, HVA, NEI!, CE , HØYRE |
| "MIDT I": | HVA, SOM, SE, HØYRE, NEI!, VENSTRE, OKAY , LR, ELLER, HVA?, CE , C, MIDT I, IGJEN |
| "HVA": | SE, OKAY , C, IGJEN, HVA, CE , VENSTRE, ELLER, MIDT I, NEI!, HVA?, SOM, LR, HØYRE |
| "ELLER": | SOM, OKAY , C, IGJEN, LR, HVA, MIDT I, CE , HVA?, NEI!, SE, HØYRE, ELLER, VENSTRE |
| "LR": | C, OKAY , SOM, IGJEN, HØYRE, NEI!, CE , VENSTRE, ELLER, LR, HVA?, HVA, MIDT I, SE |
| "NEI!": | SOM, NEI!, HVA?, ELLER, VENSTRE, HVA, IGJEN, MIDT I, C, HØYRE, SE, LR, CE , OKAY |
| "SOM": | VENSTRE, ELLER, HVA?, NEI!, C, LR, OKAY , MIDT I, CE , HVA, SOM, IGJEN, SE, HØYRE |
| "HVA?": | OKAY , HVA?, HØYRE, MIDT I, IGJEN, LR, HVA, NEI!, SOM, SE, CE , VENSTRE, C, ELLER |
| "OKAY ": | LR, ELLER, VENSTRE, CE , MIDT I, SE, NEI!, OKAY , IGJEN, HVA?, SOM, HVA, C, HØYRE |
| "IGJEN": | HVA, VENSTRE, C, NEI!, ELLER, CE , MIDT I, SE, HVA?, IGJEN, OKAY , HØYRE, SOM, LR |
| "C": | IGJEN, MIDT I, HØYRE, LR, SOM, ELLER, SE, C, HVA?, VENSTRE, HVA, CE , NEI!, OKAY |
| "SE": | SOM, MIDT I, HVA, C, LR, HVA?, HØYRE, CE , NEI!, SE, ELLER, VENSTRE, OKAY , IGJEN |
| "CE ": | OKAY , IGJEN, LR, VENSTRE, CE , C, ELLER, SOM, HVA, HVA?, HØYRE, NEI!, MIDT I, SE |
| "OVER": | ØØØØØH, TRYKK!, FERDIG?, KLAR, NESTE, NEI , GJENTA, TOMT, FEIL, OVER, IGJEN!, Ø, FERDIG, KANSKJE |
| "TRYKK!": | FERDIG?, NESTE, Ø, NEI , FEIL, FERDIG, IGJEN!, TOMT, OVER, KANSKJE, KLAR, ØØØØØH, GJENTA, TRYKK! |
| "FERDIG?": | IGJEN!, TRYKK!, NEI , FERDIG?, NESTE, GJENTA, ØØØØØH, KANSKJE, KLAR, OVER, FEIL, TOMT, Ø, FERDIG |
| "KLAR": | OVER, KLAR, GJENTA, NESTE, IGJEN!, TRYKK!, KANSKJE, FERDIG?, FEIL, NEI , ØØØØØH, FERDIG, Ø, TOMT |
| "GJENTA": | FERDIG, KANSKJE, GJENTA, NEI , FEIL, ØØØØØH, FERDIG?, TOMT, KLAR, Ø, NESTE, IGJEN!, TRYKK!, OVER |
| "KANSKJE": | NEI , ØØØØØH, NESTE, FEIL, KLAR, GJENTA, IGJEN!, FERDIG, KANSKJE, OVER, Ø, TOMT, TRYKK!, FERDIG? |
| "NEI ": | NEI , FERDIG?, TRYKK!, OVER, FERDIG, TOMT, IGJEN!, NESTE, ØØØØØH, Ø, KLAR, GJENTA, KANSKJE, FEIL |
| "IGJEN!": | GJENTA, KANSKJE, TRYKK!, KLAR, NESTE, IGJEN!, FERDIG, OVER, NEI , Ø, FERDIG?, ØØØØØH, TOMT, FEIL |
| "FEIL": | OVER, TOMT, KLAR, FERDIG?, KANSKJE, FERDIG, IGJEN!, Ø, TRYKK!, NEI , GJENTA, NESTE, FEIL, ØØØØØH |
| "FERDIG": | ØØØØØH, NEI , NESTE, FEIL, FERDIG?, GJENTA, KLAR, TOMT, Ø, OVER, KANSKJE, TRYKK!, IGJEN!, FERDIG |
| "NESTE": | FEIL, NEI , IGJEN!, FERDIG?, TOMT, ØØØØØH, NESTE, Ø, FERDIG, TRYKK!, GJENTA, KLAR, KANSKJE, OVER |
| "TOMT": | TRYKK!, KANSKJE, FERDIG, IGJEN!, OVER, GJENTA, ØØØØØH, FEIL, KLAR, NESTE, TOMT, NEI , FERDIG?, Ø |
| "ØØØØØH": | TRYKK!, FERDIG, Ø, KLAR, OVER, TOMT, NEI , GJENTA, ØØØØØH, KANSKJE, FEIL, NESTE, FERDIG?, IGJEN! |
| "Ø": | KLAR, NESTE, KANSKJE, GJENTA, TOMT, FERDIG, IGJEN!, FEIL, NEI , OVER, Ø, ØØØØØH, TRYKK!, FERDIG? |
| "LUD": | MORZE, SŁOŃ, POWTÓRZ, CZYTAM, CHWILA, KOŃ, NIE WIEM, BUK, LUD, BÓG, LÓD, GUZIK, MOŻE, DŁOŃ |
|---|---|
| "LÓD": | CHWILA, SŁOŃ, MORZE, CZYTAM, BÓG, NIE WIEM, MOŻE, GUZIK, DŁOŃ, LUD, BUK, POWTÓRZ, KOŃ, LÓD |
| "BÓG": | BUK, GUZIK, DŁOŃ, LÓD, POWTÓRZ, LUD, NIE WIEM, MORZE, MOŻE, CHWILA, KOŃ, SŁOŃ, BÓG, CZYTAM |
| "BUK": | DŁOŃ, NIE WIEM, SŁOŃ, CZYTAM, BUK, KOŃ, LUD, MOŻE, BÓG, POWTÓRZ, CHWILA, GUZIK, MORZE, LÓD |
| "MOŻE": | GUZIK, NIE WIEM, SŁOŃ, CZYTAM, MORZE, BUK, BÓG, KOŃ, CHWILA, POWTÓRZ, DŁOŃ, LÓD, MOŻE, LUD |
| "MORZE": | SŁOŃ, NIE WIEM, GUZIK, CZYTAM, LÓD, POWTÓRZ, KOŃ, LUD, MOŻE, MORZE, CHWILA, BUK, BÓG, DŁOŃ |
| "POWTÓRZ": | GUZIK, POWTÓRZ, CHWILA, MOŻE, LUD, BUK, CZYTAM, BÓG, SŁOŃ, LÓD, DŁOŃ, MORZE, KOŃ, NIE WIEM |
| "GUZIK": | LUD, MOŻE, CHWILA, POWTÓRZ, SŁOŃ, MORZE, NIE WIEM, BÓG, KOŃ, BUK, GUZIK, CZYTAM, DŁOŃ, LÓD |
| "CHWILA": | NIE WIEM, CHWILA, LÓD, BÓG, CZYTAM, MORZE, BUK, POWTÓRZ, GUZIK, DŁOŃ, KOŃ, LUD, SŁOŃ, MOŻE |
| "NIE WIEM": | MORZE, MOŻE, LUD, KOŃ, BÓG, DŁOŃ, POWTÓRZ, NIE WIEM, CZYTAM, CHWILA, GUZIK, BUK, SŁOŃ, LÓD |
| "CZYTAM": | BUK, LUD, SŁOŃ, POWTÓRZ, MOŻE, KOŃ, BÓG, DŁOŃ, CHWILA, CZYTAM, NIE WIEM, LÓD, GUZIK, MORZE |
| "SŁOŃ": | CZYTAM, BÓG, LÓD, MORZE, GUZIK, MOŻE, DŁOŃ, SŁOŃ, CHWILA, LUD, BUK, KOŃ, POWTÓRZ, NIE WIEM |
| "DŁOŃ": | GUZIK, BÓG, BUK, SŁOŃ, MORZE, CHWILA, LÓD, KOŃ, POWTÓRZ, DŁOŃ, MOŻE, LUD, NIE WIEM, CZYTAM |
| "KOŃ": | NIE WIEM, CZYTAM, MORZE, LUD, KOŃ, SŁOŃ, MOŻE, GUZIK, BUK, CHWILA, LÓD, POWTÓRZ, BÓG, DŁOŃ |
| "OKOŃ": | ŚRODEK, CHYBA, JESTEŚ, HAHAHA, DÓŁ, HAH, HA HA, GÓRA, PRAWO, OKOŃ, AHA, SŁOWO, LEWO, HAHA |
| "CHYBA": | JESTEŚ, DÓŁ, SŁOWO, HAH, PRAWO, LEWO, AHA, GÓRA, OKOŃ, HAHA, HAHAHA, ŚRODEK, HA HA, CHYBA |
| "JESTEŚ": | AHA, CHYBA, HAH, JESTEŚ, DÓŁ, HA HA, ŚRODEK, HAHA, HAHAHA, OKOŃ, PRAWO, GÓRA, SŁOWO, LEWO |
| "HAHAHA": | OKOŃ, HAHAHA, HA HA, DÓŁ, AHA, CHYBA, HAHA, JESTEŚ, PRAWO, HAH, ŚRODEK, LEWO, SŁOWO, GÓRA |
| "HA HA": | LEWO, HAHA, HA HA, HAH, PRAWO, ŚRODEK, JESTEŚ, GÓRA, HAHAHA, SŁOWO, DÓŁ, AHA, CHYBA, OKOŃ |
| "HAHA": | HAH, ŚRODEK, DÓŁ, PRAWO, HAHAHA, HA HA, AHA, LEWO, HAHA, OKOŃ, SŁOWO, GÓRA, CHYBA, JESTEŚ |
| "HAH": | HAH, JESTEŚ, CHYBA, OKOŃ, LEWO, GÓRA, AHA, DÓŁ, ŚRODEK, SŁOWO, HAHAHA, HA HA, HAHA, PRAWO |
| "AHA": | HA HA, HAHA, CHYBA, HAHAHA, DÓŁ, AHA, LEWO, OKOŃ, HAH, SŁOWO, JESTEŚ, ŚRODEK, GÓRA, PRAWO |
| "PRAWO": | OKOŃ, GÓRA, HAHAHA, JESTEŚ, HAHA, LEWO, AHA, SŁOWO, CHYBA, HAH, HA HA, DÓŁ, PRAWO, ŚRODEK |
| "LEWO": | ŚRODEK, HAH, DÓŁ, PRAWO, JESTEŚ, HA HA, HAHAHA, GÓRA, SŁOWO, OKOŃ, HAHA, CHYBA, AHA, LEWO |
| "DÓŁ": | PRAWO, HAH, AHA, JESTEŚ, GÓRA, ŚRODEK, DÓŁ, SŁOWO, LEWO, CHYBA, HA HA, HAHAHA, HAHA, OKOŃ |
| "GÓRA": | CHYBA, HAHA, LEWO, AHA, OKOŃ, HA HA, ŚRODEK, PRAWO, HAHAHA, DÓŁ, GÓRA, HAH, JESTEŚ, SŁOWO |
| "ŚRODEK": | CHYBA, LEWO, SŁOWO, HAHAHA, OKOŃ, GÓRA, HAH, HA HA, ŚRODEK, HAHA, PRAWO, DÓŁ, JESTEŚ, AHA |
| "SŁOWO": | HAHAHA, DÓŁ, HAHA, HA HA, GÓRA, LEWO, AHA, PRAWO, HAH, OKOŃ, SŁOWO, ŚRODEK, CHYBA, JESTEŚ |
| "PRONTO": | ISSO, BELEZA, QUÊ, MEIO, ESQUERDA, APERTA, DIREITA, BRANCO, PRONTO, NÃO, PRIMEIRO, SEIS, NADA, ESPERA |
|---|---|
| "PRIMEIRO": | ESQUERDA, BELEZA, ISSO, MEIO, NÃO, DIREITA, NADA, SEIS, ESPERA, PRONTO, BRANCO, QUÊ, APERTA, PRIMEIRO |
| "NÃO": | BRANCO, SEIS, ESPERA, PRIMEIRO, QUÊ, PRONTO, DIREITA, ISSO, NADA, ESQUERDA, APERTA, BELEZA, NÃO, MEIO |
| "BRANCO": | ESPERA, DIREITA, BELEZA, MEIO, BRANCO, APERTA, PRONTO, NADA, NÃO, QUÊ, ESQUERDA, SEIS, ISSO, PRIMEIRO |
| "NADA": | SEIS, DIREITA, BELEZA, MEIO, ISSO, BRANCO, NÃO, APERTA, ESQUERDA, QUÊ, ESPERA, PRIMEIRO, NADA, PRONTO |
| "ISSO": | BELEZA, DIREITA, SEIS, MEIO, PRIMEIRO, QUÊ, APERTA, PRONTO, NADA, ISSO, ESQUERDA, BRANCO, NÃO, ESPERA |
| "QUÊ": | SEIS, QUÊ, ESQUERDA, NADA, PRONTO, BRANCO, MEIO, NÃO, BELEZA, PRIMEIRO, ESPERA, ISSO, APERTA, DIREITA |
| "SEIS": | PRONTO, NADA, ESQUERDA, QUÊ, BELEZA, ISSO, DIREITA, NÃO, APERTA, BRANCO, SEIS, MEIO, ESPERA, PRIMEIRO |
| "ESQUERDA": | DIREITA, ESQUERDA, PRIMEIRO, NÃO, MEIO, ISSO, BRANCO, QUÊ, SEIS, ESPERA, APERTA, PRONTO, BELEZA, NADA |
| "DIREITA": | ISSO, NADA, PRONTO, APERTA, NÃO, ESPERA, QUÊ, DIREITA, MEIO, ESQUERDA, SEIS, BRANCO, BELEZA, PRIMEIRO |
| "MEIO": | BRANCO, PRONTO, BELEZA, QUÊ, NADA, APERTA, NÃO, ESPERA, ESQUERDA, MEIO, DIREITA, PRIMEIRO, SEIS, ISSO |
| "BELEZA": | MEIO, NÃO, PRIMEIRO, ISSO, SEIS, NADA, ESPERA, BELEZA, ESQUERDA, PRONTO, BRANCO, APERTA, QUÊ, DIREITA |
| "ESPERA": | SEIS, NÃO, BRANCO, BELEZA, ISSO, ESQUERDA, PRIMEIRO, APERTA, QUÊ, ESPERA, NADA, PRONTO, DIREITA, MEIO |
| "APERTA": | DIREITA, MEIO, ISSO, PRONTO, APERTA, BELEZA, NADA, SEIS, BRANCO, ESQUERDA, PRIMEIRO, QUÊ, NÃO, ESPERA |
| "VOCÊ": | SEI, VOCÊ É, C, CÊ É, PRÓXIMO, CESTO, C E, SEGURA, QUÊ?, VOCÊ, SEXTO, TIPO, FOI, CÊ |
| "VOCÊ É": | C, PRÓXIMO, TIPO, CESTO, QUÊ?, FOI, SEXTO, SEGURA, VOCÊ, CÊ, CÊ É, SEI, C E, VOCÊ É |
| "C": | SEXTO, VOCÊ É, CESTO, C, PRÓXIMO, C E, SEI, CÊ, CÊ É, VOCÊ, QUÊ?, SEGURA, TIPO, FOI |
| "CÊ É": | VOCÊ, CÊ É, C E, PRÓXIMO, SEXTO, VOCÊ É, CÊ, C, QUÊ?, CESTO, SEI, FOI, TIPO, SEGURA |
| "C E": | FOI, CÊ, C E, CESTO, QUÊ?, SEI, C, SEGURA, CÊ É, TIPO, PRÓXIMO, SEXTO, VOCÊ É, VOCÊ |
| "CÊ": | CESTO, SEI, PRÓXIMO, QUÊ?, CÊ É, C E, SEXTO, FOI, CÊ, VOCÊ, TIPO, SEGURA, VOCÊ É, C |
| "CESTO": | CESTO, C, VOCÊ É, VOCÊ, FOI, SEGURA, SEXTO, PRÓXIMO, SEI, TIPO, CÊ É, C E, CÊ, QUÊ? |
| "SEXTO": | C E, CÊ, VOCÊ É, CÊ É, PRÓXIMO, SEXTO, FOI, VOCÊ, CESTO, TIPO, C, SEI, SEGURA, QUÊ? |
| "QUÊ?": | VOCÊ, SEGURA, CÊ É, C, CÊ, FOI, SEXTO, TIPO, VOCÊ É, CESTO, C E, PRÓXIMO, QUÊ?, SEI |
| "FOI": | SEI, CESTO, PRÓXIMO, QUÊ?, C, C E, CÊ É, SEGURA, TIPO, VOCÊ, CÊ, VOCÊ É, SEXTO, FOI |
| "PRÓXIMO": | QUÊ?, CESTO, SEXTO, C, SEGURA, SEI, PRÓXIMO, TIPO, FOI, VOCÊ É, C E, CÊ É, CÊ, VOCÊ |
| "SEGURA": | VOCÊ É, CÊ, FOI, SEXTO, VOCÊ, C E, SEI, QUÊ?, CÊ É, PRÓXIMO, SEGURA, CESTO, C, TIPO |
| "SEI": | VOCÊ É, FOI, TIPO, CÊ É, VOCÊ, SEGURA, CESTO, C E, SEI, CÊ, QUÊ?, PRÓXIMO, C, SEXTO |
| "TIPO": | CÊ É, PRÓXIMO, CÊ, C E, SEGURA, FOI, SEXTO, QUÊ?, CESTO, VOCÊ, TIPO, SEI, VOCÊ É, C |
| "ГОТОВО": | ДА, ТАК, ЕЩЁ РАЗ, СРЕДНЯЯ, ЛЕВАЯ, ЖМИ, ПРАВАЯ, ПУСТО, ГОТОВО, НЕТ, ПЕРВОЕ, НУ-У-У, НИЧЕГО, ПОГОДИ |
|---|---|
| "ПЕРВОЕ": | ЛЕВАЯ, ТАК, ДА, СРЕДНЯЯ, НЕТ, ПРАВАЯ, НИЧЕГО, НУ-У-У, ПОГОДИ, ГОТОВО, ПУСТО, ЕЩЁ РАЗ, ЖМИ, ПЕРВОЕ |
| "НЕТ": | ПУСТО, НУ-У-У, ПОГОДИ, ПЕРВОЕ, ЕЩЁ РАЗ, ГОТОВО, ПРАВАЯ, ДА, НИЧЕГО, ЛЕВАЯ, ЖМИ, ТАК, НЕТ, СРЕДНЯЯ |
| "ПУСТО": | ПОГОДИ, ПРАВАЯ, ТАК, СРЕДНЯЯ, ПУСТО, ЖМИ, ГОТОВО, НИЧЕГО, НЕТ, ЕЩЁ РАЗ, ЛЕВАЯ, НУ-У-У, ДА, ПЕРВОЕ |
| "НИЧЕГО": | НУ-У-У, ПРАВАЯ, ТАК, СРЕДНЯЯ, ДА, ПУСТО, НЕТ, ЖМИ, ЛЕВАЯ, ЕЩЁ РАЗ, ПОГОДИ, ПЕРВОЕ, НИЧЕГО, ГОТОВО |
| "ДА": | ТАК, ПРАВАЯ, НУ-У-У, СРЕДНЯЯ, ПЕРВОЕ, ЕЩЁ РАЗ, ЖМИ, ГОТОВО, НИЧЕГО, ДА, ЛЕВАЯ, ПУСТО, НЕТ, ПОГОДИ |
| "ЕЩЁ РАЗ": | НУ-У-У, ЕЩЁ РАЗ, ЛЕВАЯ, НИЧЕГО, ГОТОВО, ПУСТО, СРЕДНЯЯ, НЕТ, ТАК, ПЕРВОЕ, ПОГОДИ, ДА, ЖМИ, ПРАВАЯ |
| "НУ-У-У": | ГОТОВО, НИЧЕГО, ЛЕВАЯ, ЕЩЁ РАЗ, ТАК, ДА, ПРАВАЯ, НЕТ, ЖМИ, ПУСТО, НУ-У-У, СРЕДНЯЯ, ПОГОДИ, ПЕРВОЕ |
| "ЛЕВАЯ": | ПРАВАЯ, ЛЕВАЯ, ПЕРВОЕ, НЕТ, СРЕДНЯЯ, ДА, ПУСТО, ЕЩЁ РАЗ, НУ-У-У, ПОГОДИ, ЖМИ, ГОТОВО, ТАК, НИЧЕГО |
| "ПРАВАЯ": | ДА, НИЧЕГО, ГОТОВО, ЖМИ, НЕТ, ПОГОДИ, ЕЩЁ РАЗ, ПРАВАЯ, СРЕДНЯЯ, ЛЕВАЯ, НУ-У-У, ПУСТО, ТАК, ПЕРВОЕ |
| "СРЕДНЯЯ": | ПУСТО, ГОТОВО, ТАК, ЕЩЁ РАЗ, НИЧЕГО, ЖМИ, НЕТ, ПОГОДИ, ЛЕВАЯ, СРЕДНЯЯ, ПРАВАЯ, ПЕРВОЕ, НУ-У-У, ДА |
| "ТАК": | СРЕДНЯЯ, НЕТ, ПЕРВОЕ, ДА, НУ-У-У, НИЧЕГО, ПОГОДИ, ТАК, ЛЕВАЯ, ГОТОВО, ПУСТО, ЖМИ, ЕЩЁ РАЗ, ПРАВАЯ |
| "ПОГОДИ": | НУ-У-У, НЕТ, ПУСТО, ТАК, ДА, ЛЕВАЯ, ПЕРВОЕ, ЖМИ, ЕЩЁ РАЗ, ПОГОДИ, НИЧЕГО, ГОТОВО, ПРАВАЯ, СРЕДНЯЯ |
| "ЖМИ": | ПРАВАЯ, СРЕДНЯЯ, ДА, ГОТОВО, ЖМИ, ТАК, НИЧЕГО, НУ-У-У, ПУСТО, ЛЕВАЯ, ПЕРВОЕ, ЕЩЁ РАЗ, НЕТ, ПОГОДИ |
| "ВЕСЕЛО": | КОНЕЧНО, ВЕСИЛА, ВЕСИЛО, КРАБ, ДАЛЬШЕ, НУ ТАК, КРАП, ПОСТОЙ, ЕЩЕ РАЗ, ВЕСЕЛО, НУ И, НУ ТИПА, СДЕЛАНО, КРАББ |
| "ВЕСИЛА": | ВЕСИЛО, ДАЛЬШЕ, НУ ТИПА, НУ ТАК, ЕЩЕ РАЗ, СДЕЛАНО, НУ И, ПОСТОЙ, ВЕСЕЛО, КРАББ, КРАБ, КОНЕЧНО, КРАП, ВЕСИЛА |
| "ВЕСИЛО": | НУ И, ВЕСИЛА, НУ ТАК, ВЕСИЛО, ДАЛЬШЕ, КРАП, КОНЕЧНО, КРАББ, КРАБ, ВЕСЕЛО, ЕЩЕ РАЗ, ПОСТОЙ, НУ ТИПА, СДЕЛАНО |
| "КРАБ": | ВЕСЕЛО, КРАБ, КРАП, ДАЛЬШЕ, НУ И, ВЕСИЛА, КРАББ, ВЕСИЛО, ЕЩЕ РАЗ, НУ ТАК, КОНЕЧНО, СДЕЛАНО, НУ ТИПА, ПОСТОЙ |
| "КРАП": | СДЕЛАНО, КРАББ, КРАП, НУ ТАК, ЕЩЕ РАЗ, КОНЕЧНО, ВЕСИЛО, ПОСТОЙ, КРАБ, НУ ТИПА, ДАЛЬШЕ, НУ И, ВЕСИЛА, ВЕСЕЛО |
| "КРАББ": | НУ ТАК, КОНЕЧНО, ДАЛЬШЕ, ЕЩЕ РАЗ, КРАБ, КРАП, НУ И, СДЕЛАНО, КРАББ, ВЕСЕЛО, НУ ТИПА, ПОСТОЙ, ВЕСИЛА, ВЕСИЛО |
| "НУ ТАК": | НУ ТАК, ВЕСИЛО, ВЕСИЛА, ВЕСЕЛО, СДЕЛАНО, ПОСТОЙ, НУ И, ДАЛЬШЕ, КОНЕЧНО, НУ ТИПА, КРАБ, КРАП, КРАББ, ЕЩЕ РАЗ |
| "НУ И": | КРАП, КРАББ, ВЕСИЛА, КРАБ, ДАЛЬШЕ, НУ И, СДЕЛАНО, ВЕСЕЛО, НУ ТАК, НУ ТИПА, ВЕСИЛО, КОНЕЧНО, ПОСТОЙ, ЕЩЕ РАЗ |
| "ЕЩЕ РАЗ": | ВЕСЕЛО, ПОСТОЙ, КРАБ, ВЕСИЛО, КРАББ, СДЕЛАНО, НУ И, НУ ТИПА, ВЕСИЛА, НУ ТАК, КРАП, ДАЛЬШЕ, ЕЩЕ РАЗ, КОНЕЧНО |
| "СДЕЛАНО": | КОНЕЧНО, НУ ТАК, ДАЛЬШЕ, ЕЩЕ РАЗ, ВЕСИЛО, КРАП, КРАБ, ПОСТОЙ, НУ ТИПА, ВЕСЕЛО, КРАББ, ВЕСИЛА, НУ И, СДЕЛАНО |
| "ДАЛЬШЕ": | ЕЩЕ РАЗ, НУ ТАК, НУ И, ВЕСИЛО, ПОСТОЙ, КОНЕЧНО, ДАЛЬШЕ, НУ ТИПА, СДЕЛАНО, ВЕСИЛА, КРАП, КРАБ, КРАББ, ВЕСЕЛО |
| "ПОСТОЙ": | ВЕСИЛА, КРАББ, СДЕЛАНО, НУ И, ВЕСЕЛО, КРАП, КОНЕЧНО, ЕЩЕ РАЗ, КРАБ, ДАЛЬШЕ, ПОСТОЙ, НУ ТАК, ВЕСИЛО, НУ ТИПА |
| "КОНЕЧНО": | ВЕСИЛА, СДЕЛАНО, НУ ТИПА, КРАБ, ВЕСЕЛО, ПОСТОЙ, НУ ТАК, КРАП, КОНЕЧНО, КРАББ, ЕЩЕ РАЗ, ДАЛЬШЕ, ВЕСИЛО, НУ И |
| "НУ ТИПА": | КРАБ, ДАЛЬШЕ, КРАББ, КРАП, ПОСТОЙ, СДЕЛАНО, НУ И, ЕЩЕ РАЗ, НУ ТАК, ВЕСЕЛО, НУ ТИПА, КОНЕЧНО, ВЕСИЛА, ВЕСИЛО |
| "REDO": | JA, OKEJ, VAD, MITTEN, VÄNSTER, TRYCK, HÖGER, TOM, REDO, NEJ, FÖRSTA, ÖHHH, INGET, VÄNTA |
|---|---|
| "FÖRSTA": | VÄNSTER, OKEJ, JA, MITTEN, NEJ, HÖGER, INGET, ÖHHH, VÄNTA, REDO, TOM, VAD, TRYCK, FÖRSTA |
| "NEJ": | TOM, ÖHHH, VÄNTA, FÖRSTA, VAD, REDO, HÖGER, JA, INGET, VÄNSTER, TRYCK, OKEJ, NEJ, MITTEN |
| "TOM": | VÄNTA, HÖGER, OKEJ, MITTEN, TOM, TRYCK, REDO, INGET, NEJ, VAD, VÄNSTER, ÖHHH, JA, FÖRSTA |
| "INGET": | ÖHHH, HÖGER, OKEJ, MITTEN, JA, TOM, NEJ, TRYCK, VÄNSTER, VAD, VÄNTA, FÖRSTA, INGET, REDO |
| "JA": | OKEJ, HÖGER, ÖHHH, MITTEN, FÖRSTA, VAD, TRYCK, REDO, INGET, JA, VÄNSTER, TOM, NEJ, VÄNTA |
| "VAD": | ÖHHH, VAD, VÄNSTER, INGET, REDO, TOM, MITTEN, NEJ, OKEJ, FÖRSTA, VÄNTA, JA, TRYCK, HÖGER |
| "ÖHHH": | REDO, INGET, VÄNSTER, VAD, OKEJ, JA, HÖGER, NEJ, TRYCK, TOM, ÖHHH, MITTEN, VÄNTA, FÖRSTA |
| "VÄNSTER": | HÖGER, VÄNSTER, FÖRSTA, NEJ, MITTEN, JA, TOM, VAD, ÖHHH, VÄNTA, TRYCK, REDO, OKEJ, INGET |
| "HÖGER": | JA, INGET, REDO, TRYCK, NEJ, VÄNTA, VAD, HÖGER, MITTEN, VÄNSTER, ÖHHH, TOM, OKEJ, FÖRSTA |
| "MITTEN": | TOM, REDO, OKEJ, VAD, INGET, TRYCK, NEJ, VÄNTA, VÄNSTER, MITTEN, HÖGER, FÖRSTA, ÖHHH, JA |
| "OKEJ": | MITTEN, NEJ, FÖRSTA, JA, ÖHHH, INGET, VÄNTA, OKEJ, VÄNSTER, REDO, TOM, TRYCK, VAD, HÖGER |
| "VÄNTA": | ÖHHH, NEJ, TOM, OKEJ, JA, VÄNSTER, FÖRSTA, TRYCK, VAD, VÄNTA, INGET, REDO, HÖGER, MITTEN |
| "TRYCK": | HÖGER, MITTEN, JA, REDO, TRYCK, OKEJ, INGET, ÖHHH, TOM, VÄNSTER, FÖRSTA, VAD, NEJ, VÄNTA |
| "ELLER": | VISST, HELLER, SEJ, SÄG, NÄSTA, ÖÖÖH, HÄLLER, STOPP, VAD?, ELLER, Ö, SOM, KLAR, LR |
| "HELLER": | SEJ, NÄSTA, SOM, ÖÖÖH, VAD?, KLAR, Ö, STOPP, ELLER, LR, SÄG, VISST, HÄLLER, HELLER |
| "SEJ": | Ö, HELLER, ÖÖÖH, SEJ, NÄSTA, HÄLLER, VISST, LR, SÄG, ELLER, VAD?, STOPP, SOM, KLAR |
| "SÄG": | ELLER, SÄG, HÄLLER, NÄSTA, Ö, HELLER, LR, SEJ, VAD?, ÖÖÖH, VISST, KLAR, SOM, STOPP |
| "HÄLLER": | KLAR, LR, HÄLLER, ÖÖÖH, VAD?, VISST, SEJ, STOPP, SÄG, SOM, NÄSTA, Ö, HELLER, ELLER |
| "LR": | ÖÖÖH, VISST, NÄSTA, VAD?, SÄG, HÄLLER, Ö, KLAR, LR, ELLER, SOM, STOPP, HELLER, SEJ |
| "ÖÖÖH": | ÖÖÖH, SEJ, HELLER, ELLER, KLAR, STOPP, Ö, NÄSTA, VISST, SOM, SÄG, HÄLLER, LR, VAD? |
| "Ö": | HÄLLER, LR, HELLER, SÄG, NÄSTA, Ö, KLAR, ELLER, ÖÖÖH, SOM, SEJ, VISST, STOPP, VAD? |
| "VAD?": | ELLER, STOPP, SÄG, SEJ, LR, KLAR, Ö, SOM, HELLER, ÖÖÖH, HÄLLER, NÄSTA, VAD?, VISST |
| "KLAR": | VISST, ÖÖÖH, NÄSTA, VAD?, SEJ, HÄLLER, SÄG, STOPP, SOM, ELLER, LR, HELLER, Ö, KLAR |
| "NÄSTA": | VAD?, ÖÖÖH, Ö, SEJ, STOPP, VISST, NÄSTA, SOM, KLAR, HELLER, HÄLLER, SÄG, LR, ELLER |
| "STOPP": | HELLER, LR, KLAR, Ö, ELLER, HÄLLER, VISST, VAD?, SÄG, NÄSTA, STOPP, ÖÖÖH, SEJ, SOM |
| "VISST": | HELLER, KLAR, SOM, SÄG, ELLER, STOPP, ÖÖÖH, HÄLLER, VISST, LR, VAD?, NÄSTA, SEJ, Ö |
| "SOM": | SÄG, NÄSTA, LR, HÄLLER, STOPP, KLAR, Ö, VAD?, ÖÖÖH, ELLER, SOM, VISST, HELLER, SEJ |
| "กด": | ถูก, เศร้า, ไม่ใช่, เขลา, เข่า, เสาร์, เข้า, มัด, กด, ตัด, ลด, เขา, ผิด, เสา |
|---|---|
| "ลด": | เข่า, เศร้า, ถูก, เขลา, ตัด, เข้า, ผิด, เขา, เสา, กด, มัด, ไม่ใช่, เสาร์, ลด |
| "ตัด": | มัด, เขา, เสา, ลด, ไม่ใช่, กด, เข้า, ถูก, ผิด, เข่า, เสาร์, เศร้า, ตัด, เขลา |
| "มัด": | เสา, เข้า, เศร้า, เขลา, มัด, เสาร์, กด, ผิด, ตัด, ไม่ใช่, เข่า, เขา, ถูก, ลด |
| "ผิด": | เขา, เข้า, เศร้า, เขลา, ถูก, มัด, ตัด, เสาร์, เข่า, ไม่ใช่, เสา, ลด, ผิด, กด |
| "ถูก": | เศร้า, เข้า, เขา, เขลา, ลด, ไม่ใช่, เสาร์, กด, ผิด, ถูก, เข่า, มัด, ตัด, เสา |
| "ไม่ใช่": | เขา, ไม่ใช่, เข่า, ผิด, กด, มัด, เขลา, ตัด, เศร้า, ลด, เสา, ถูก, เสาร์, เข้า |
| "เขา": | กด, ผิด, เข่า, ไม่ใช่, เศร้า, ถูก, เข้า, ตัด, เสาร์, มัด, เขา, เขลา, เสา, ลด |
| "เข่า": | เข้า, เข่า, ลด, ตัด, เขลา, ถูก, มัด, ไม่ใช่, เขา, เสา, เสาร์, กด, เศร้า, ผิด |
| "เข้า": | ถูก, ผิด, กด, เสาร์, ตัด, เสา, ไม่ใช่, เข้า, เขลา, เข่า, เขา, มัด, เศร้า, ลด |
| "เขลา": | มัด, กด, เศร้า, ไม่ใช่, ผิด, เสาร์, ตัด, เสา, เข่า, เขลา, เข้า, ลด, เขา, ถูก |
| "เศร้า": | เขลา, ตัด, ลด, ถูก, เขา, ผิด, เสา, เศร้า, เข่า, กด, มัด, เสาร์, ไม่ใช่, เข้า |
| "เสา": | เขา, ตัด, มัด, เศร้า, ถูก, เข่า, ลด, เสาร์, ไม่ใช่, เสา, ผิด, กด, เข้า, เขลา |
| "เสาร์": | เข้า, เขลา, ถูก, กด, เสาร์, เศร้า, ผิด, เขา, มัด, เข่า, ลด, ไม่ใช่, ตัด, เสา |
| "อาน": | ตบะ, อ่าน, ผ่าน, ยกเลิก, ส่อง, กล่อง, ไม่ถูก, ขยะ, ต้อง, อาน, กล้อง, ระยะ, ล่อง, ก่อง |
| "อ่าน": | ผ่าน, ส่อง, ระยะ, กล่อง, ต้อง, ล่อง, กล้อง, ขยะ, อาน, ก่อง, ยกเลิก, ตบะ, ไม่ถูก, อ่าน |
| "ผ่าน": | กล้อง, อ่าน, กล่อง, ผ่าน, ส่อง, ไม่ถูก, ตบะ, ก่อง, ยกเลิก, อาน, ต้อง, ขยะ, ระยะ, ล่อง |
| "ยกเลิก": | อาน, ยกเลิก, ไม่ถูก, ส่อง, กล้อง, อ่าน, ก่อง, ผ่าน, ต้อง, กล่อง, ตบะ, ล่อง, ระยะ, ขยะ |
| "ไม่ถูก": | ล่อง, ก่อง, ไม่ถูก, กล่อง, ต้อง, ตบะ, ผ่าน, ขยะ, ยกเลิก, ระยะ, ส่อง, กล้อง, อ่าน, อาน |
| "ก่อง": | กล่อง, ตบะ, ส่อง, ต้อง, ยกเลิก, ไม่ถูก, กล้อง, ล่อง, ก่อง, อาน, ระยะ, ขยะ, อ่าน, ผ่าน |
| "กล่อง": | กล่อง, ผ่าน, อ่าน, อาน, ล่อง, ขยะ, กล้อง, ส่อง, ตบะ, ระยะ, ยกเลิก, ไม่ถูก, ก่อง, ต้อง |
| "กล้อง": | ไม่ถูก, ก่อง, อ่าน, ยกเลิก, ส่อง, กล้อง, ล่อง, อาน, กล่อง, ระยะ, ผ่าน, ตบะ, ขยะ, ต้อง |
| "ต้อง": | อาน, ขยะ, ยกเลิก, ผ่าน, ก่อง, ล่อง, กล้อง, ระยะ, อ่าน, กล่อง, ไม่ถูก, ส่อง, ต้อง, ตบะ |
| "ล่อง": | ตบะ, กล่อง, ส่อง, ต้อง, ผ่าน, ไม่ถูก, ยกเลิก, ขยะ, ระยะ, อาน, ก่อง, อ่าน, กล้อง, ล่อง |
| "ส่อง": | ต้อง, กล่อง, กล้อง, ผ่าน, ขยะ, ตบะ, ส่อง, ระยะ, ล่อง, อ่าน, ไม่ถูก, ยกเลิก, ก่อง, อาน |
| "ขยะ": | อ่าน, ก่อง, ล่อง, กล้อง, อาน, ไม่ถูก, ตบะ, ต้อง, ยกเลิก, ส่อง, ขยะ, กล่อง, ผ่าน, ระยะ |
| "ตบะ": | อ่าน, ล่อง, ระยะ, ยกเลิก, อาน, ขยะ, กล่อง, ไม่ถูก, ตบะ, ก่อง, ต้อง, ส่อง, ผ่าน, กล้อง |
| "ระยะ": | ยกเลิก, ส่อง, ก่อง, ไม่ถูก, ขยะ, ล่อง, กล้อง, ต้อง, กล่อง, อาน, ระยะ, ตบะ, อ่าน, ผ่าน |
| "有": | 下一个,快点,过了,速度,第二个,炸了,第四个,没有,有,有没有,有有,什么,错了,要炸了 |
|---|---|
| "有有": | 第二个,快点,下一个,速度,有没有,第四个,错了,什么,要炸了,有,没有,过了,炸了,有有 |
| "有没有": | 没有,什么,要炸了,有有,过了,有,第四个,下一个,错了,第二个,炸了,快点,有没有,速度 |
| "没有": | 要炸了,第四个,快点,速度,没有,炸了,有,错了,有没有,过了,第二个,什么,下一个,有有 |
| "错了": | 什么,第四个,快点,速度,下一个,没有,有没有,炸了,第二个,过了,要炸了,有有,错了,有 |
| "下一个": | 快点,第四个,什么,速度,有有,过了,炸了,有,错了,下一个,第二个,没有,有没有,要炸了 |
| "过了": | 什么,过了,第二个,错了,有,没有,速度,有没有,快点,有有,要炸了,下一个,炸了,第四个 |
| "什么": | 有,错了,第二个,过了,快点,下一个,第四个,有没有,炸了,没有,什么,速度,要炸了,有有 |
| "第二个": | 第四个,第二个,有有,有没有,速度,下一个,没有,过了,什么,要炸了,炸了,有,快点,错了 |
| "第四个": | 下一个,错了,有,炸了,有没有,要炸了,过了,第四个,速度,第二个,什么,没有,快点,有有 |
| "速度": | 没有,有,快点,过了,错了,炸了,有没有,要炸了,第二个,速度,第四个,有有,什么,下一个 |
| "快点": | 速度,有没有,有有,下一个,什么,错了,要炸了,快点,第二个,有,没有,炸了,过了,第四个 |
| "要炸了": | 什么,有没有,没有,快点,下一个,第二个,有有,炸了,过了,要炸了,错了,有,第四个,速度 |
| "炸了": | 第四个,速度,下一个,有,炸了,快点,错了,什么,没有,第二个,有有,过了,有没有,要炸了 |
| "按了": | 第1个,地是个,右边,又编,中间,时间,真的吗,中问,左下角,按了,左边,第l个,右上角,错一次 |
| "地是个": | 右边,中间,第l个,时间,左下角,右上角,左边,中问,按了,错一次,又编,第1个,真的吗,地是个 |
| "右边": | 左边,地是个,时间,右边,中间,真的吗,第1个,错一次,又编,按了,左下角,中问,第l个,右上角 |
| "又编": | 按了,又编,真的吗,中间,左边,地是个,错一次,右边,左下角,时间,第1个,右上角,第l个,中问 |
| "真的吗": | 右上角,错一次,真的吗,时间,左下角,第1个,右边,中问,又编,第l个,中间,左边,地是个,按了 |
| "错一次": | 时间,第1个,中间,左下角,又编,真的吗,左边,右上角,错一次,按了,第l个,中问,地是个,右边 |
| "时间": | 时间,右边,地是个,按了,右上角,中问,左边,中间,第1个,第l个,又编,真的吗,错一次,左下角 |
| "左边": | 真的吗,错一次,地是个,又编,中间,左边,右上角,按了,时间,第l个,右边,第1个,中问,左下角 |
| "左下角": | 按了,中问,又编,右边,错一次,右上角,左边,第l个,地是个,时间,真的吗,中间,左下角,第1个 |
| "右上角": | 第1个,时间,中间,左下角,右边,真的吗,又编,中问,第l个,按了,错一次,地是个,左边,右上角 |
| "中间": | 左下角,时间,左边,右边,中问,第1个,中间,第l个,右上角,地是个,真的吗,又编,错一次,按了 |
| "中问": | 地是个,错一次,右上角,左边,按了,真的吗,第1个,左下角,又编,中间,中问,时间,右边,第l个 |
| "第1个": | 地是个,右上角,第l个,又编,按了,中问,时间,真的吗,第1个,错一次,左下角,中间,右边,左边 |
| "第l个": | 又编,中间,错一次,真的吗,中问,右上角,左边,左下角,时间,按了,第l个,第1个,地是个,右边 |
Based on the display, read the label of a particular button and proceed to step 2.
Using the label from step 1, push the first button that appears in its corresponding list.

Sometimes, the wire may look like a face, calming you down... and then you explode.
| Wire connected to C3 is | |||||
|---|---|---|---|---|---|
| Black | Blue | Red | White | Yellow | |
| Cut if color | is connected to: | ||||
| Yellow | D2 | D1 | D2 | A2 | D1 |
| Blue | A2 | C4 | A1 | C4 | D4 |
| White | D3 | D2 | D4 | B3 | B2 |
| White | B2 | C1 | B4 | A1 | C1 |
| Red | A1 | B3 | C4 | B2 | B3 |
| Blue | C3 | C2 | C1 | D3 | B1 |
| Black | B1 | D4 | A4 | D2 | B4 |
| Red | C4 | D3 | B1 | C1 | C2 |
| Yellow | A3 | C3 | A2 | A4 | A3 |
| Yellow | D1 | A1 | B2 | B4 | A4 |
Wires are the lifeblood of electronics! Wait, no, electricity is the lifeblood. Wires are more like the arteries. The veins? No matter…
| 3 wires:
If there are no red wires, cut the second wire. Otherwise, if the last wire is white, cut the last wire. Otherwise, if there is more than one blue wire, cut the last blue wire. Otherwise, cut the last wire. |
| 4 wires:
If there is more than one red wire and the last digit of the serial number is odd, cut the last red wire. Otherwise, if the last wire is yellow and there are no red wires, cut the first wire. Otherwise, if there is exactly one blue wire, cut the first wire. Otherwise, if there is more than one yellow wire, cut the last wire. Otherwise, cut the second wire. |
| 5 wires:
If the last wire is black and the last digit of the serial number is odd, cut the fourth wire. Otherwise, if there is exactly one red wire and there is more than one yellow wire, cut the first wire. Otherwise, if there are no black wires, cut the second wire. Otherwise, cut the first wire. |
| 6 wires:
If there are no yellow wires and the last digit of the serial number is odd, cut the third wire. Otherwise, if there is exactly one yellow wire and there is more than one white wire, cut the fourth wire. Otherwise, if there are no red wires, cut the last wire. Otherwise, cut the fourth wire. |
It's hard to say how this mechanism works. The engineering is pretty impressive, but there must have been an easier way to manage nine wires.
| Red Wire Occurrences | |
|---|---|
| Wire Occurrence | Cut if connected to: |
| First red occurrence | C |
| Second red occurrence | B |
| Third red occurrence | A |
| Fourth red occurrence | A or C |
| Fifth red occurrence | B |
| Sixth red occurrence | A or C |
| Seventh red occurrence | A, B or C |
| Eighth red occurrence | A or B |
| Ninth red occurrence | B |
| Blue Wire Occurrences | |
|---|---|
| Wire Occurrence | Cut if connected to: |
| First blue occurrence | B |
| Second blue occurrence | A or C |
| Third blue occurrence | B |
| Fourth blue occurrence | A |
| Fifth blue occurrence | B |
| Sixth blue occurrence | B or C |
| Seventh blue occurrence | C |
| Eighth blue occurrence | A or C |
| Ninth blue occurrence | A |
| Black Wire Occurrences | |
|---|---|
| Wire Occurrence | Cut if connected to: |
| First black occurrence | A, B or C |
| Second black occurrence | A or C |
| Third black occurrence | B |
| Fourth black occurrence | A or C |
| Fifth black occurrence | B |
| Sixth black occurrence | B or C |
| Seventh black occurrence | A or B |
| Eighth black occurrence | C |
| Ninth black occurrence | C |

These letters are confusing. I think they're in the wrong order.
The display shows a scrambled word. Decipher the word and punch it in to solve this module.
See Appendix Sword for an anagrams table reference.
| AAABNN | BANANA |
|---|---|
| AACELP | PALACE |
| AACKTT | ATTACK |
| AADEGM | DAMAGE |
| AALMNP | NAPALM |
| AAOTTW | OTTAWA |
| ABKMOO | KABOOM |
| ABLSST | BLASTS |
| ACEGHR | CHARGE |
| ACEGLY | LEGACY |
| ACEHRR | ARCHER |
| ACGINS | CASING |
| ACNNNO | CANNON |
| ADEKPY | KEYPAD |
| ADEPTU | UPDATE |
| ADIMRS | DISARM |
| AEFLMS | FLAMES |
| AEGRTT | TARGET |
| AEKLRV | KEVLAR |
| AENOPW | WEAPON |
| AEPPRS | SAPPER |
| AMORRT | MORTAR |
| BIMSTU | SUBMIT |
| BNOTTU | BUTTON |
| BOORST | ROBOTS |
| BRSSTU | BURSTS |
| CDEEIV | DEVICE |
| CEKORT | ROCKET |
| CHISTW | SWITCH |
| CIIMTV | VICTIM |
| CIRSTT | STRICT |
| DEEFSU | DEFUSE |
| DEGITW | WIDGET |
| DELMOU | MODULE |
| EELRTT | LETTER |
| EEMSTX | SEMTEX |
| EFFRSU | SUFFER |
| EIMNTU | MINUTE |
| EINQUU | UNIQUE |
| ELMOUV | VOLUME |
| ENOPRS | PERSON |
| GIIMNT | TIMING |
| GIINRW | WIRING |
| INOOPT | OPTION |

LZIEAJDHARDERBNCOJWTHANPQIEYBZITLOOKSYWH
A field of 36 letters will appear on the screen within the module. Some of these letters will spell out words, which may be spelled backwards and appear in any direction.

I can see right through you.
| 2 | 1 | 5 | 2 | 5 | 2 | 5 | 3 | 5 | 2 | 5 | 3 | |
| 4 | 5 | 4 | 3 | 4 | 3 | 4 | 2 | 1 | 4 | 3 | 2 | |
| 2 | 3 | 1 | 5 | 2 | 1 | 5 | 1 | 3 | 2 | 1 | 4 | |
| 4 | 1 | 4 | 3 | 4 | 3 | 2 | 4 | 2 | 1 | 3 | 5 | |
| 3 | 2 | 5 | 2 | 1 | 2 | 5 | 1 | 5 | 4 | 5 | 2 | |
| 4 | 5 | 1 | 4 | 3 | 5 | 3 | 2 | 3 | 2 | 3 | 4 | |
| 2 | 3 | 2 | 3 | 5 | 4 | 2 | 1 | 4 | 1 | 4 | 2 | |
| 4 | 5 | 1 | 4 | 2 | 3 | 5 | 4 | 3 | 5 | 2 | 1 | |
| 5 | 2 | 3 | 2 | 3 | 4 | 1 | 2 | 1 | 2 | 4 | 5 | |
| 2 | 4 | 1 | 5 | 1 | 2 | 5 | 3 | 4 | 3 | 5 | 1 | |
| 5 | 3 | 5 | 3 | 2 | 3 | 1 | 4 | 2 | 5 | 2 | 4 | |
| 2 | 4 | 1 | 2 | 1 | 5 | 4 | 3 | 5 | 4 | 3 | 5 |

When has bomb defusal ever been a game of chance?
There are five dice in the colors of purple, yellow, blue, white and black. Start by rolling the dice. Then choose which dice to keep and which to reroll. You may only keep dice of the same value. Keep repeating this process until you get a Yahtzee.*
At each stage, the dice to keep are given by the following rules:
Follow the first rule that applies:
| If there is a... | Die color |
|---|---|
| parallel port | purple |
| PS/2 port | blue |
| RCA port | white |
| RJ port | black |
| otherwise | yellow |
Yahtzee: All dice show the same value.
Large straight: Five consecutive values.
Small straight: Four consecutive values. The outlier is the fifth die.
Three of a kind: Three dice of equal value, but not four.
Full house: Three of a kind plus two of another kind.
These terms always refer to all of the dice, regardless of which were rolled and which were kept.
Keep rolling it until you achieve a Yahtzee.

Ruff! Roar! Meow! Warble! Neigh! Tweet! Mew! Cock-a-doodle-doo! Honk! Baa! Bark! Bellow! Crow! Cha-caw! Buzz! Growl! Ribbit! Coo! Caw! Gobble! Screech! Whinny! Bleat! Hee-haw! Chirrup! Arf! Croak! Chirp! Squawk! Woof! Bow-wow! Cluck! Snort! Yap! Click! Squeal! Oink! Hoot! Moo! Squeak! Howl! Bah-gawk! Purr! Hiss! Quack!
Using the two animals displayed on the module, find the starting position in the grid on the next page.
Refer to the direction chart on the right to translate port types to a direction.
Out of the port types whose associated direction allows you to form a straight line of 5 animals from the starting position, find the line pertaining to the port type of which the bomb has the most ports (including zero) that is not tied with another such port type.
If no port type satisfies this condition, form a straight line of 5 animals by moving two steps at a time. There is always only one direction in which this is possible.
Open the sliding door on the module. Press the animals in the order they appear in the line. Avoid pressing the animals that aren’t in the line. You must do this within 6 seconds before the door closes again.
Needy modules cannot be disarmed, but pose a recurrent hazard.
Needy modules can be identified as a module with a small 2‑digit timer in the top center. Interacting with the bomb may cause them to become activated. Once activated, these needy modules must be tended to regularly before their timer expires in order to prevent a strike.
Stay observant: needy modules may reactivate at any time.

Just don’t break the button, speed runners should know how it feels.

You would think that the ports on the side of the bomb are used for something other than just for answering questions...

Be happy you are only doing this for one game session. At least you weren’t Nintendo in the 1980’s figuring out how to program the NES with 0s and 1s.
The main display at the top left displays a random hexadecimal character.
The input display at the top right displays the number the defuser has currently added.
Starting from 0, the defuser must add 100, 10, 1, or subtract 1 to get the desired number.
The defuser may also press MAX to set the display to 255.
If the defuser messes up, they may reset by pressing the "CLR" button.
| -0 | -1 | -2 | -3 | -4 | -5 | -6 | -7 | -8 | -9 | -A | -B | -C | -D | -E | -F | |
|---|---|---|---|---|---|---|---|---|---|---|---|---|---|---|---|---|
| 0- | 0 | 1 | 2 | 3 | 4 | 5 | 6 | 7 | 8 | 9 | 10 | 11 | 12 | 13 | 14 | 15 |
| 1- | 16 | 17 | 18 | 19 | 20 | 21 | 22 | 23 | 24 | 25 | 26 | 27 | 28 | 29 | 30 | 31 |
| 2- | 32 | 33 | 34 | 35 | 36 | 37 | 38 | 39 | 40 | 41 | 42 | 43 | 44 | 45 | 46 | 47 |
| 3- | 48 | 49 | 50 | 51 | 52 | 53 | 54 | 55 | 56 | 57 | 58 | 59 | 60 | 61 | 62 | 63 |
| 4- | 64 | 65 | 66 | 67 | 68 | 69 | 70 | 71 | 72 | 73 | 74 | 75 | 76 | 77 | 78 | 79 |
| 5- | 80 | 81 | 82 | 83 | 84 | 85 | 86 | 87 | 88 | 89 | 90 | 91 | 92 | 93 | 94 | 95 |
| 6- | 96 | 97 | 98 | 99 | 100 | 101 | 102 | 103 | 104 | 105 | 106 | 107 | 108 | 109 | 110 | 111 |
| 7- | 112 | 113 | 114 | 115 | 116 | 117 | 118 | 119 | 120 | 121 | 122 | 123 | 124 | 125 | 126 | 127 |
| 8- | 128 | 129 | 130 | 131 | 132 | 133 | 134 | 135 | 136 | 137 | 138 | 139 | 140 | 141 | 142 | 143 |
| 9- | 144 | 145 | 146 | 147 | 148 | 149 | 150 | 151 | 152 | 153 | 154 | 155 | 156 | 157 | 158 | 159 |
| A- | 160 | 161 | 162 | 163 | 164 | 165 | 166 | 167 | 168 | 169 | 170 | 171 | 172 | 173 | 174 | 175 |
| B- | 176 | 177 | 178 | 179 | 180 | 181 | 182 | 183 | 184 | 185 | 186 | 187 | 188 | 189 | 190 | 191 |
| C- | 192 | 193 | 194 | 195 | 196 | 197 | 198 | 199 | 200 | 201 | 202 | 203 | 204 | 205 | 206 | 207 |
| D- | 208 | 209 | 210 | 211 | 212 | 213 | 214 | 215 | 216 | 217 | 218 | 219 | 220 | 221 | 222 | 223 |
| E- | 224 | 225 | 226 | 227 | 228 | 229 | 230 | 231 | 232 | 233 | 234 | 235 | 236 | 237 | 238 | 239 |
| F- | 240 | 241 | 242 | 243 | 244 | 245 | 246 | 247 | 248 | 249 | 250 | 251 | 252 | 253 | 254 | 255 |

What’s this game called? Ok, let’s do that.
This module requires a microphone connected to the device used by the defuser to disarm bombs.
If the module does not work correctly, it has likely been misconfigured.
See Appendix BombMfg#AF for configuration notes.

When your bomb acts as a web server...
| Full name | Abbrev. | Response | Full name | Abbrev. | Response |
|---|---|---|---|---|---|
| Continue | Cont | 100 | Unauthorized | Unauth | 401 |
| Switching Protocols | SwPrt | 101 | Payment Required | PayReq | 402 |
| Processing | Proc | 102 | Forbidden | Frbd | 403 |
| OK | OK | 200 | Not Found | NFnd | 404 |
| Created | Crtd | 201 | Request Time-out | TmOut | 408 |
| Moved Permanently | MvPerm | 301 | Gone | Gone | 410 |
| Found | Found | 302 | I’m a teapot | ImaTp | 418 |
| Not Modified | NMod | 304 | Internal Server Error | SrvErr | 500 |
| Use Proxy | UPrx | 305 | Bad Gateway | BGw | 502 |
| Bad Request | BadR | 400 | Service Unavailable | SrvUn | 503 |
| Full name | Abbrev. | Response | Fullname | Abbrev. | Response |
|---|---|---|---|---|---|
| Strike | Stk | 601 | Detonate | Dtn | 602 |
| Pass | Ps | 603 | Press | Prs | 604 |
| Command | Cmd | 605 | Release | Rls | 606 |
| Blue | Blue | 701 | Green | Grn | 702 |
| Red | Red | 703 | Yellow | Yel | 704 |
| Black | Blk | 705 | White | Wht | 706 |
| Cut | Cut | 801 | Unscrew | Uns | 802 |
| Set | Set | 803 | Locate | Loc | 804 |
| Indicator | Indc | 805 | Batteries | Batt | 806 |
| Timer | Tmr | 901 | Lower | Lwr | 902 |
| Upper | Upr | 903 | Lever | Lvr | 904 |
| Time | Time | 905 | Done | Done | 906 |
Note: In the rare case the response number is over 999, subtract 999 from the response code.

Who knew turning out all the lights was a hard task?

Are you still a fan of some animated series from your childhood? It looks like you stumbled upon another fan.
| Monsplode™ | Name | Monsplode™ | Name | Monsplode™ | Name | ||
|---|---|---|---|---|---|---|---|
 |
Buhar |  |
Lanaluff |  |
Magmy | ||
 |
Bob |  |
Melbor |  |
Docsplode | ||
 |
Mountoise |  |
Nibs |  |
Clondar | ||
 |
Aluga |  |
Lugirit |  |
Zapra | ||
 |
Caadarim |  |
Vellarim |  |
Ukkens | ||
 |
Flaurim |  |
Gloorim |  |
Zenlad | ||
 |
Asteran |  |
Violan |  |
Pouse | ||
 |
Myrchat |  |
Cutie Pie |  |
Percy |

Don’t move. Its explosiveness is based on movement.

Math is still easy. But is it easy when you have to answer questions over and over to stop an explosion? Only one way to find out.
Answer the question. Enter the numbers with the keypad and press ‘=’ to submit your answer. Use ‘-’ to toggle the sign. Don’t blow up!

You don’t want to end up getting drunk now, do ya?
I'm going to guess that this is just meant to occupy your attention, because otherwise this is some shoddy electronics work.
Needlessly complicated and endlessly needy. Imagine if such expertise were used to make something other than diabolical puzzles.
| X | X | X | |||
| X | X | X | X | X |
| X | X | X | |||
| X | X | X | X |
| X | X | X | |||
| X | X | X | X | X |
| X | X | X | |||
| X | X |
| X | |||||
| X | X | X | X |
| X | |||||
| X | X |
| X | X | X | X | X | |
| X | X | X | X |
| X | X | X | |||
| X | X | X | X |
X = Lit LED

Hello, this is emergency services, please hold...

Oh look! It’s that game that everyone knows of but nobody knows the name of!
Computer hacking is hard work! Well, it usually is. This job could probably be performed by a simple drinking bird pressing the same key over and over again.

I hope you studied, it’s quiz night!

Yes, you will need a QR Code scanner here to proceed.

We are now at the mercy of RNGesus.
Odd: The number must be odd.
Even: The number must be even.
Present: The number must be in between 0 - 49.
Absent: The number must be in between 50 - 99.

Chances are you’ve already played many iterations of this game. At this point, how can we be sure that Tetris isn’t some kind of meta-virus that propagates itself through game developers and modders?
Alas, the drinking bird only speaks English, so it didn't know which key to press.
Respond to the computer prompts by pressing “Y” for “Yes” or “N” for “No”.
Use the table to help translate the questions and button labels.
Use the language sticker on the module to help identify the correct language.
Refer to the original manual of Needy Vent Gas for more instructions.
| Language | Y | N | Vent gas? | Detonate? |
|---|---|---|---|---|
| CS | A | N | Vypustit? | Odpálit? |
| DA | J | N | Udluft gas? | Detoner? |
| DE | J | N | Gas ablassen? | Sprengen? |
| EN | Y | N | Vent gas? | Detonate? |
| EO | J | N | Blovlasu gason? | Eksplodigi? |
| ES | S | N | ¿Evacuar gas? | Detonar? |
| ET | J | E | Tuuluta gaasi? | Plahvata? |
| FI | K | E | Pura kaasun painetta? | Räjäytä? |
| FR | O | N | Évacuer le gaz? | Provoquer l'explosion? |
| HE | כן | לא | ?שחרר גז | ?הפעל פצצה |
| IT | S | N | Sfogare gas? | Detonare? |
| JA | ◯ | ✕ | ガスヌキ ヲシマ スカ? | バクハ シマス カ? |
| KO | Y | N | 가스를 배출할까요? | 폭파시킬까요? |
| NL | J | N | Gas afvoeren? | Ontsteek? |
| NO | J | N | Ventiler gass? | Detoner |
| PL | T | N | Wentylować gaz? | Detonować? |
| PT | S | N | Liberar o gás? | Detonar? |
| RU | Д | Н | Спустить газ? | Взорвать |
| SV | J | N | Avlufta? | Detonera? |
| TH | ช | ม | ระบายแก๊ส? | จุดชนวน? |
| ZH | ✓ | ✗ | 排气? | 爆炸吗? |
Common battery types can be found within enclosures on the sides of the bomb casing.
| Battery | Type |
|---|---|
|
AA |
|
D |
Finally, encryption that’s not NP hard!

This indicator works like any other, except its label has been encrypted! The three letters next to the indicator light have been replaced with arcane symbols. Find the sum of the numbers gained from looking up each symbol in the left table. If the result is in the range [1,11], then use that result in the second table to find the label. Otherwise, each symbol instead represents the letters in the first table.
| Symbol | in position | ||
|---|---|---|---|
| X__ | _X_ | __X | |
| ใ | 5 / G | 0 / D | 4 / G |
| ɮ | 4 / Z | 0 / D | 5 / R |
| ʖ | 0 / C | -1 / S | 4 / O |
| ฬ | 0 / J | 2 / X | 5 / Y |
| น | 2 / V | 1 / B | 2 / L |
| Þ | -2 / T | 5 / L | 5 / J |
| ฏ | 4 / L | 1 / A | 2 / O |
| Ѩ | 3 / G | 5 / A | 4 / S |
| Ԉ | 4 / F | 4 / S | 2 / M |
| Ԓ | 3 / P | 2 / O | 3 / F |
| ด | -1 / K | 3 / Q | 4 / K |
| ล | -1 / D | -2 / N | 4 / L |
| Ж | 5 / Q | 0 / O | 5 / Z |
| Result | Indicator |
|---|---|
| 1 | CLR |
| 2 | IND |
| 3 | TRN |
| 4 | FRK |
| 5 | CAR |
| 6 | FRQ |
| 7 | NSA |
| 8 | SIG |
| 9 | MSA |
| 10 | SND |
| 11 | BOB |
Labelled indicator lights can be found on the sides of the bomb casing.
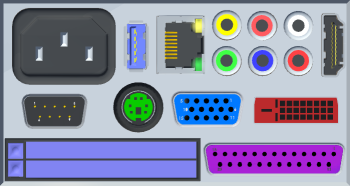
Whats a PCMCIA and USB3.0 doing on a bomb?
Parallel Port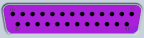 | Serial Port |
DVI-D | RJ-45 |
PS/2 | Stereo RCA |
AC (Power) | Component Video |
HDMI | Composite Video |
VGA | USB |
PCMCIA | |
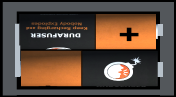
Durafuser? Isn’t this a rip off of a well known brand of batteries?
9-Volt Battery | 2 x AA Batteries |
3 x AA Batteries | 4 x AA Batteries |
| 9-Volt Battery Holder | 2 x AA Battery Holder |
| 3 x AA Battery Holder | 4 x AA Battery Holder |
**Note: Most of the mods that just count batteries/holders will see ALL of these. These same mods, if they are looking for AA batteries, will ONLY see the 2xAA batteries, and they will see the 9-Volt battery as a D-Cell.
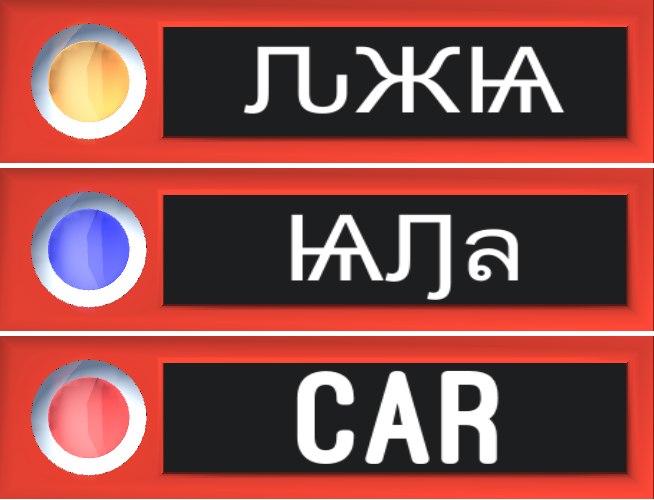
What is up with that Blue ѨԒล indicator and Red CAR indicator?
This indicator works like any other, except that the label is sometimes encrypted. In the case of encryption, use the following instructions. The three letters next to the indicator light have been replaced with arcane symbols. Find the sum of the numbers gained from looking up each symbol in the left table. If the result is in the range [1,11], then use that result in the second table to find the label. Otherwise, each symbol instead represents the letters in the first table.
| Symbol | in Position | ||
|---|---|---|---|
| X__ | _X_ | __X | |
| ใ | 5 / G | 0 / D | 4 / G |
| ɮ | 4 / Z | 0 / D | 5 / R |
| ʖ | 0 / C | -1 / S | 4 / O |
| ฬ | 0 / J | 2 / X | 5 / Y |
| น | 2 / V | 1 / B | 2 / L |
| Þ | -2 / T | 5 / L | 5 / J |
| ฏ | 4 / L | 1 / A | 2 / O |
| Ѩ | 3 / G | 5 / A | 4 / S |
| Ԉ | 4 / F | 4 / S | 2 / M |
| Ԓ | 3 / P | 2 / O | 3 / F |
| ด | -1 / K | 3 / Q | 4 / K |
| ล | -1 / D | -2 / N | 4 / L |
| Ж | 5 / Q | 0 / O | 5 / Z |
| Result | Indicator |
|---|---|
| 1 | CLR |
| 2 | IND |
| 3 | TRN |
| 4 | FRK |
| 5 | CAR |
| 6 | FRQ |
| 7 | NSA |
| 8 | SIG |
| 9 | MSA |
| 10 | SND |
| 11 | BOB |
Off Indicators are considered to be Black. On Indicators can be the following colors
| Colors | |
|---|---|
| White | Gray |
| Red | Orange |
| Yellow | Green |
| Blue | Purple |
| Magenta | |
Since when did bombs come equipped with Two Factor Authentication?
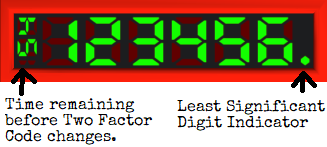
The Two factor code changes every 60* seconds real time. Least significant digit is the one closest to the dot.
* The time may have been configured from between 30–120 seconds. Additionally, Two-Factor might be disabled completely.Digital and analog ports can be found on sides of the bomb casing.
| Port | Name | Notes |
|---|---|---|
|
DVI-D | |
|
Parallel | |
|
PS/2 | |
|
RJ-45 | |
|
Serial | |
|
Stereo RCA | This counts as one port despite having two sockets. |
Digital displays can be found on sides of the bomb casing showing a serial number.

The display shows up to a six digit number for two factor authentication. The number rotates every 60 seconds for security. When the serial number changes, three audio tones will sound.
Keep Talking and Nobody Explodes is a game by Steel Crate Games. https://keeptalkinggame.com/
Manuals retrieved from https://ktane.timwi.de/ (Repository of Manual Pages) and https://www.bombmanual.com/. Slight modifications have been made by LotsOfS. Refer to https://lotsofs.com. This document is not automatically synchronized with the Repository of Manual Pages. Refer to the Repository of Manual Pages for the most recent manuals. Special thanks to Timwi et al for maintaining the Repository of Manual Pages.
The contents of this manual originate from a wide variety of authors. Please consult each individual author on licensing of each module's manual page. Many contents of this manual are licensed under the KTANE ModKit License.
Certain graphics in this manual document and/or its module counterparts have been sourced from third parties:
For more information on each license, browse to the following Uniform Resource Locators (URL) using a computer's internet browser:
The Keep Talking and Nobody Explodes ModKit License Copyright (c) 2016 keeptalkinggame Permission is hereby granted, free of charge, to any person obtaining a copy of this software and associated documentation files (the "Software"), to deal in the Software without restriction, including without limitation the rights to use, copy, modify, merge, publish, distribute, sublicense, and/or sell copies of the Software, and to permit persons to whom the Software is furnished to do so, subject to the following conditions: The above copyright notice and this permission notice shall be included in all copies or substantial portions of the Software. The Software will only be used for the purpose of creating modifications to the game "Keep Talking and Nobody Explodes". THE SOFTWARE IS PROVIDED "AS IS", WITHOUT WARRANTY OF ANY KIND, EXPRESS OR IMPLIED, INCLUDING BUT NOT LIMITED TO THE WARRANTIES OF MERCHANTABILITY, FITNESS FOR A PARTICULAR PURPOSE AND NONINFRINGEMENT. IN NO EVENT SHALL THE AUTHORS OR COPYRIGHT HOLDERS BE LIABLE FOR ANY CLAIM, DAMAGES OR OTHER LIABILITY, WHETHER IN AN ACTION OF CONTRACT, TORT OR OTHERWISE, ARISING FROM, OUT OF OR IN CONNECTION WITH THE SOFTWARE OR THE USE OR OTHER DEALINGS IN THE SOFTWARE.